Hello everyone in this article, we will get to know about how we can send push notifications in Laravel 8. I would like to show you laravel 8 firebase web push notification. This article goes into detail on firebase web push notification laravel 8. you’ll learn to send firebase push notifications using laravel 8.
Before moving forward Let’s know what is web push notification?
If you’ve subscribed to a brand’s web push notifications, then you’re no stranger to the messages that periodically pop up at the top right of your desktop screen.
Web push notifications (also known as browser push notifications) are actionable messages sent to a visitor’s device from a website via a browser. These messages are contextual, timely, personalized, and best used to engage, re-engage, and retain website visitors.
I hope now have the basic idea of a web push notification, now let’s start the integration.
Will follow below step to integrate firebase web push notification in laravel
- Create Firebase Project and App
- Install Laravel 8
- Create Auth in laravel
- Create migration and update model
- Create route
- Add code in controller
- Add blade
- Create Firebase Service Worker
- Register Service worker
- Test the integration
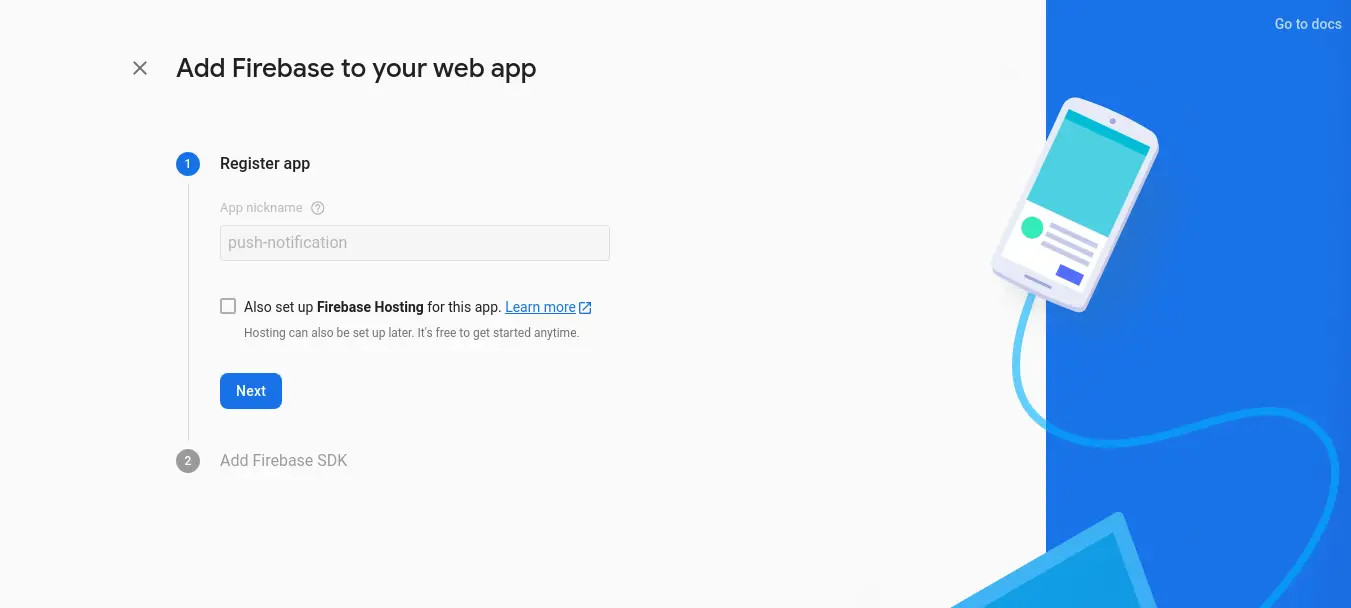
Step: 1 Create Firebase Project and App
In the first step, we have to go Firebase Console and create a project. then you have to create a web app for that project as I added the below screenshot:
After the given name and next then you will receive firebase SDK as like the bellow screenshot:

You have to save that all information because we will use it later in our app.
Step: 2 Install Laravel 8
first of all, we need to get a fresh Laravel 8 application using bellow command, So open your terminal OR command prompt and run bellow command:
composer create-project --prefer-dist laravel/laravel Firebase
Step: 3 Create Auth
Now, in this step, we will create auth scaffold command to create a login, register, and dashboard. so run the following commands:
Before creating the auth you have to install node module, to install node modules please add the below code.
npm install
npm run dev
After that use the below code to create auth scaffolding
npm install
Step:4 Create model and migration
In this step, we need to add a new column “device_token” in the user’s table and model. then we need to create a new migration. so let’s create new migration by following the command.
php artisan make:migration add_column_device_token
database/migrations/2021_10_23_144523_add_column_device_token.php
<?php

use Illuminate\Database\Migrations\Migration;
use Illuminate\Database\Schema\Blueprint;
use Illuminate\Support\Facades\Schema;

class AddColumnDeviceToken extends Migration
{
    /**
     * Run the migrations.
     *
     * @return void
     */
    public function up()
    {
        Schema::table('users', function (Blueprint $table) {
            $table->string('device_token')->nullable();
        });
    }

    /**
     * Reverse the migrations.
     *
     * @return void
     */
    public function down()
    {

    }
}
Now we also have to add device_token in our user’s model page app/Models/User.php
<?php

namespace App\Models;

use Illuminate\Contracts\Auth\MustVerifyEmail;
use Illuminate\Database\Eloquent\Factories\HasFactory;
use Illuminate\Foundation\Auth\User as Authenticatable;
use Illuminate\Notifications\Notifiable;

class User extends Authenticatable
{
    use HasFactory, Notifiable;

    /**
     * The attributes that are mass assignable.
     *
     * @var array
     */
    protected $fillable = [
        'name',
        'email',
        'password',
        'device_token'
    ];

    /**
     * The attributes that should be hidden for arrays.
     *
     * @var array
     */
    protected $hidden = [
        'password',
        'remember_token',
    ];

    /**
     * The attributes that should be cast to native types.
     *
     * @var array
     */
    protected $casts = [
        'email_verified_at' => 'datetime',
    ];
}
now run the migration command to add device_token column to your user’s table
php artisan migrate
Step:5 Create route
Now we will create route for our firebase web push notification application, add the below route in your routes/web.php file
Route::get('/home', [App\Http\Controllers\HomeController::class, 'index'])->name('home');
Route::post('/save-token', [App\Http\Controllers\HomeController::class, 'saveToken'])->name('save-token');
Route::post('/send-notification', [App\Http\Controllers\HomeController::class, 'sendNotification'])->name('send.notification');
Step:6 Add Code in controller
Now we will add the code in the HomeController, HomeController will exist inside app/http/controller now add the below code in HomeController.
<?php

namespace App\Http\Controllers;

use Illuminate\Http\Request;
use App\Models\User;

class HomeController extends Controller
{
    /**
     * Create a new controller instance.
     *
     * @return void
     */
    public function __construct()
    {
        $this->middleware('auth');
    }

    /**
     * Show the application dashboard.
     *
     * @return \Illuminate\Contracts\Support\Renderable
     */
    public function index()
    {
        return view('home');
    }

    /**
     * Write code on Method
     *
     * @return response()
     */
    public function saveToken(Request $request)
    {
        auth()->user()->update(['device_token'=>$request->token]);
        return response()->json(['token saved successfully.']);
    }

    /**
     * Write code on Method
     *
     * @return response()
     */
    public function sendNotification(Request $request)
    {
        $firebaseToken = User::whereNotNull('device_token')->pluck('device_token')->all();

        $SERVER_API_KEY = 'AAAASyLLvI4:APA91bGGaj267CCmi6wUzDvtlRXDqpjz5M4ZjWn1-paIWUqoVAJZn2S6LbYG_y9Mwbp6g51zSvb0vKmwJHmDPwwYD5H4G4fdE1ch65vtqBavJKNzR2lDv75g1c9vNBlmm6aB6THTrBxB';

        $data = [
            "registration_ids" => $firebaseToken,
            "notification" => [
                "title" => $request->title,
                "body" => $request->body,
            ]
        ];
        $encodedData = json_encode($data);
        // dd($encodedData);
        $headers = [
            'Authorization: key=' . $SERVER_API_KEY,
            'Content-Type: application/json',
        ];
        // dd($headers);
        $ch = curl_init();

        curl_setopt($ch, CURLOPT_URL, 'https://fcm.googleapis.com/fcm/send');
        curl_setopt($ch, CURLOPT_POST, true);
        curl_setopt($ch, CURLOPT_HTTPHEADER, $headers);
        curl_setopt($ch, CURLOPT_SSL_VERIFYPEER, false);
        curl_setopt($ch, CURLOPT_RETURNTRANSFER, true);
        curl_setopt($ch, CURLOPT_POSTFIELDS, $encodedData);

        $response = curl_exec($ch);

        dd($response);

    }
}
Step:7 Add code in blade file
Now we will add the code in our blade file, go to resources/views/home.blade.php and add the below code into it.
@extends('layouts.app')

@section('content')
<div class="container">
    <div class="row justify-content-center">
        <div class="col-md-8">
            <center>
                <button id="btn-nft-enable" onclick="initFirebaseMessagingRegistration()" class="btn btn-danger btn-xs btn-flat">Allow for Notification</button>
            </center>
            <div class="card">
                <div class="card-header">{{ __('Dashboard') }}</div>

                <div class="card-body">
                    @if (session('status'))
                        <div class="alert alert-success" role="alert">
                            {{ session('status') }}
                        </div>
                    @endif

                    <form action="{{ route('send.notification') }}" method="POST">
                        @csrf
                        <div class="form-group">
                            <label>Title</label>
                            <input type="text" class="form-control" name="title">
                        </div>
                        <div class="form-group">
                            <label>Body</label>
                            <textarea class="form-control" name="body"></textarea>
                          </div>
                        <button type="submit" class="btn btn-primary">Send Notification</button>
                    </form>

                </div>
            </div>
        </div>
    </div>
</div>

<script src="https://www.gstatic.com/firebasejs/7.23.0/firebase.js"></script>
<script>

    var firebaseConfig = {
        apiKey: "AIzaSyCc6ZkRQxufxbL2RFJse5p3WifshPmqOj0",
        authDomain: "fir-72c97.firebaseapp.com",
        databaseURL: "https://fir-72c97-default-rtdb.firebaseio.com",
        projectId: "fir-72c97",
        storageBucket: "fir-72c97.appspot.com",
        messagingSenderId: "322706324622",
        appId: "1:322706324622:web:500cd805e8b732cfa8dddf",
        measurementId: "G-WFCEJB3KRH"
    };

    firebase.initializeApp(firebaseConfig);
    const messaging = firebase.messaging();

    function initFirebaseMessagingRegistration() {
            messaging
            .requestPermission()
            .then(function () {
                return messaging.getToken()
            })
            .then(function(token) {
                console.log(token);

                $.ajaxSetup({
                    headers: {
                        'X-CSRF-TOKEN': $('meta[name="csrf-token"]').attr('content')
                    }
                });

                $.ajax({
                    url: '{{ route("save-token") }}',
                    type: 'POST',
                    data: {
                        token: token
                    },
                    dataType: 'JSON',
                    success: function (response) {
                        alert('Token saved successfully.');
                    },
                    error: function (err) {
                        console.log('User Chat Token Error'+ err);
                    },
                });

            }).catch(function (err) {
                console.log('User Chat Token Error'+ err);
            });
     }

    messaging.onMessage(function(payload) {
        const noteTitle = payload.notification.title;
        const noteOptions = {
            body: payload.notification.body,
            icon: payload.notification.icon,
        };
        new Notification(noteTitle, noteOptions);
    });

</script>
@endsection
Step: 8 Create firebase service worker
Before going towards adding the code, let’s know what is the service worker. A service worker is a script that your browser runs in the background, separate from a web page.
Now I think you have a basic idea that why we have to add this firebase service worker in order to receive web push notifications. Create a file named as firebase-messaging-sw.js under your resources/js folder and the below code into it.
/*
Give the service worker access to Firebase Messaging.
Note that you can only use Firebase Messaging here, other Firebase libraries are not available in the service worker.
*/
importScripts('https://www.gstatic.com/firebasejs/8.7.0/firebase-app.js');
importScripts('https://www.gstatic.com/firebasejs/7.23.0/firebase-messaging.js');
importScripts('https://www.gstatic.com/firebasejs/8.7.0/firebase-analytics.js');

/*
Initialize the Firebase app in the service worker by passing in the messagingSenderId.
* New configuration for app@pulseservice.com
*/
firebase.initializeApp({
    apiKey: "AIzaSyCc6ZkRQxufxbL2RFJse5p3WifshPmqOj0",
    authDomain: "fir-72c97.firebaseapp.com",
    databaseURL: "https://fir-72c97-default-rtdb.firebaseio.com",
    projectId: "fir-72c97",
    storageBucket: "fir-72c97.appspot.com",
    messagingSenderId: "322706324622",
    appId: "1:322706324622:web:500cd805e8b732cfa8dddf",
    measurementId: "G-WFCEJB3KRH"
    });
   // Initialize Firebase
   firebase.initializeApp(firebaseConfig);

   if (firebase.messaging.isSupported()) {
     firebase.messaging();
   }
/*
Retrieve an instance of Firebase Messaging so that it can handle background messages.
*/
const messaging = firebase.messaging();
// Handle incoming messages. Called when:
// - a message is received while the app has focus

// Add the public key generated from the console here.
messaging.getToken({vapidKey: "fxHuyxxEE4uRaeAig6xJrN:APA91bF2z00nliBtjNnLx3KjJ9YuoMjNTw1Cw6Q6OIl27cfbPbPM8uN6atI9QqI-twG07l8RQLDWwZ_Xk010tntV-Pu4hxQZNGanlv8WROqH39eOb6EHhXwS_i022QWvBqjkyV46zlFk"});
messaging.setBackgroundMessageHandler(function(payload) {
    console.log(
        "[firebase-messaging-sw.js] Received background message ",
        payload,
    );
    /* Customize notification here */
    const notificationTitle = "Background Message Title";
    const notificationOptions = {
        body: "Background Message body.",
        icon: "/itwonders-web-logo.png",
    };

    return self.registration.showNotification(
        notificationTitle,
        notificationOptions,
    );
});
console.log(notificationTitle);
Step:9 Register the service worker
Now we have to register this service worker, to register this service worker go resouces/js/ and open app.js file and the below code into it.
require('./bootstrap');

if ('serviceWorker' in navigator) {
    window.addEventListener('load', function() {
      navigator.serviceWorker.register('/firebase-messaging-sw.js').then(function(registration) {
        // Registration was successful
        console.log('ServiceWorker registration successful with scope: ', registration.scope);
      }, function(err) {
        // registration failed :(
        console.log('ServiceWorker registration failed: ', err);
      });
    });
  }
Step:10 Test the integration
Now it’s to test the integration, let’s see how our code works go to your project root folder and type php artisan serve . It will starts the development server.
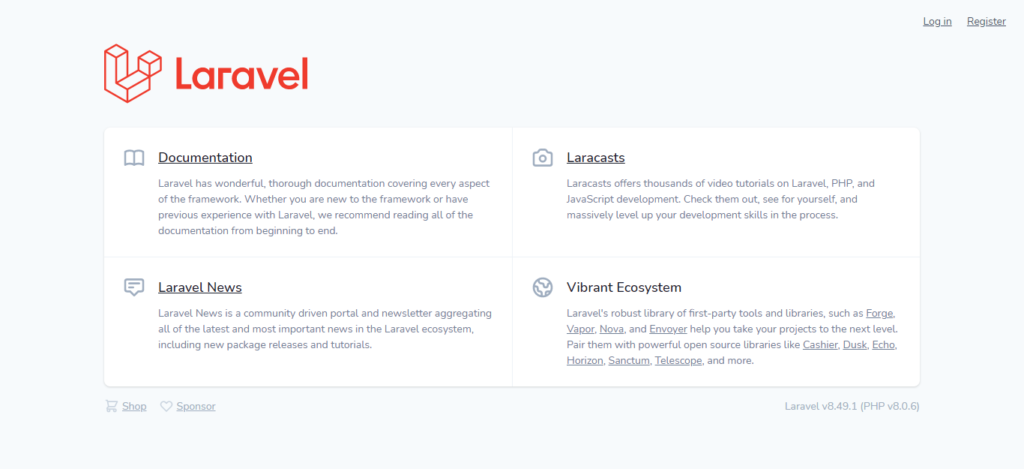
Now go to your browser and enter this url in your chrome browser http://localhost:8000/ when you open this url you have something like the below image.
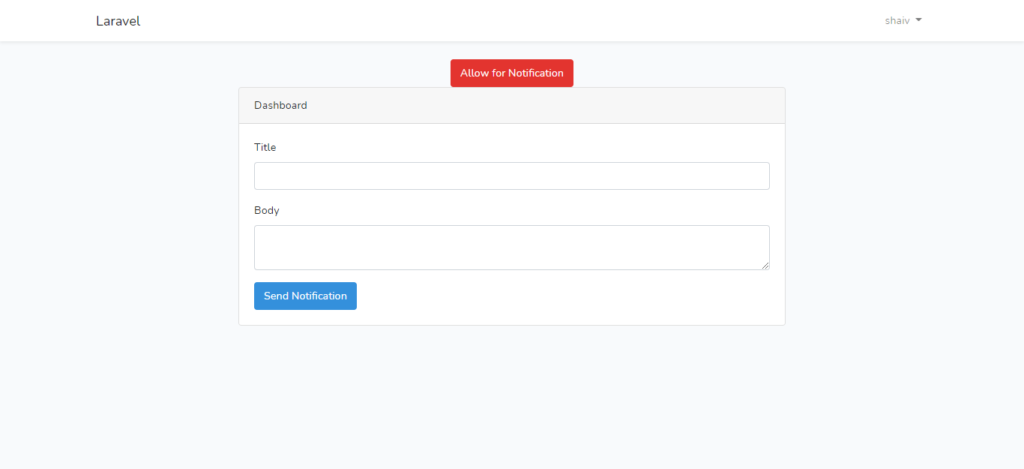
Now here you can register yourself. once you registered yourself will have something like the below image.
Now open the same URL in your edge for firefox browser, to receive notifications.
NOTE: Notification can’t be sent on the same browser, you need a browser on to sent and one to receive the notification.
When open http://localhost:8000/ in your edge browser login with your credential which you have used to register yourself on chrome.
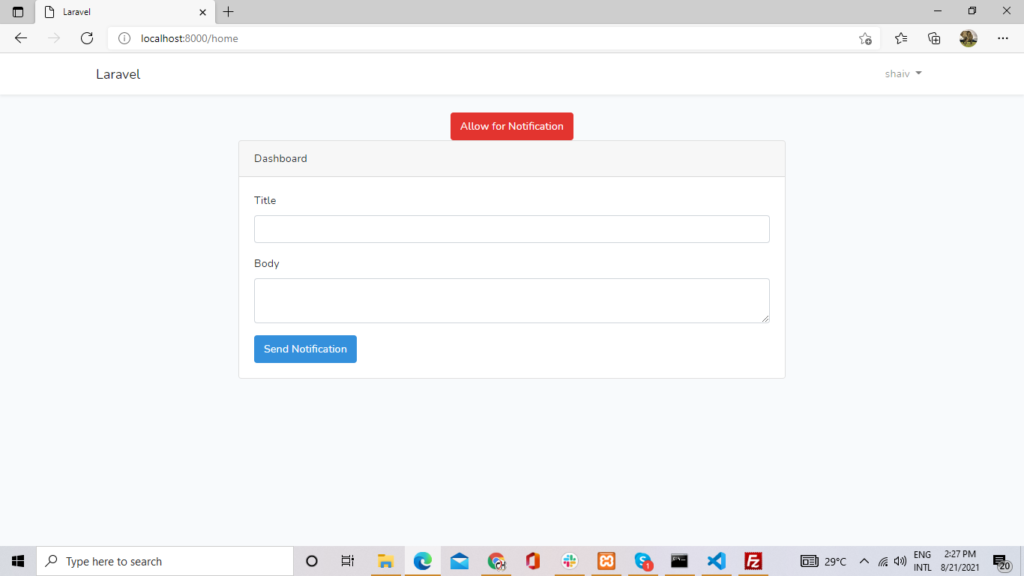
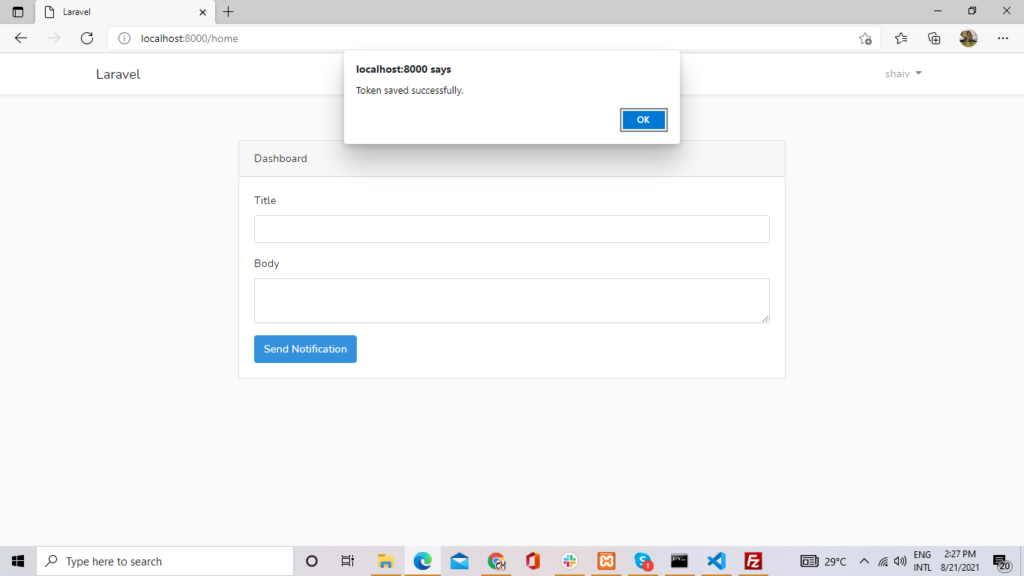
Now here click on allow for notification.When you click on it you will get the confirm popup message like the below one.
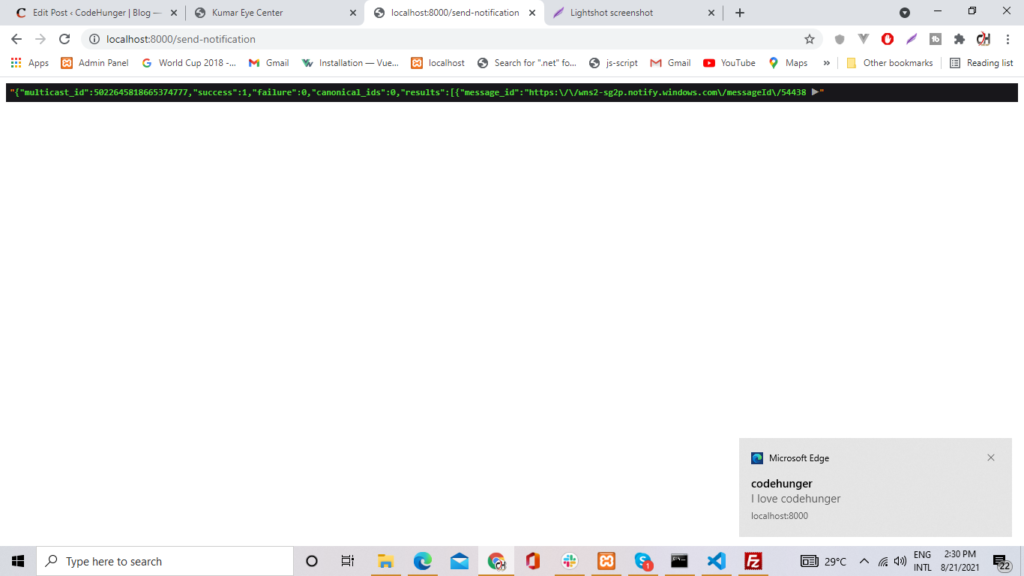
Now it’s time to send a notification to go to the chrome browser, and then in the title enter codehunger and in the description add I love codehunger and click on send notification.
Now you can see in the below image, that notification has been received.
Hurray! we have successfully done the integration, I hope in your case it’s working you can also download the code directly from Github.