In this section we will learn how to create and configured Google+ app and used it to authenticate our ASP.NET Core application.
Steps
Step 1: Create MVC Core Web Application
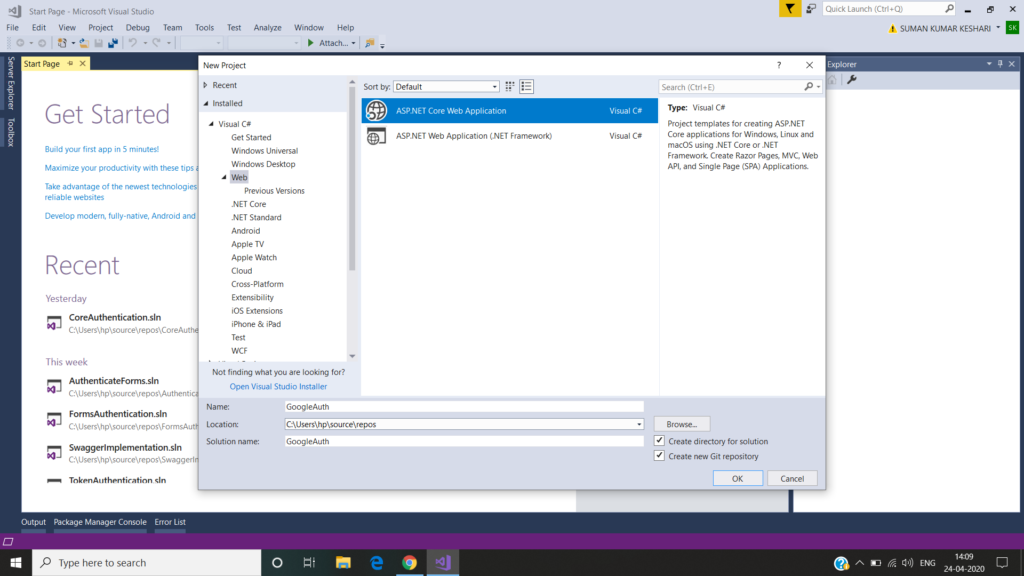
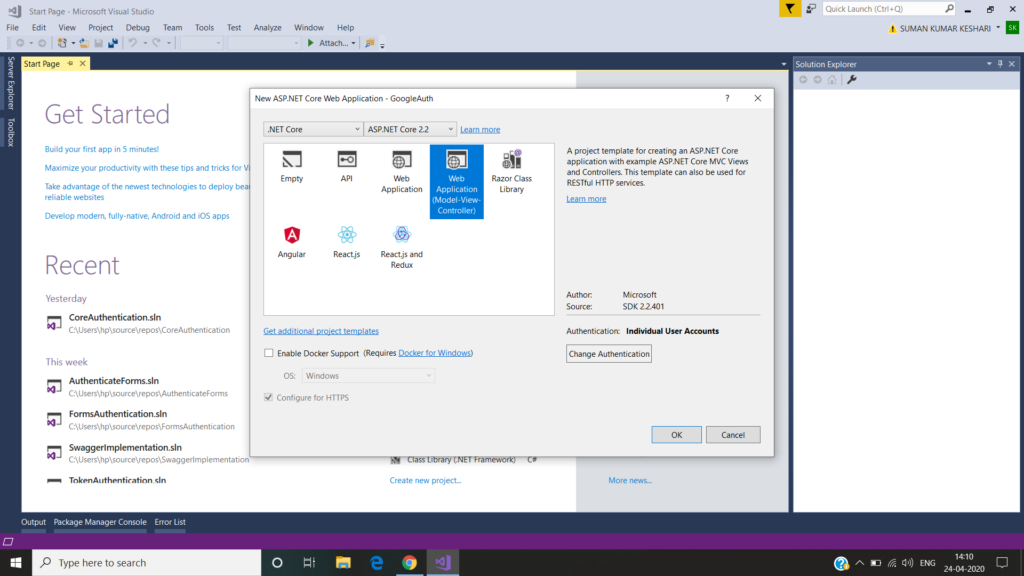
Open Visual Studio and select File >> New >> Project. After selecting the project, a “New Project” dialog will open. Select .NET Core inside the Visual C# menu from the left panel. Then, select “ASP.NET Core Web Application” from the available project types. Set the name of the project as GoogleAuth and press OK.
Step 2:
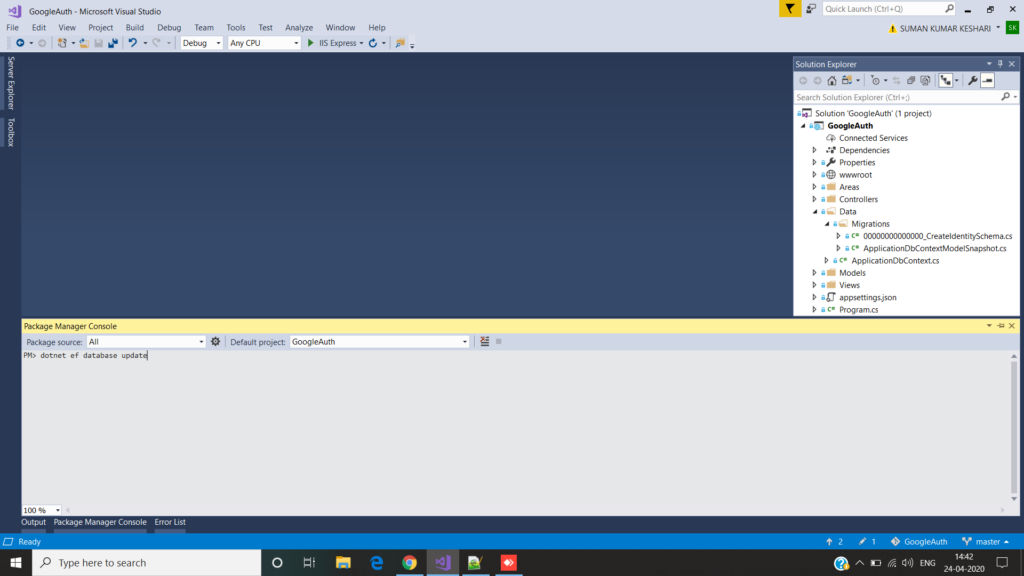
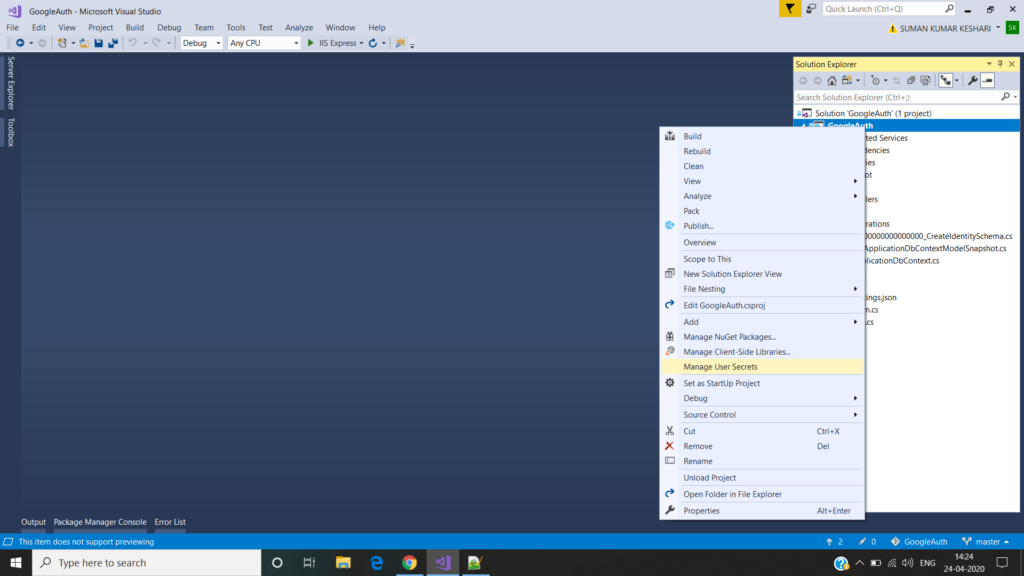
Before running the application, we need to apply migrations to our app.
Navigate to Tools >> Nuget Package Manager >> Package Manager Console.
dotnet ef database update
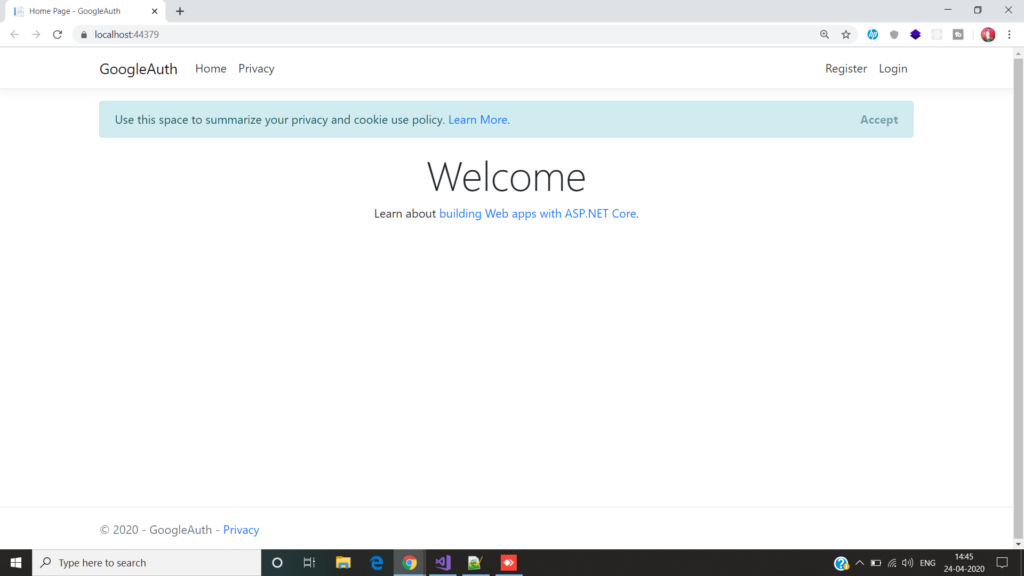
Step 3: After that Run the project.
Step 4: Create a Google App
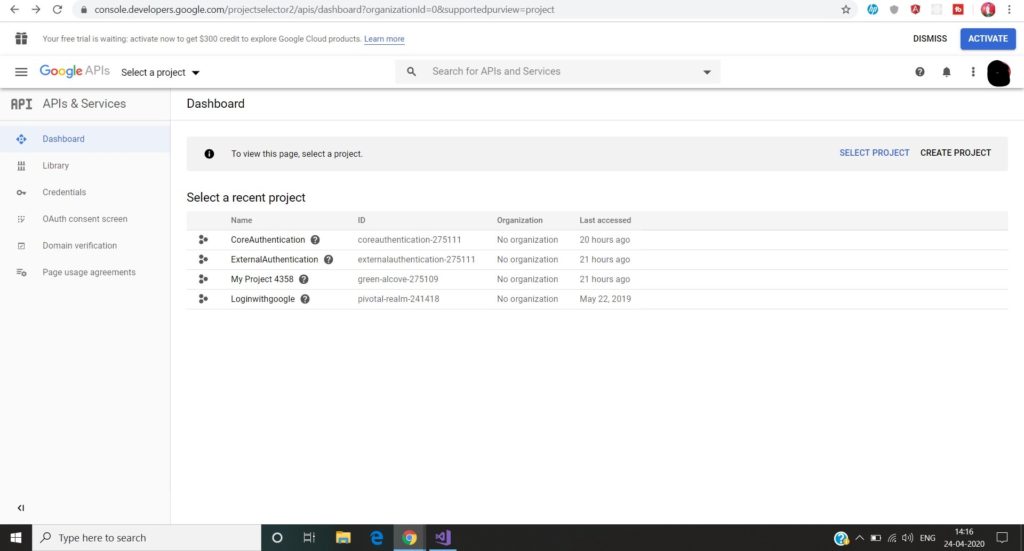
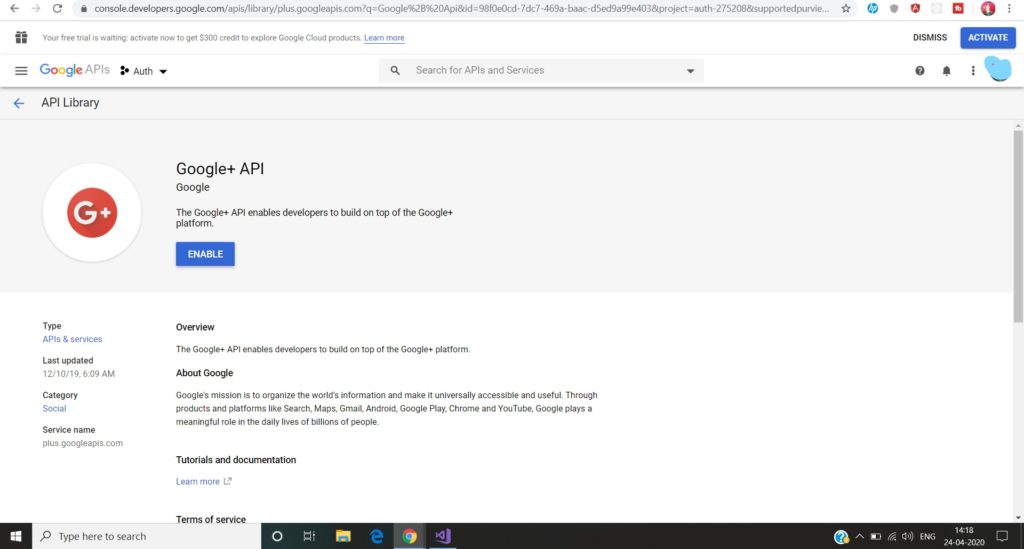
Navigate to https://console.developers.google.com/projectselector/apis/library and log in using your Google account. If you do not have a google account you need to create first. Once you have logged in, you will be redirected to the API Manager Library page, similar to the one shown below.
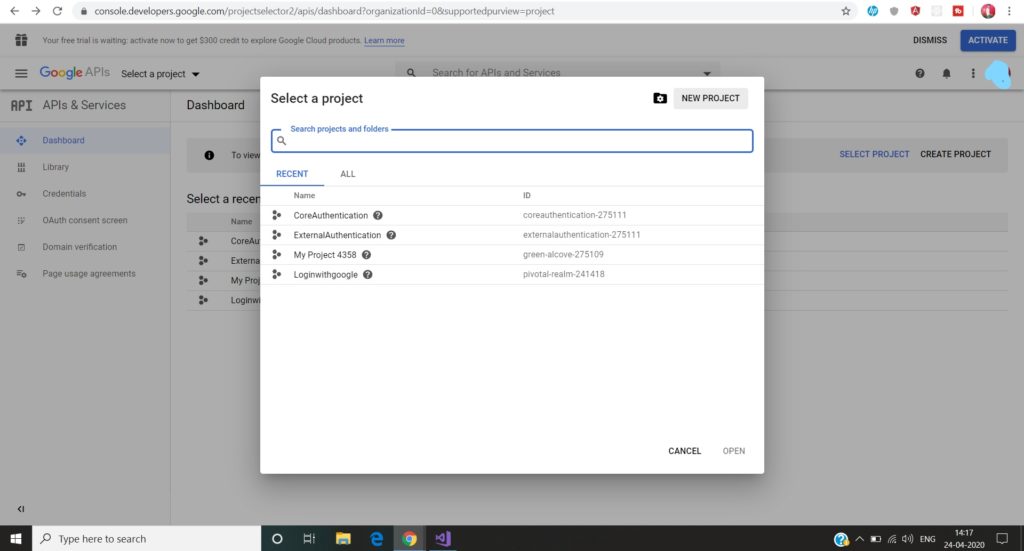
After that click on the Select Project dropdown on the left top and add new project.
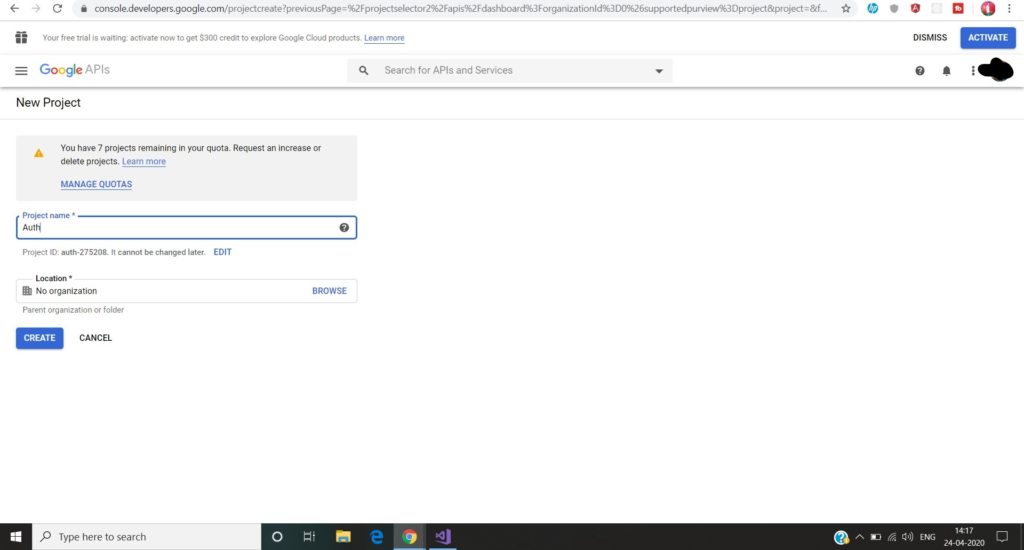
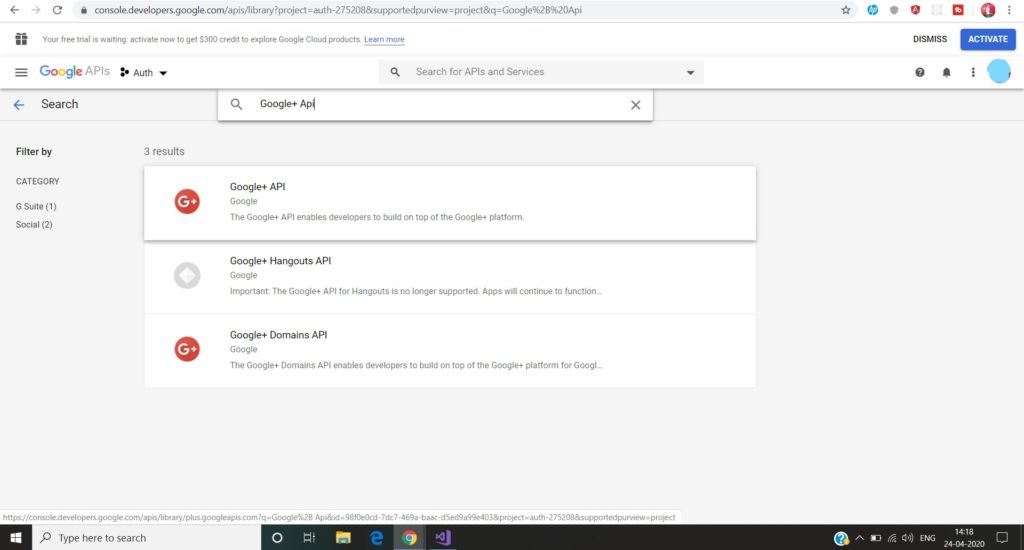
Your project will be created successfully and then navigate to the API Library page and Search Google+ Api.
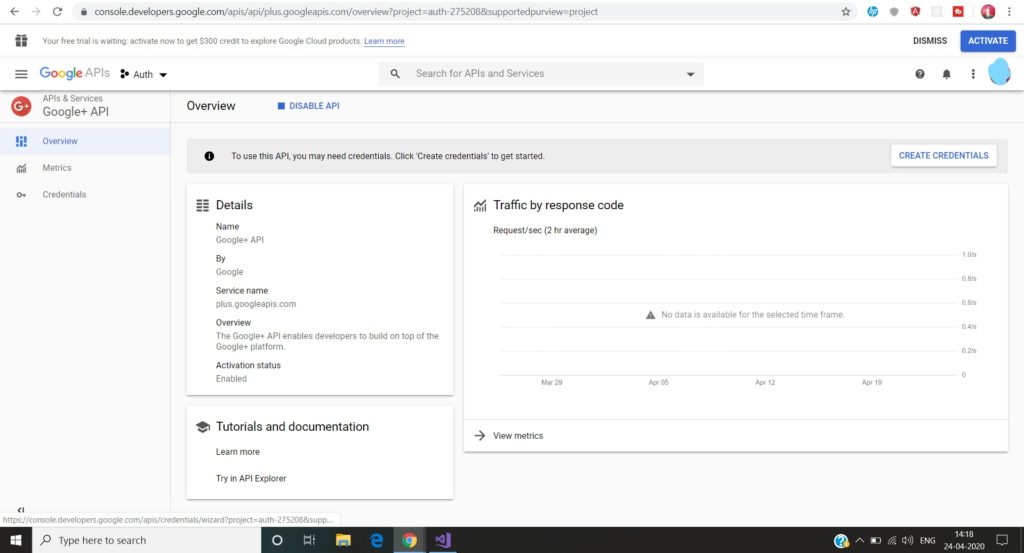
After this, the Google+ API will be enabled and you will be redirected to the API home page. Click on the Create credentials button on the right side of the page to configure the secrets for your API.
After that click on create button where you see a dropdown where you select the Google+ Api and then click on the What Credential do i need button. And then Click on Save button.
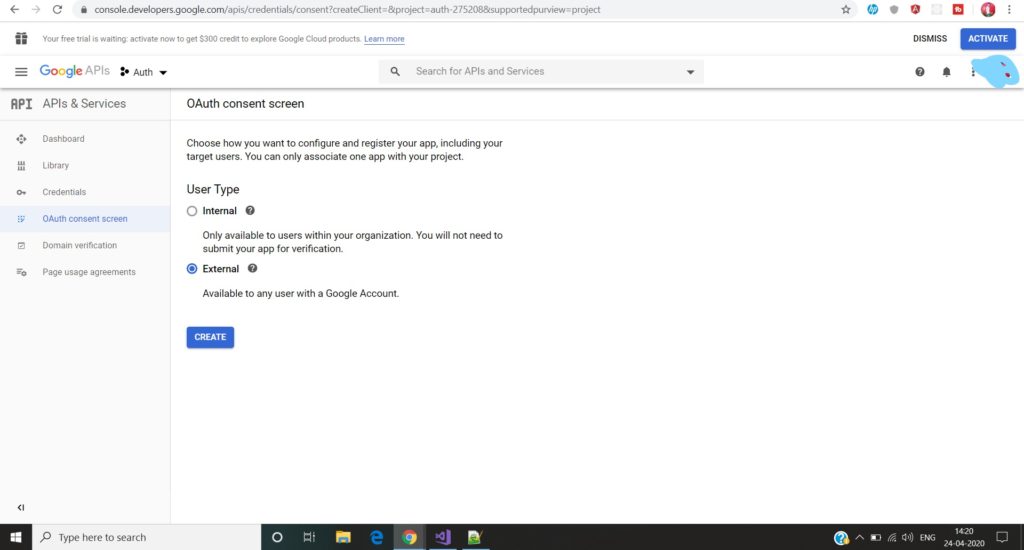
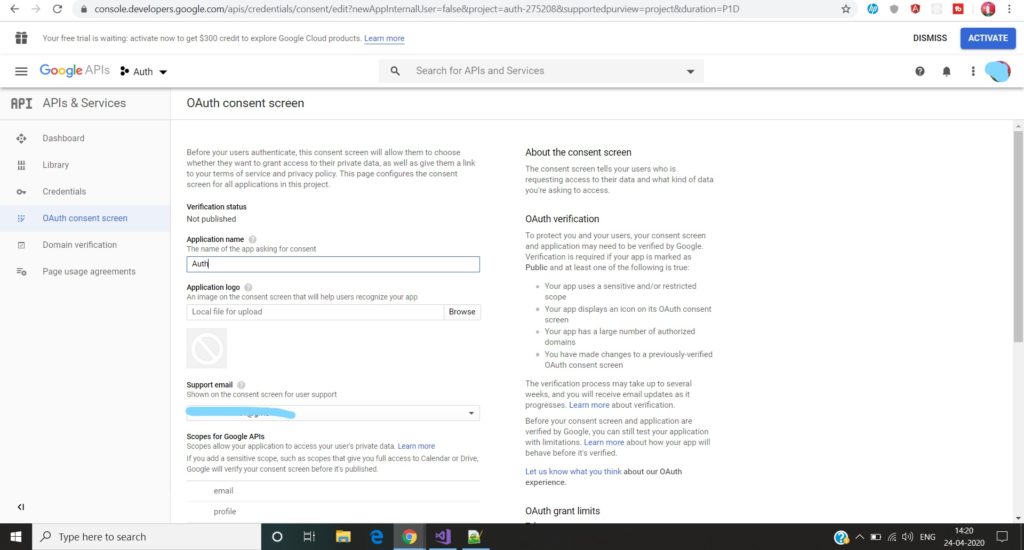
After that go to the OAuth consent screen and fill the Application Name and the select the Gmail Id as shown below.
After that you will be redirected to the Library screen where on the top left you find a dropdown containing three items and click on the second one Create an OAuth 2.0 Client ID where you enter your project details as shown below.
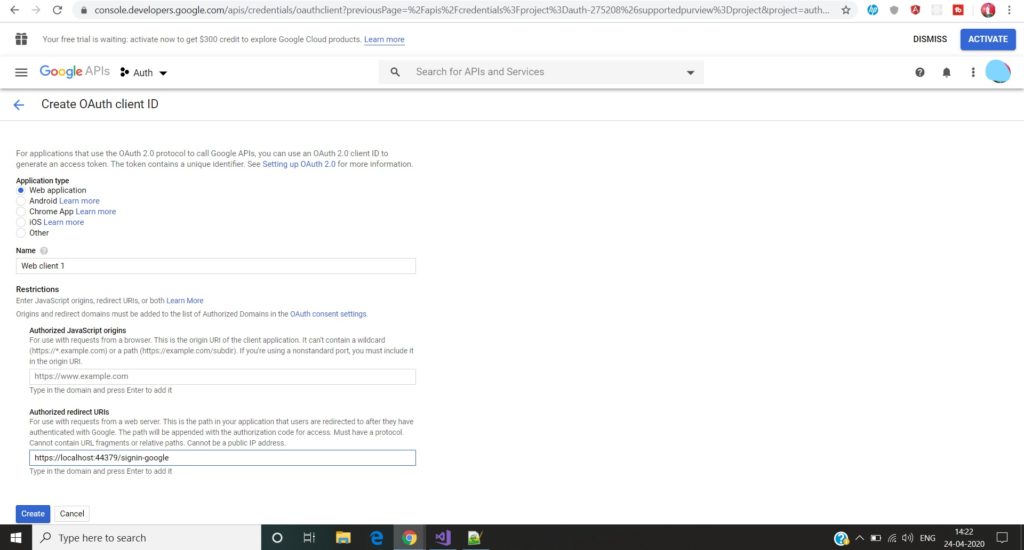
- Name – The default value provided by Google.
- Authorized JavaScript origins – Leave it blank.
- Authorized redirect URIs – Give the base URL of your application with /signin-google appended to it. For this tutorial, the URL will be http://localhost:44379/signin-google. After entering the URL, press TAB to add the value.
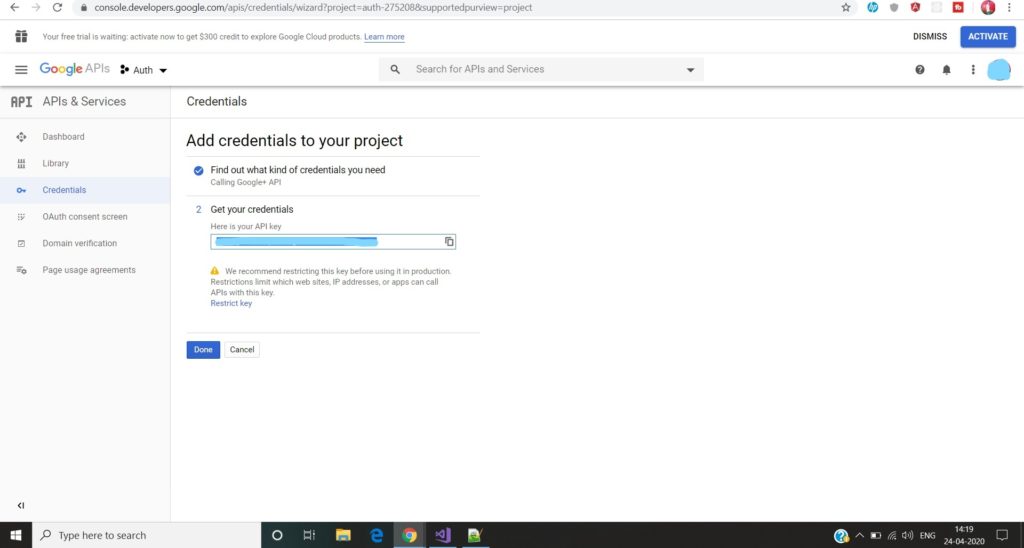
- After saving the data you will get the ClientID and ClientSecretKey
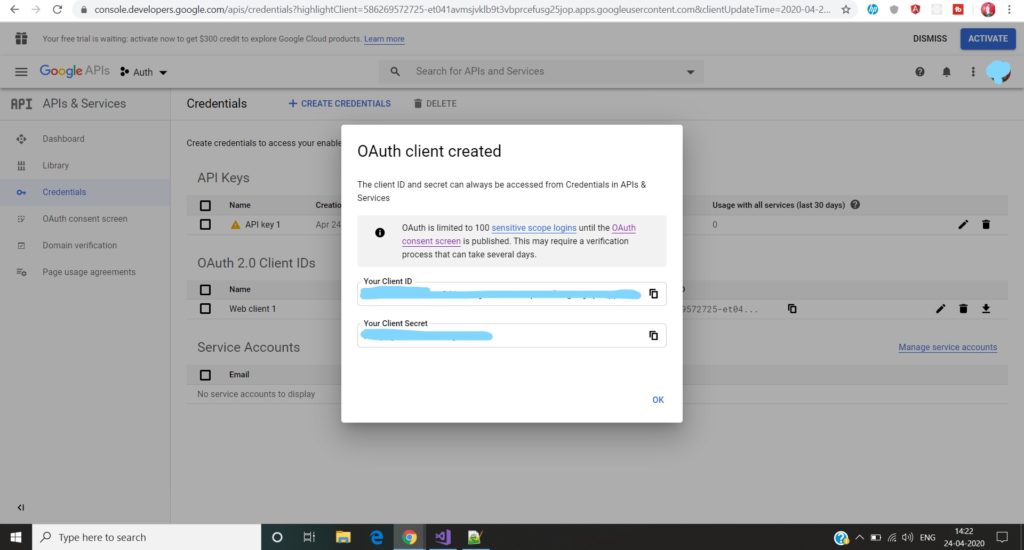
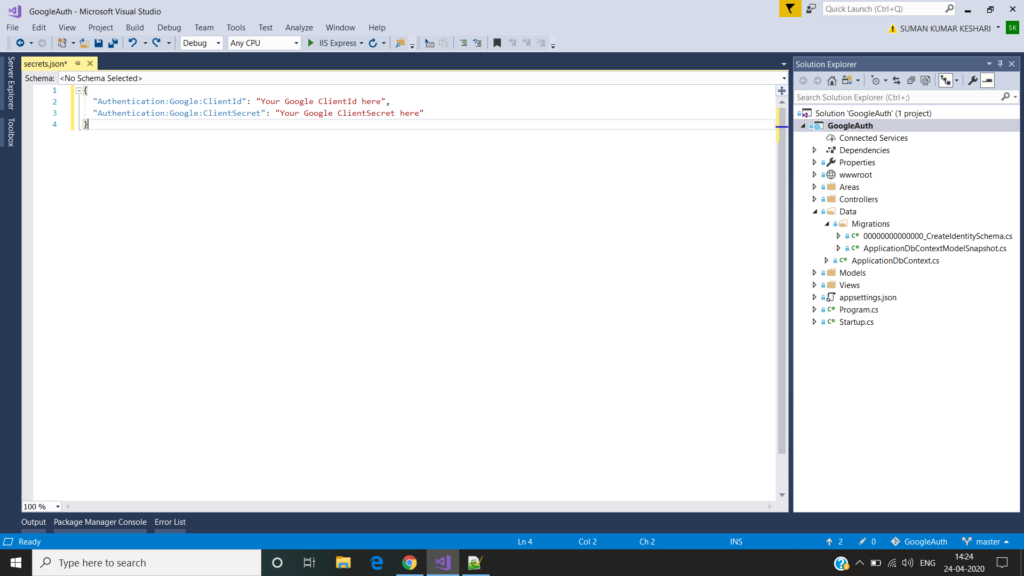
After completing all these steps .Copy the ClientID and Client Secret and Paste in the project as show below.
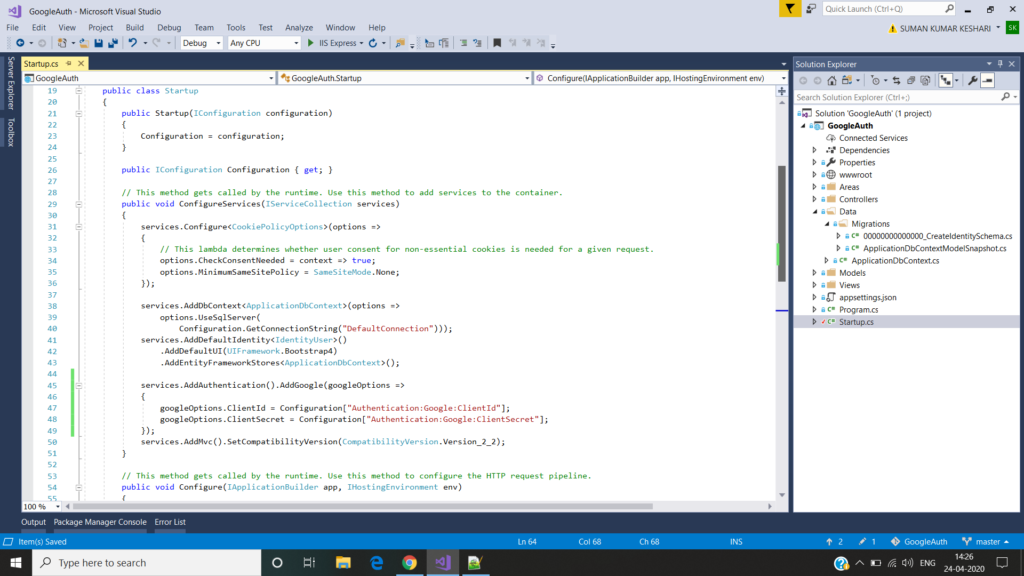
And then add the following code in your project in the StartUp.cs class in the Configure Service method.
 services.AddAuthentication().AddGoogle(googleOptions =>
            {
                googleOptions.ClientId = Configuration["Authentication:Google:ClientId"];
                googleOptions.ClientSecret = Configuration["Authentication:Google:ClientSecret"];
            });
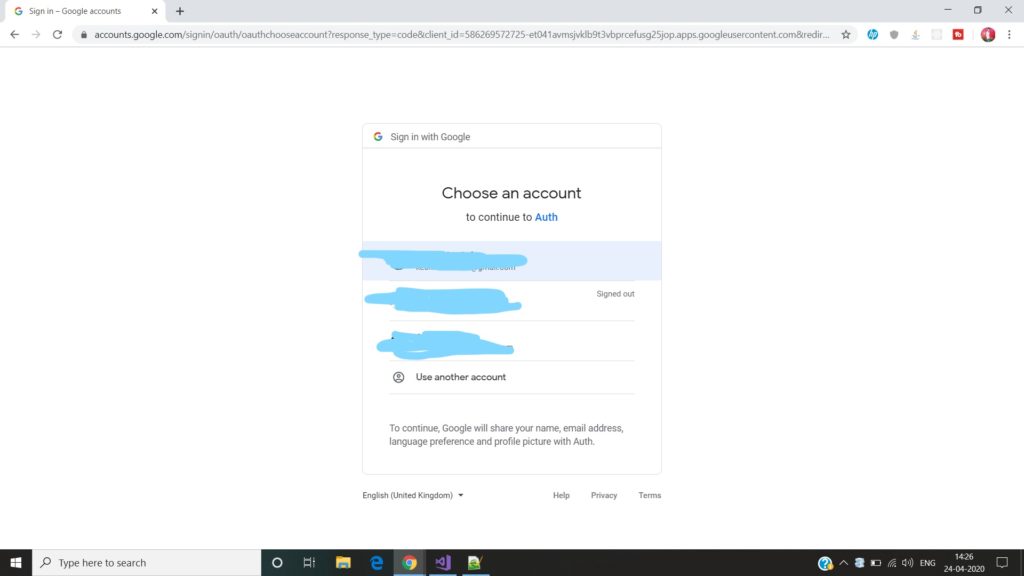
Then Run the project. And you will see in the Login page a Google Button is automatically appears in the right side.

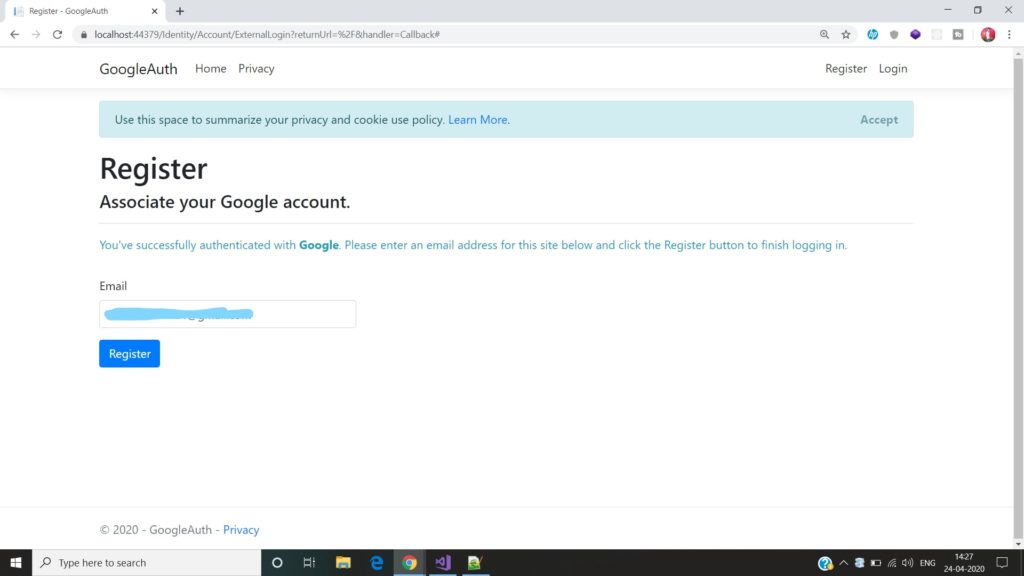
Click on that button you will redirected to the Google Sign In page and Select the user as per your choice. Clicking on the Google button will take you to the Google login page where you will be asked to fill in your Google credentials and authorize the Google app to use your Google account. After successful authentication from Google, you will be redirected to a registration page inside our application where you need to fill in an email id to tag with your account. The Gmail id that you have used to log in will already be populated in the Email id field. If you want to use another mail id you can change it here.
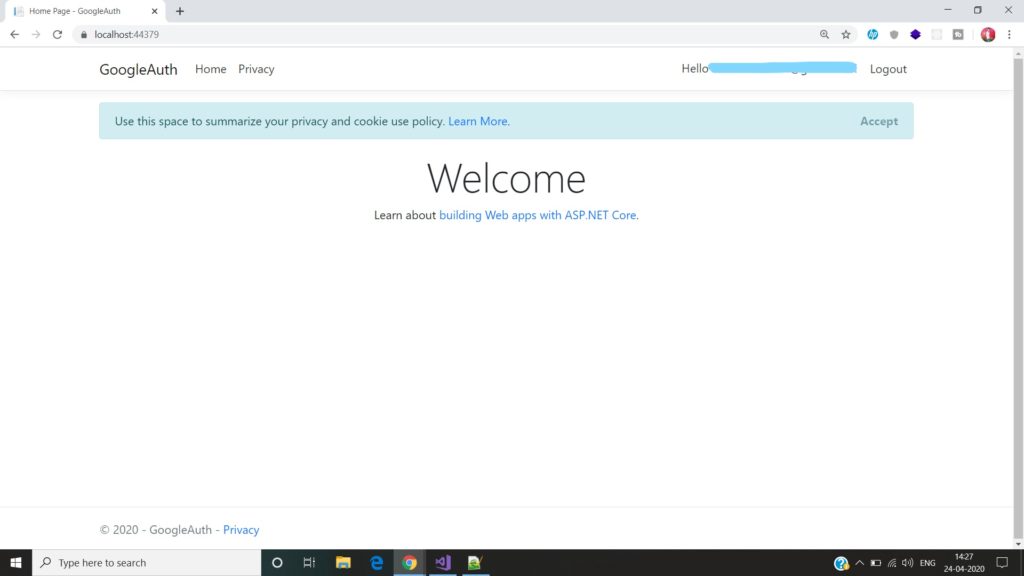
Click register, you will be redirected to the home page again but this time you can also see your registered email is at the top right corner.
We have successfully created and configured Google+ app and used it to authenticate our ASP.NET Core application.