Hello, there I hope you are doing well, In this blog will get to know how to deploy Laravel 9 on shared hosting, well sometimes it is a bit challenging to host Laravel on shared due, to the index file present inside the public folder.
There are several ways to deploy laravel on shared hostings, like changes in index.php file.
I tell you the correct way of deploying laravel on your shared hosting, well in the market there many shared hosting like godaddy, hostingraja, bluehost, hostgator etc. In this blog, I am going to use hostinger web hosting, and the reason behind purchasing the hostinger web hosting over the other is hostinger provides, Free SSL, LiteSpeed, and Cloudflare Integration at a low cost as compared to the other hosting services.
We will follow the below step to host laravel on hostinger
- Create an account on hostinger
- Sign in to your account
- Purchase one domain
- Install Laravel On the Local System
- Upload the file
- Setting up .htacces
- Create a database
- Run the migration
- Test the laravel Website
Step: 1 Create an account on hostinger
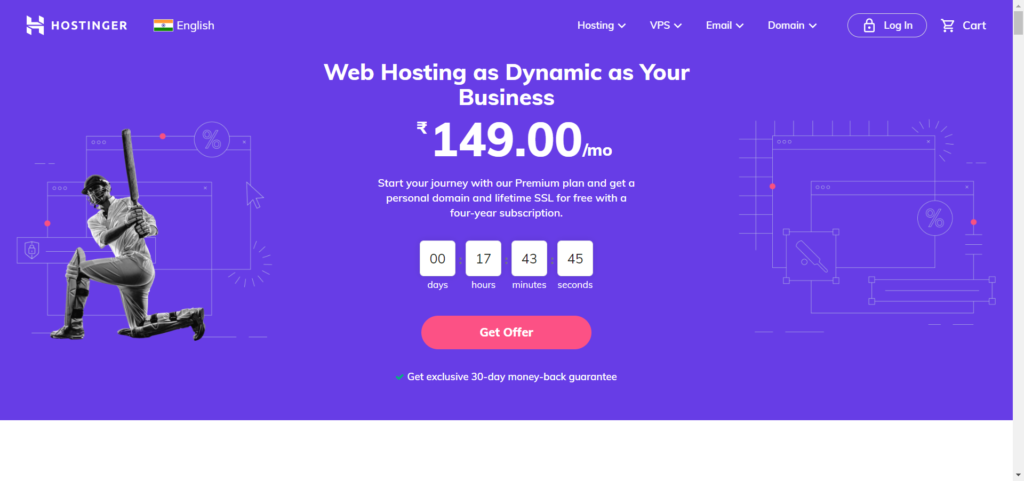
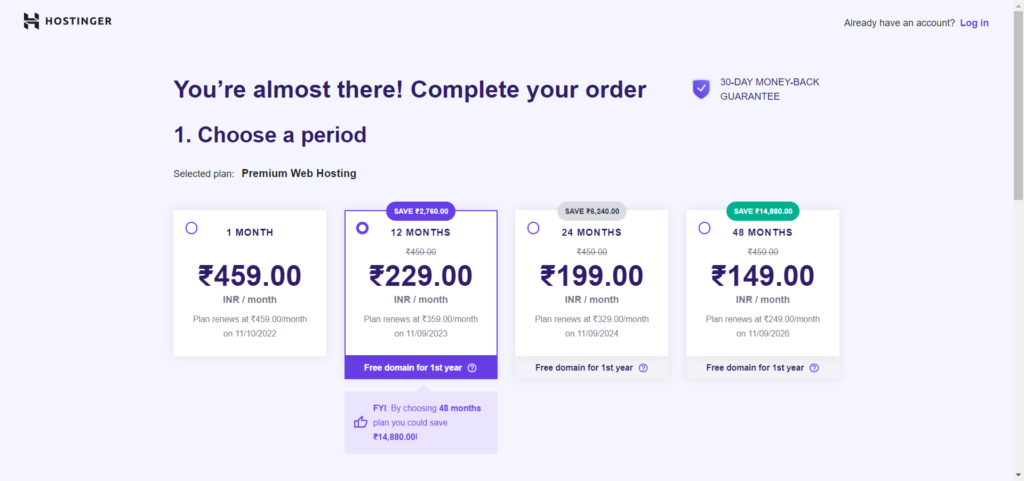
To create an account on hostinger with upto 35% off click on this link , when you click on the link you have the image like something below.
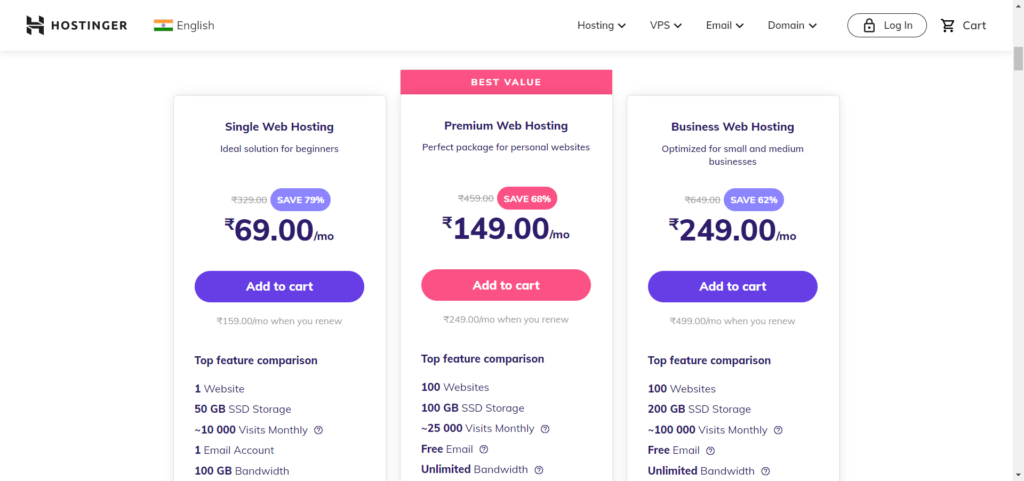
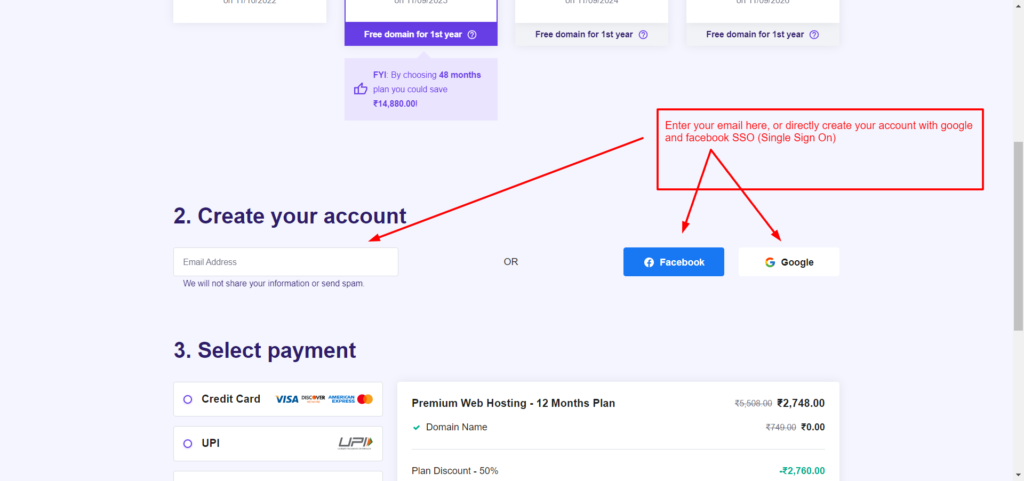
When you click on add to cart you will be able to see something like the below image.
Step:2 Sign in to your account
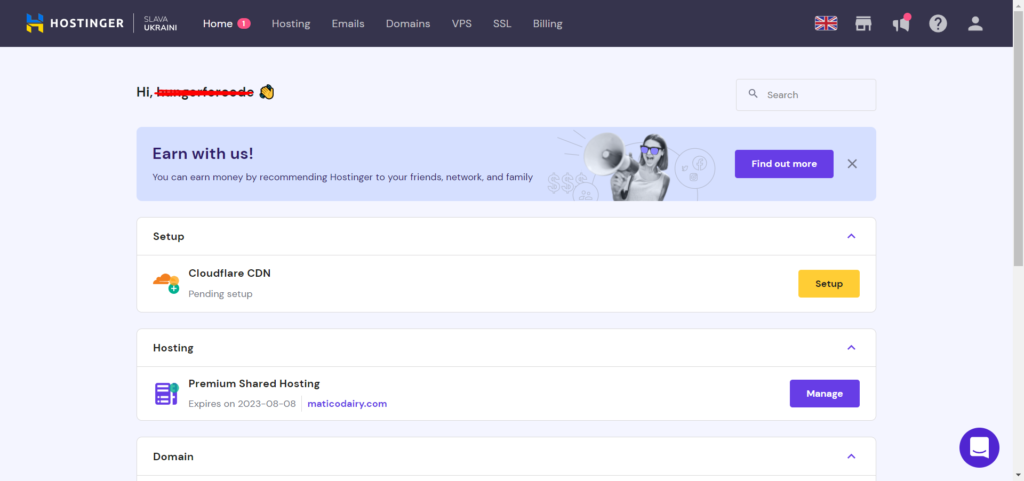
Now when you first time signs in to your account you have something like the below one.
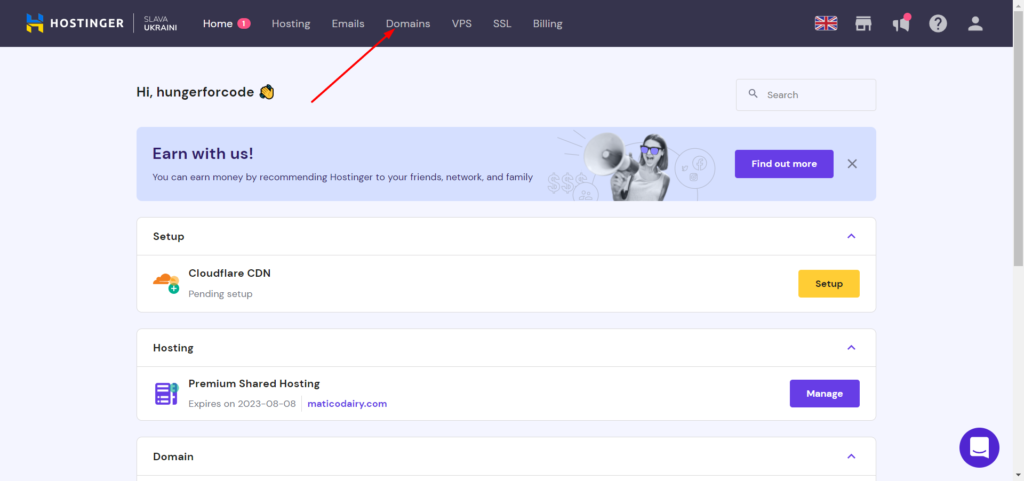
Step:3 Purchase One Doman
If you have purchased the premium web hosting then you don’t need to purchase one domain, if you have bought single web hosting then you have to purchase one domain, to purchase the domain click on the domain, I have marked in the below image.
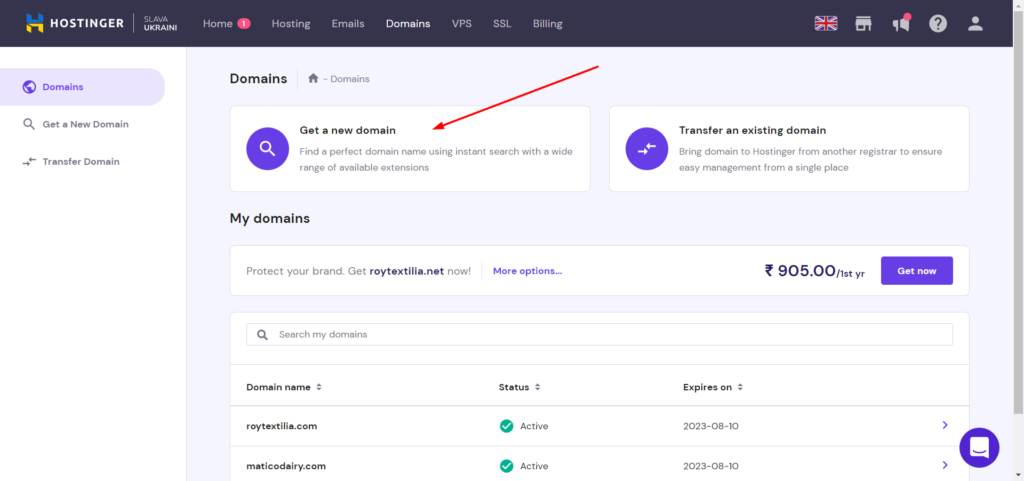
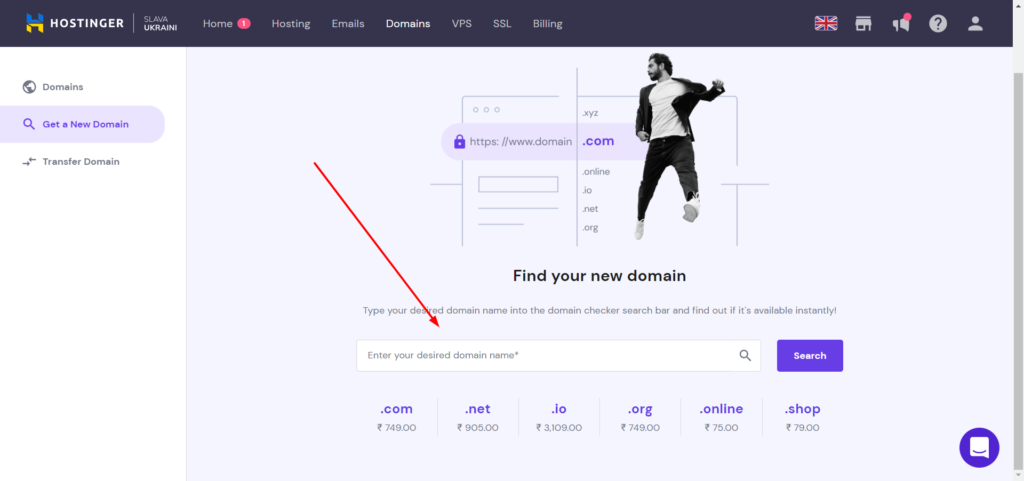
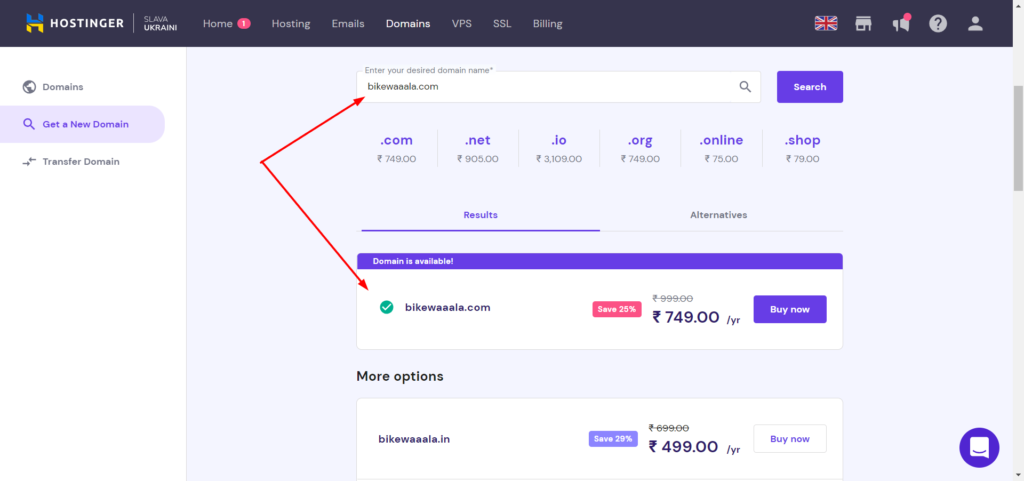
Then you have to look for your desired domain name.
Step:4 Install Laravel in local system
I will show you how to install laravel in the local system inside the xampp, and I am using a windows device as my operating system.
Go to xammp/htdocs and on the top in the address bar type cmd and then press enter, it will open the command panel.

In your command write the below code to install laravel 9, then press enter it will install the project under the example app folder
composer create-project laravel/laravel example-app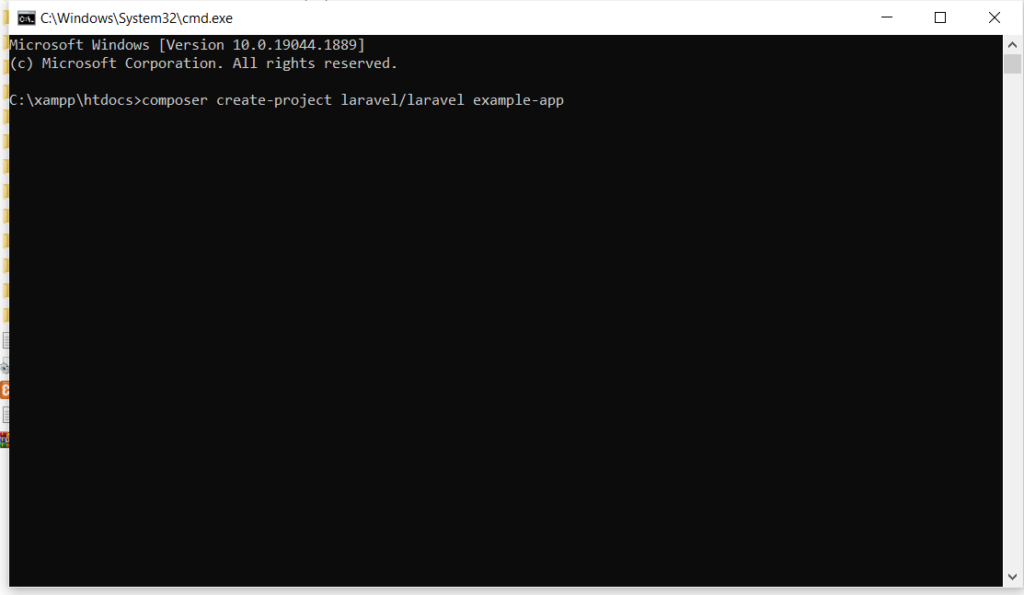

Step:5 Upload the Project folder
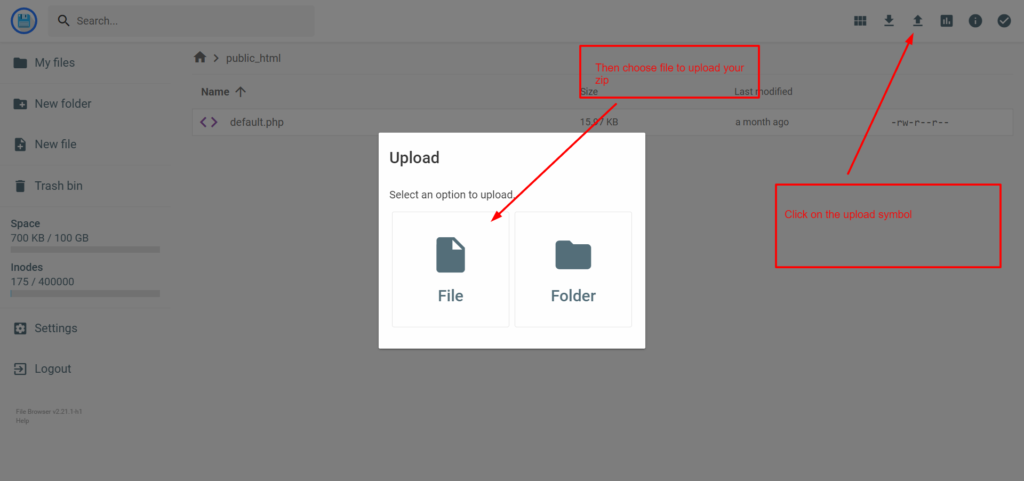
First, we have to make the zip of our example-app folder, then we upload that zip to our hostinger services.

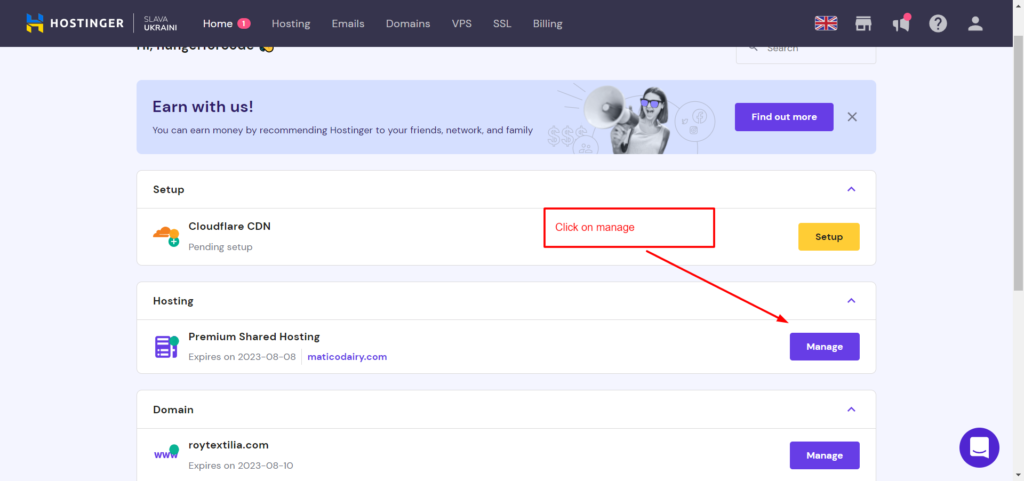
Go to your hostinger account and click on the manage button, I have marked in the below image

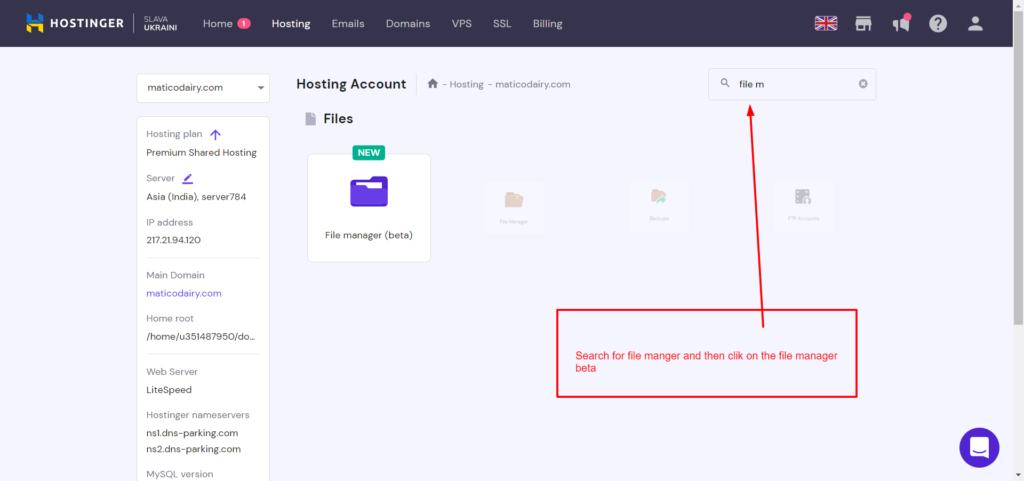
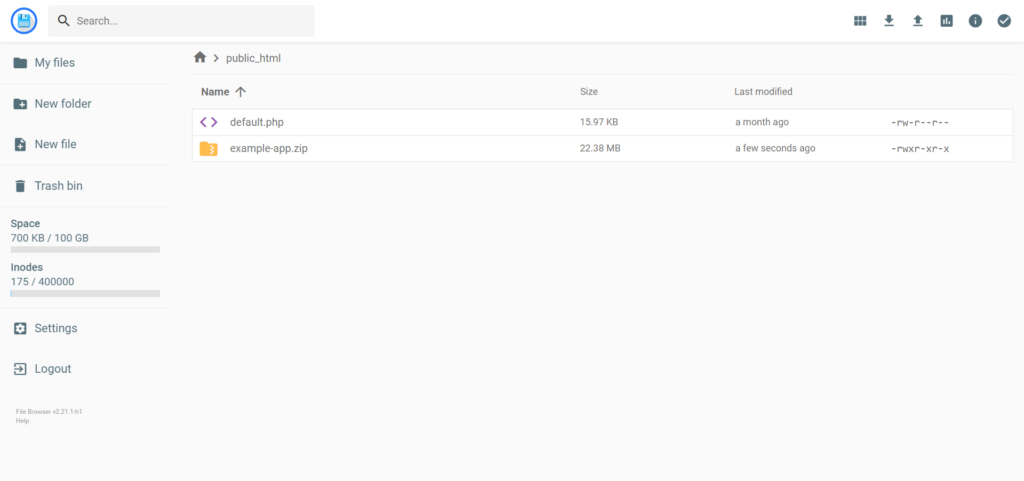
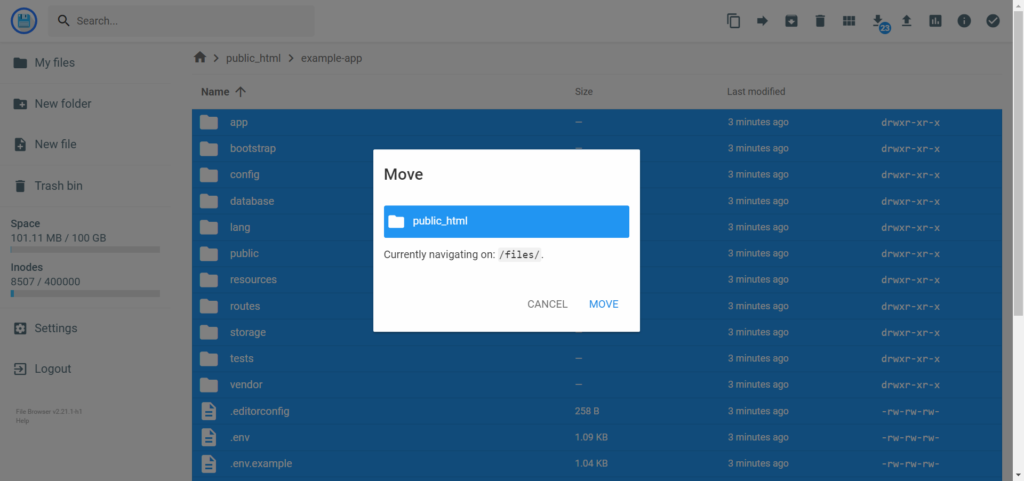
We have to upload our project inside the public_html folder, double click on the public_html to go inside it.

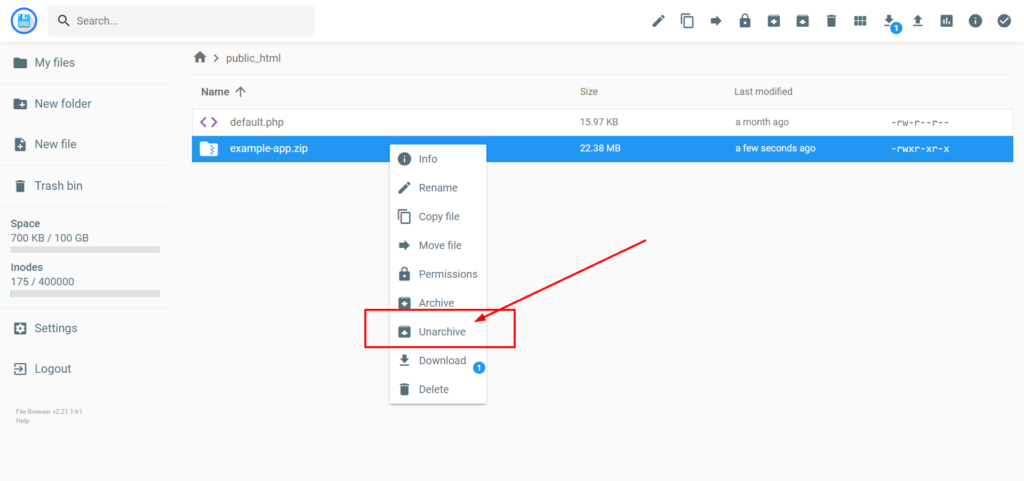
When you click on unarchive they will ask for the folder name at the place of folder name just add a forward slash /.
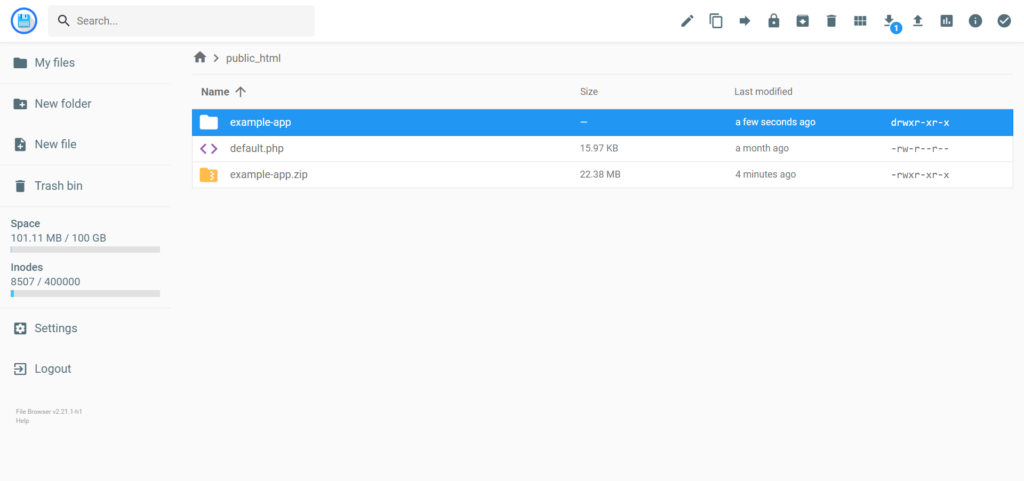
After moving it into the public_html delete the example-app and default.php file
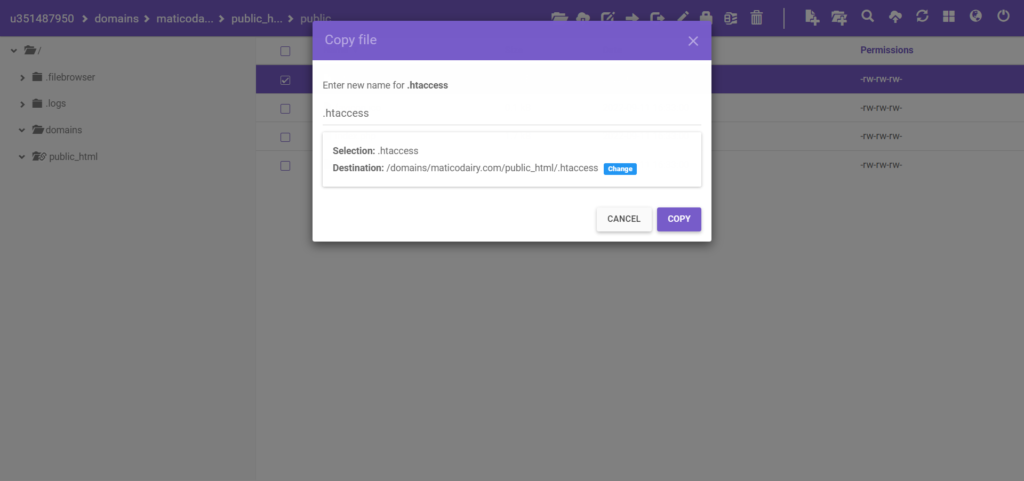
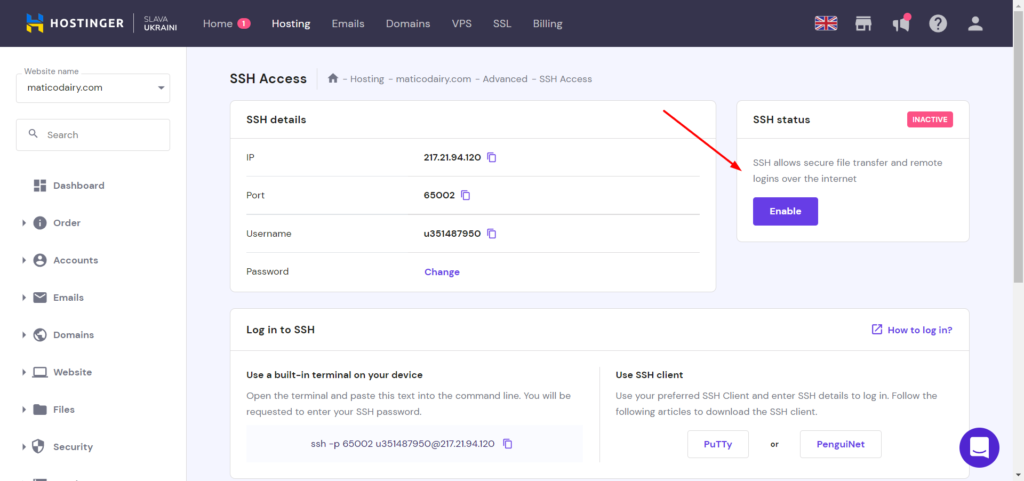
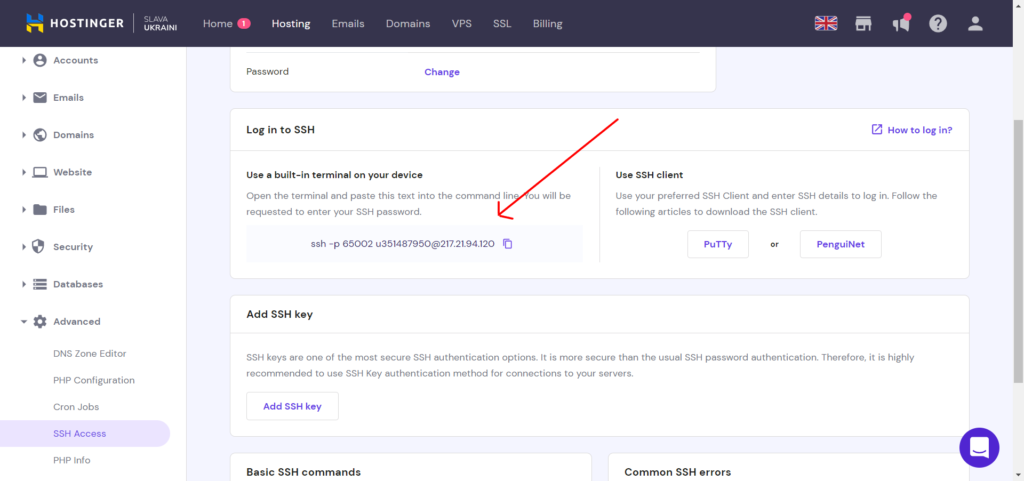
Step:6 Change in .htacces
To change in .htacces, first we have to copy our .htaccess file from the public folder to the public_html folder.
<IfModule mod_rewrite.c>
<IfModule mod_negotiation.c>
Options -MultiViews
</IfModule>
RewriteEngine On
# Redirect Trailing Slashes If Not A Folder...
RewriteCond %{REQUEST_FILENAME} !-d
RewriteCond %{REQUEST_URI} (.+)/$
RewriteRule ^ %1 [L,R=301]
# Handle Front Controller...
RewriteCond %{REQUEST_FILENAME} !-d
RewriteCond %{REQUEST_FILENAME} !-f
RewriteRule ^ index.php [L]
RewriteRule ^(.*)$ public/$1
# Handle Authorization Header
RewriteCond %{HTTP:Authorization} .
RewriteRule .* - [E=HTTP_AUTHORIZATION:%{HTTP:Authorization}]
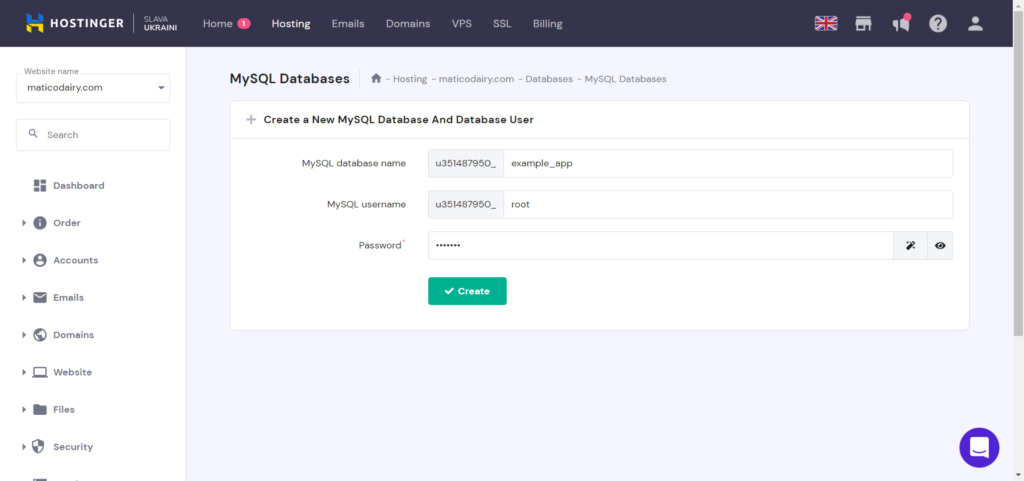
</IfModule>Step:7 Create the database
Search for the database, then click on that to create a new database. Then fill in your database name, username and password, and click on the create button
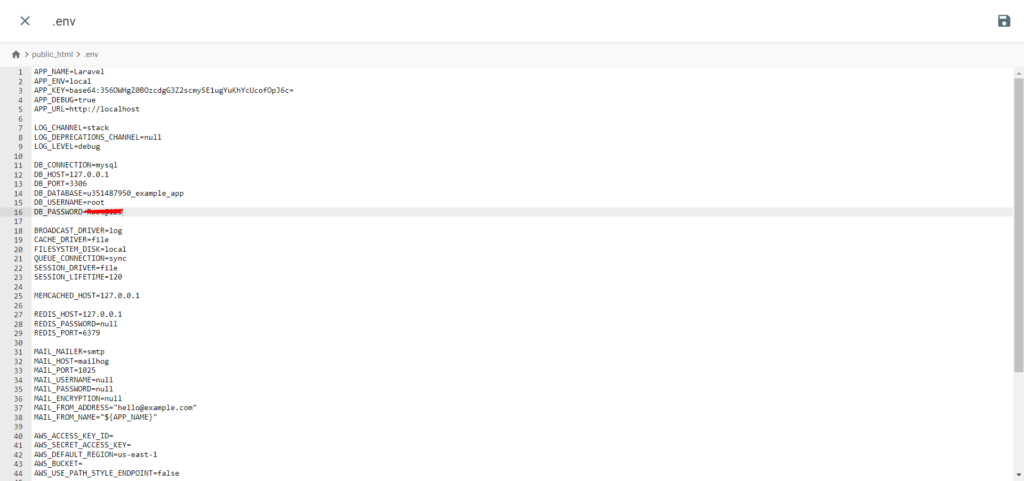
Now we have to connect our database to our laravel project, look for .env file and enter the database details, which your have created.
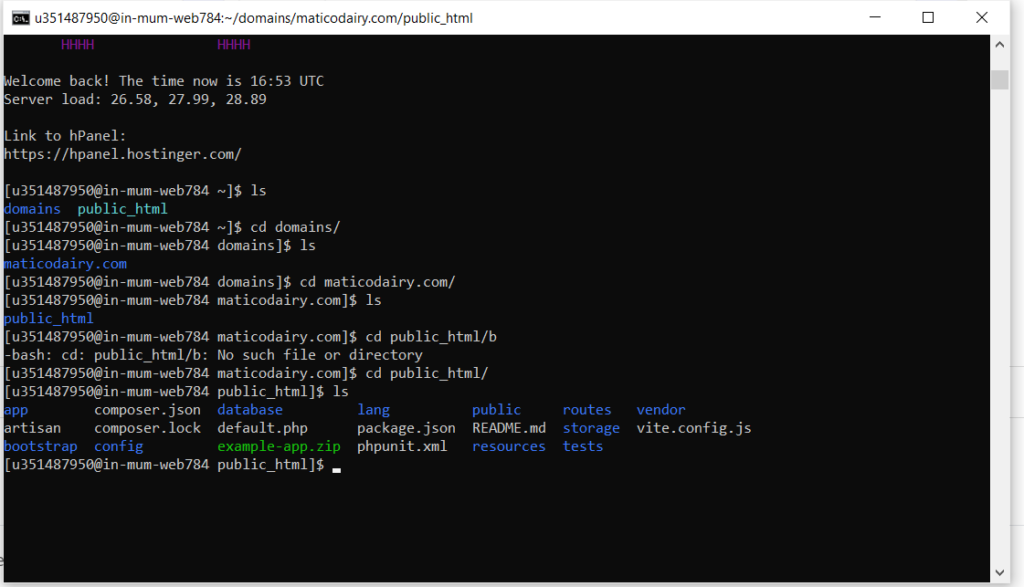
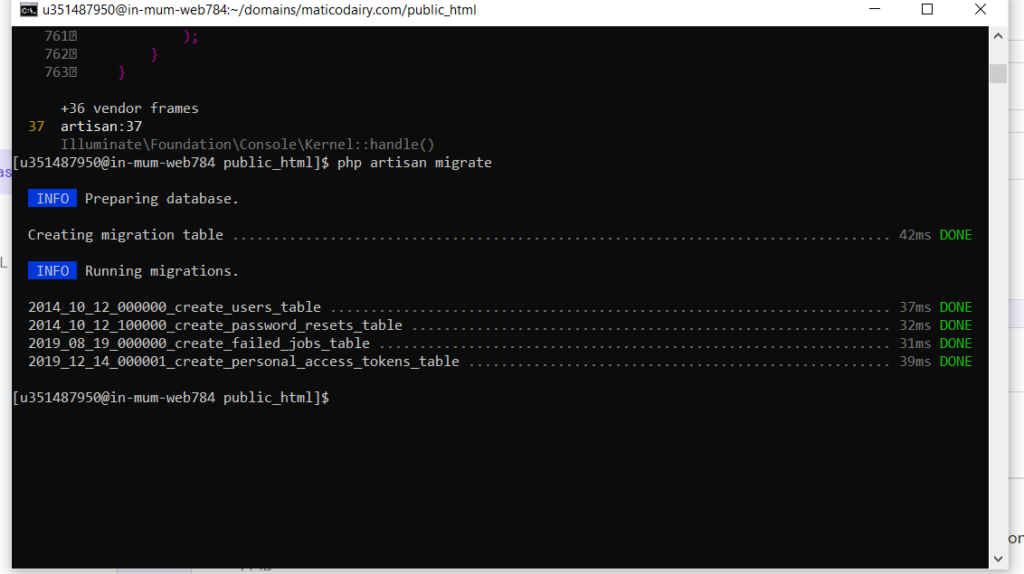
In the public_html we will use the below command to run the migration and create the laravel default table.
Step:8 Run the migration
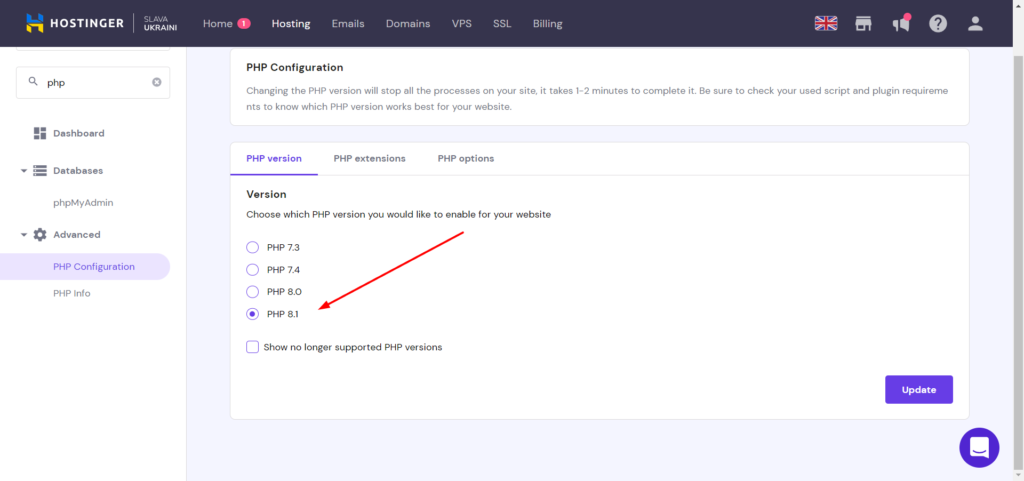
php artisan migrateIf you see the below error, just search for the PHP and we will change our PHP version to 8.1
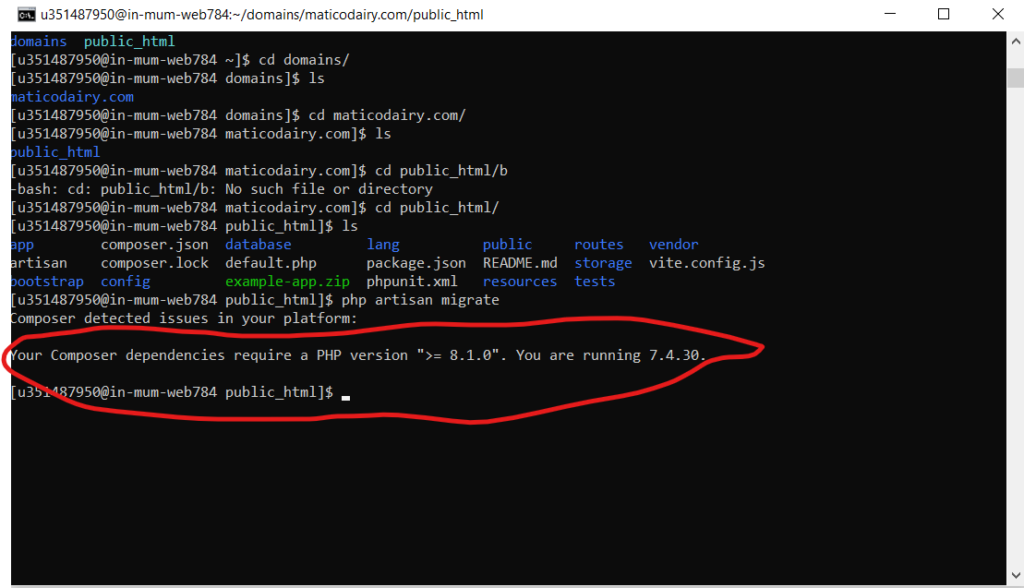
Search for the PHP configuration then change it to the PHP 8.1
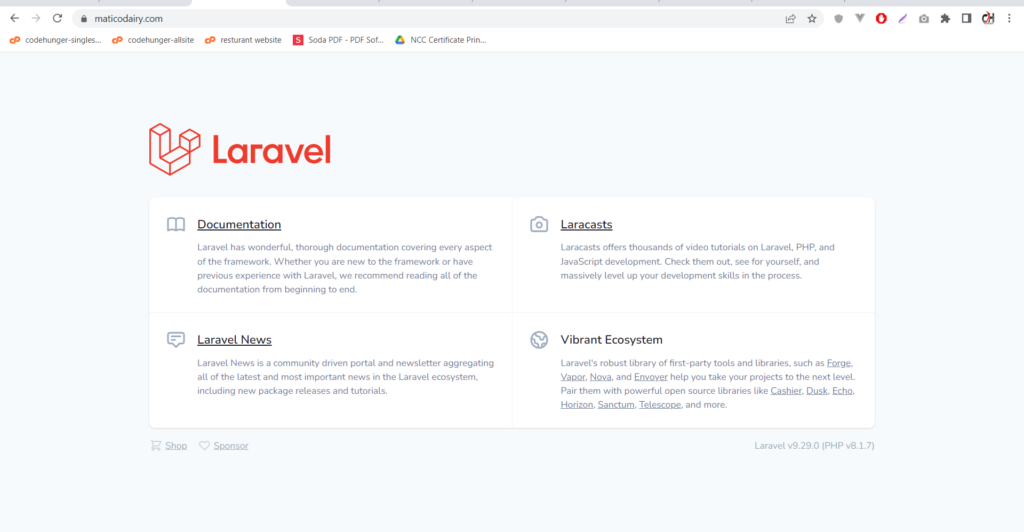
Step:9 Test the laravel Website
Now, it’s time to test our maticodairy.com, you can see in the below image the site is working fine.
Horray, we have successfully hosted our website on hostinger shared hosting.I hope you love it.