

In this article, I am going to discuss how to use Swagger in WEB API Application to document and test restful Web API services.
What is Swagger?
Swagger is a language-agnostic specification for describing REST APIs. The Swagger project was donated to the OpenAPI Initiative, where it’s now referred to as OpenAPI. Both names are used interchangeably; however, OpenAPI is preferred. It allows both computers and humans to understand the capabilities of a service without any direct access to the implementation (source code, network access, documentation). One goal is to minimize the amount of work needed to connect disassociated services. Another goal is to reduce the amount of time needed to accurately document a service.
Swagger Specification
Swagger Specification is an important part of the Swagger flow. By default, a document named swagger.json is generated by the Swagger tool which is based on our API. It describes the capabilities of our API and how to access it via HTTP.
Steps for implementing Swagger
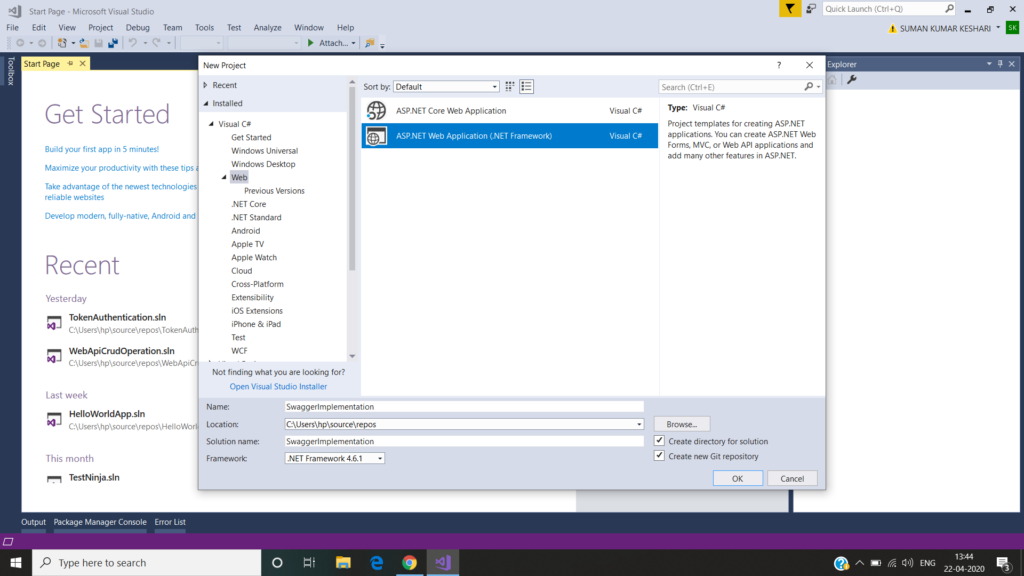
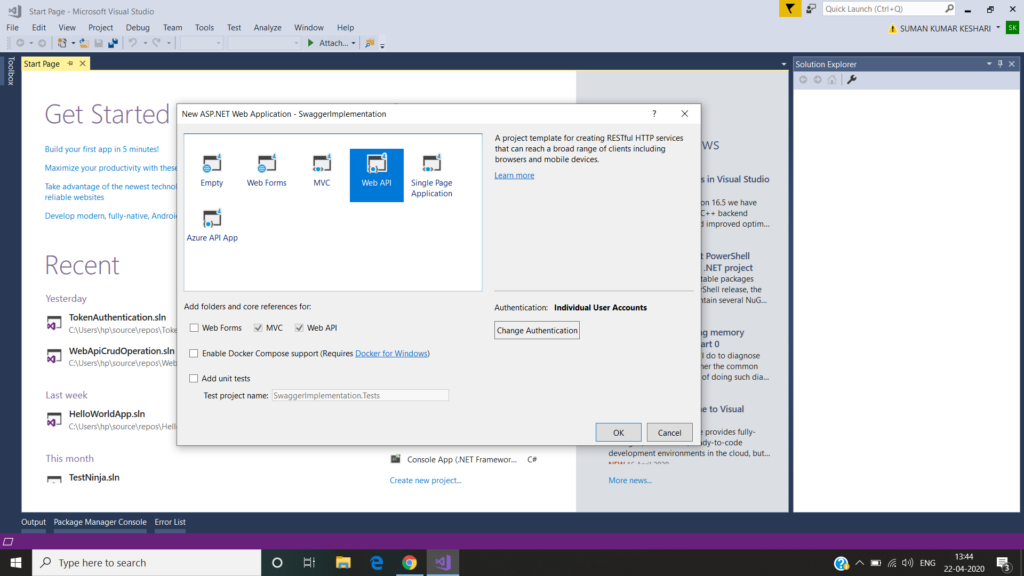
Step 1 – Create Web API application using Visual Studio
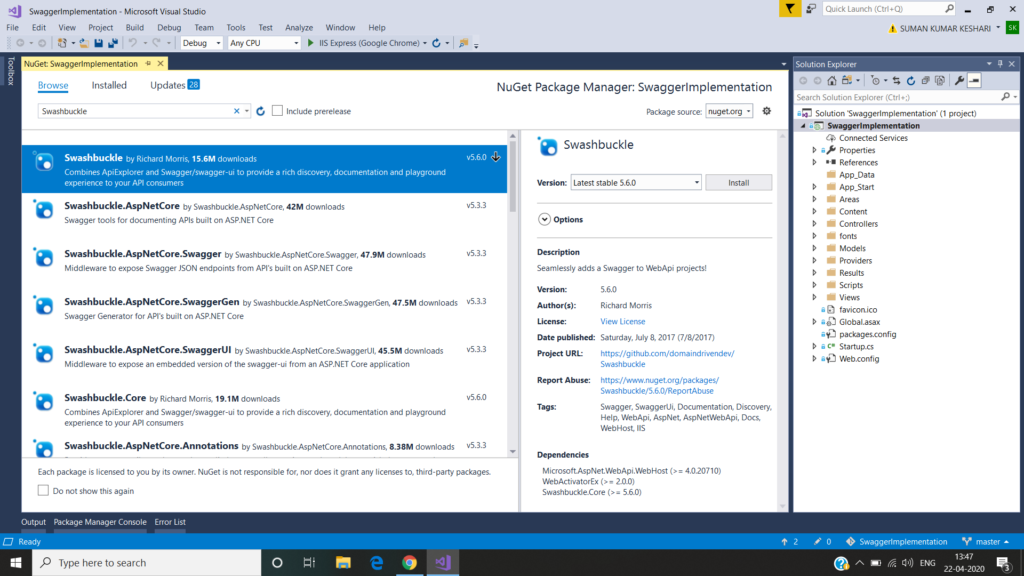
Step 2 – Install Swashbuckle from Nuget Package
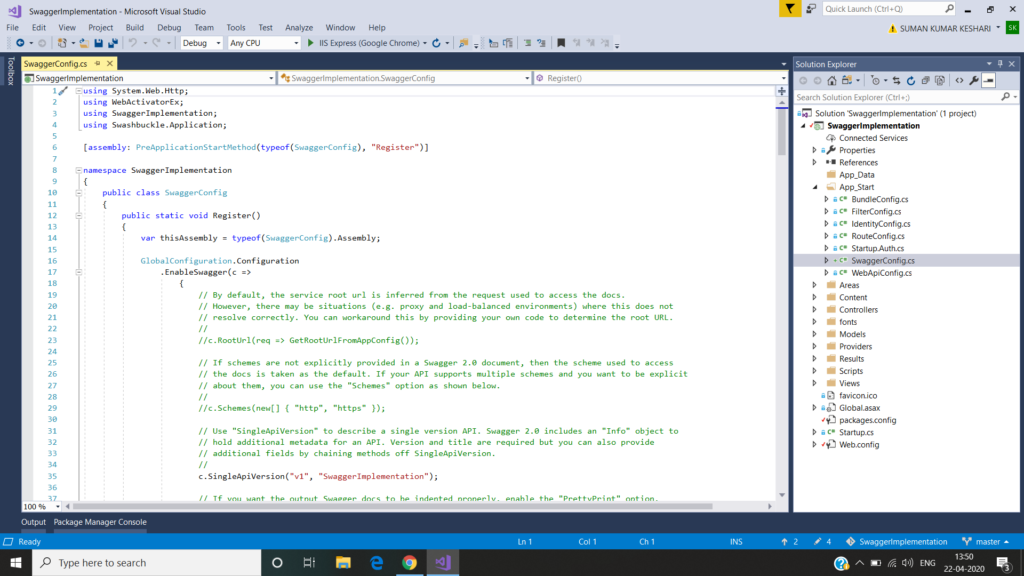
Step 3 – Modify the SwaggerConfig class which is present in the App_Start Folder

using System.Web.Http;
using WebActivatorEx;
using SwaggerImplementation;
using Swashbuckle.Application;

[assembly: PreApplicationStartMethod(typeof(SwaggerConfig), "Register")]

namespace SwaggerImplementation
{
    public class SwaggerConfig
    {
        public static void Register()
        {
         var thisAssembly = typeof(SwaggerConfig).Assembly;
            GlobalConfiguration.Configuration
              .EnableSwagger(c => c.SingleApiVersion("v1", "Swagger Implementation"))
              .EnableSwaggerUi();
        }
    }
}
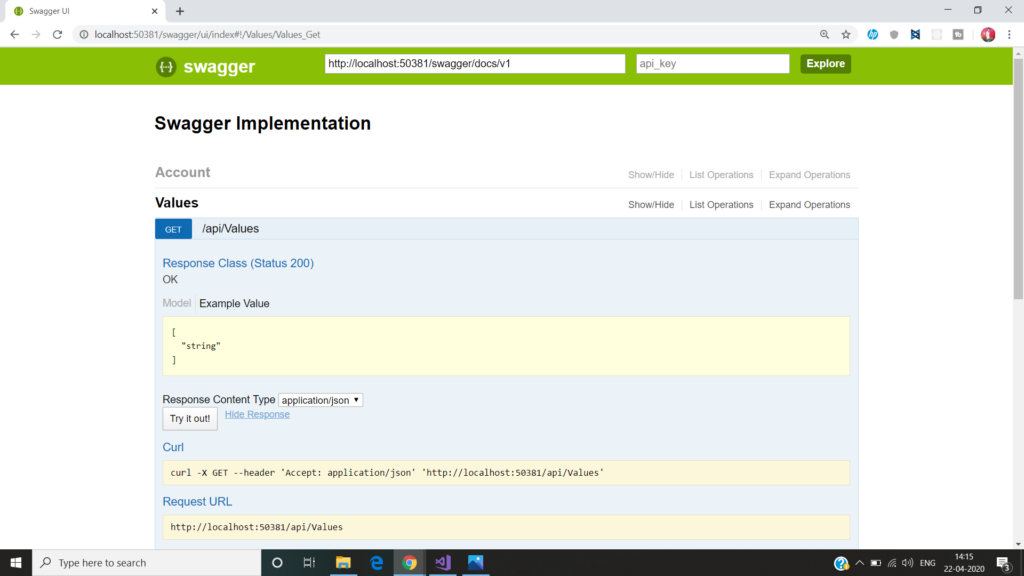
Step 4 – Run the project and go to the URL http://localhost:[PORT_NUM]/swagger

How to enable Swagger to use XML Comments in ASP.NET Web API Application?
s of now, we use the minimum configuration to get started. But now we are going to add more customization. We can tell the Swashbuckle to use our custom XML comments to add more details about our APIs to the Swagger metadata.
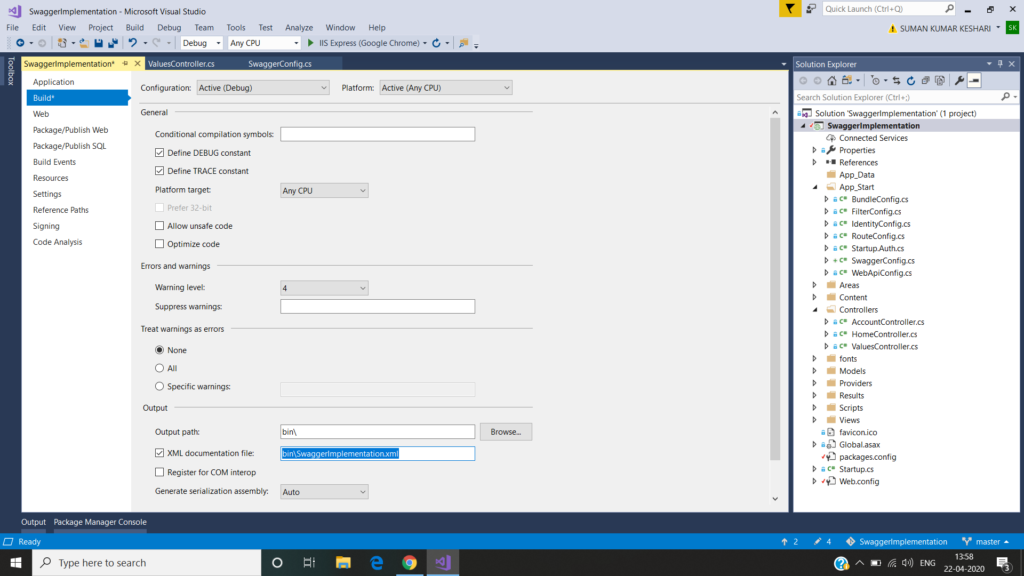
First, we need to enable XML documentation file creation during the build. In the Solution Explorer right-click on the Web API project and click on the Properties. Click the Build tab and navigate to Output. Make sure the XML documentation file is checked. You can leave the default file path. In our case its bin\SwaggerImplementation.XML as shown below
Next, we need to tell the Swashbuckle to include our XML comments in the Swagger metadata. To do this we need to add the following line to SwaggerConfig.cs. Make sure to change the file path to the path of your XML documentation file.
c.IncludeXmlComments(string.Format(@”{0}\bin\SwaggerImplementation.XML”, System.AppDomain.CurrentDomain.BaseDirectory));
using System.Web.Http;
using WebActivatorEx;
using SwaggerImplementation;
using Swashbuckle.Application;

[assembly: PreApplicationStartMethod(typeof(SwaggerConfig), "Register")]

namespace SwaggerImplementation
{
    public class SwaggerConfig
    {
        public static void Register()
        {
            var thisAssembly = typeof(SwaggerConfig).Assembly;
            GlobalConfiguration.Configuration
              .EnableSwagger(c =>
              {
                  c.SingleApiVersion("v1", "Swagger Implementation");
                  c.IncludeXmlComments(string.Format(@"{0}\bin\SwaggerImplementation.XML",
                                       System.AppDomain.CurrentDomain.BaseDirectory));
              })
              .EnableSwaggerUi();
        }
    }
}
Let’s add some XML documents to our API methods as shown below. Here we are adding XML Document to the get method. Modify the Get method as shown below.
namespace SwaggerImplementation.Controllers
{
    public class ValuesController : ApiController
    {
        /// <summary>
        /// Get All the Values
        /// </summary>
        /// <remarks>
        /// Get All the String Values
        /// </remarks>
        /// <returns></returns>
        public IEnumerable<string> Get()
        {
            return new string[] { "value1", "value2" };
        }
     }
}
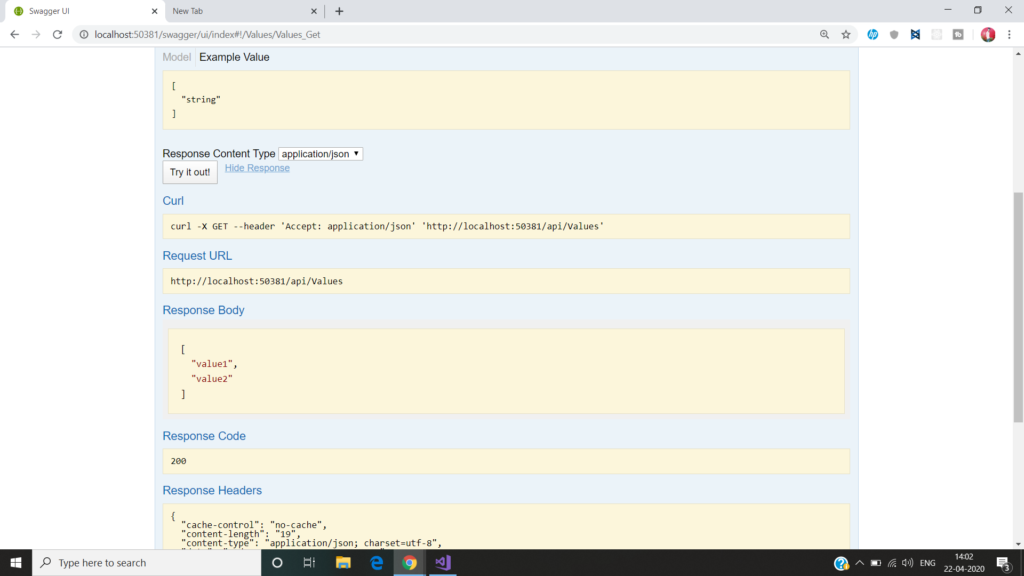
Now run the Application and check the result.


Wow, awesome blog format! How long have you been running a blog for?
you make running a blog glance easy. The full glance
of your site is wonderful, let alone the content!
Thanks for your grateful feedback your feedback more valuable to us.
Team codehunger
You have noted very interesting points! ps nice website.
Thanks for your appreciating feedback,
team codehunger
Saved as a favorite!, I love your site!
Thanks,
For your feedback for more updates keep visit.
Team codehunger
I blog frequently and I really appreciate your content. Your article has truly peaked my interest.
I will bookmark your site and keep checking for new information about once per
week. I subscribed to your RSS feed as well.
Thanks for your appreciating feedback, keep visit for more updates.
Team codehunger
As I website owner I conceive the articles here is
real good, thanks for your efforts.
Thanks for your feedback.
Team codehunger