In this tutorial we are going to see how we can integrate Facebook SignIn using FBSDK in a React Native Application. We are going to implement this using Facebook Console. I am going to cover all the points which is necessary in the integration. Because I personally face many problems regarding this implementation. So let’s start the tutorial.
First of all you have to create a project using this command.
npx react-native init ProjectNameAfter running the project we are going to integrate the facebook sign in functionality.
- Install and link the React Native Facebook SDK package and dependencies.
npm install react-native-fbsdk

//After that you have to link this

react-native link react-native-fbsdk
Configure Your Project
You have installed the Facebook SDK for React Native, but you must now perform some additional steps to install and configure the native project for android using this link.
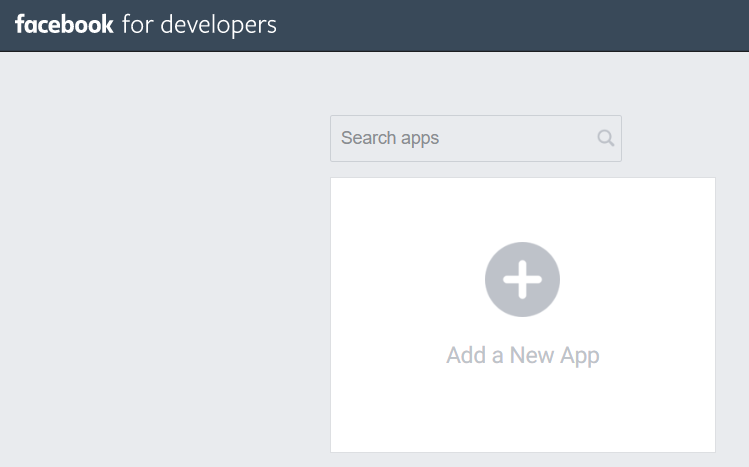
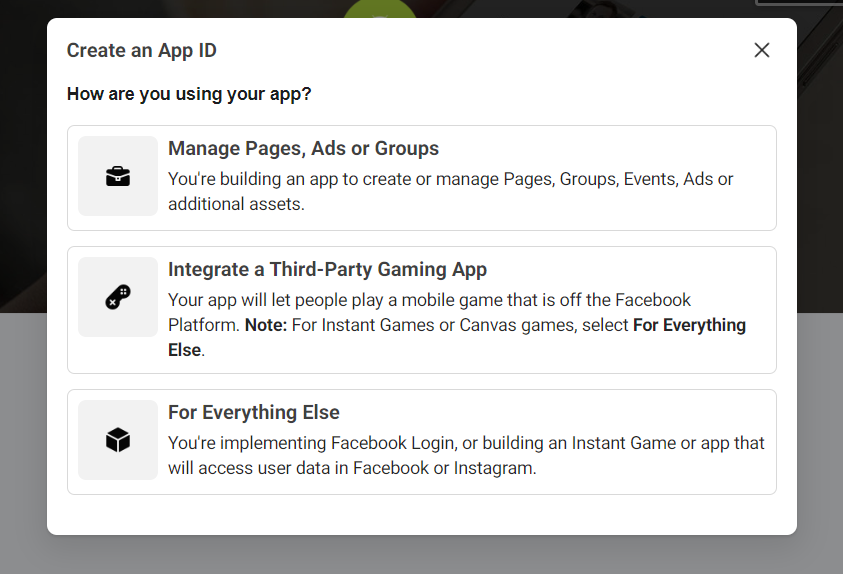
1. Create App in Facebook Console
Then click the 3rd option For Everything Else.
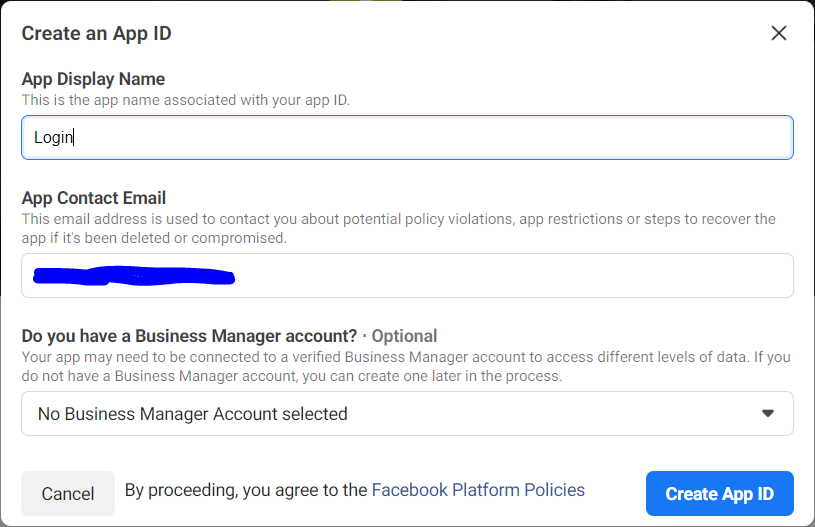
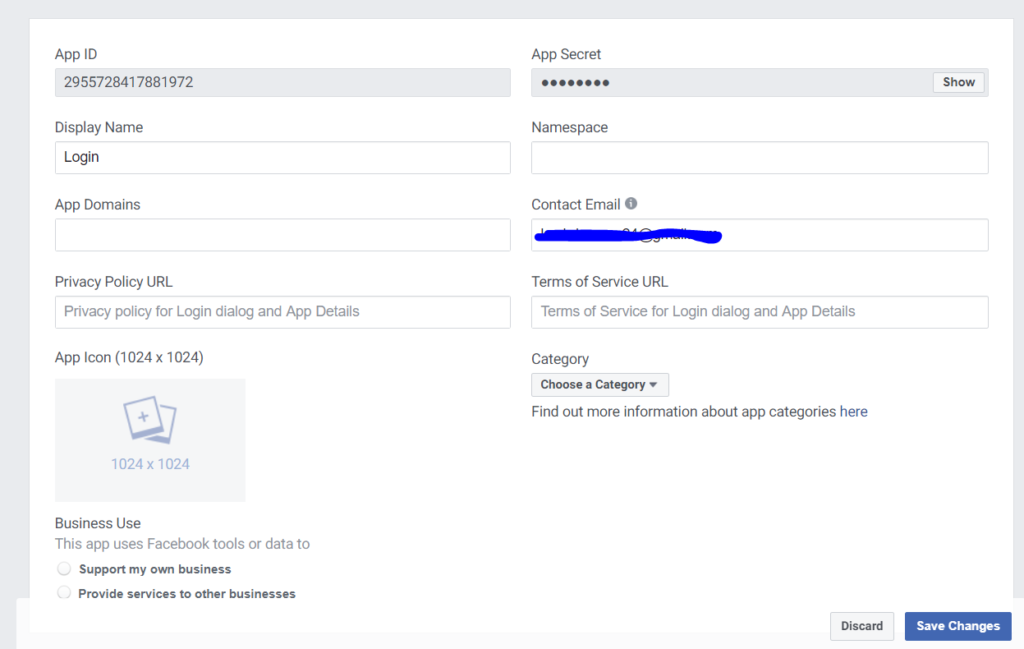
After filling all the details you have to click on Create App ID and then go to the Basic Section of the Sidebar.
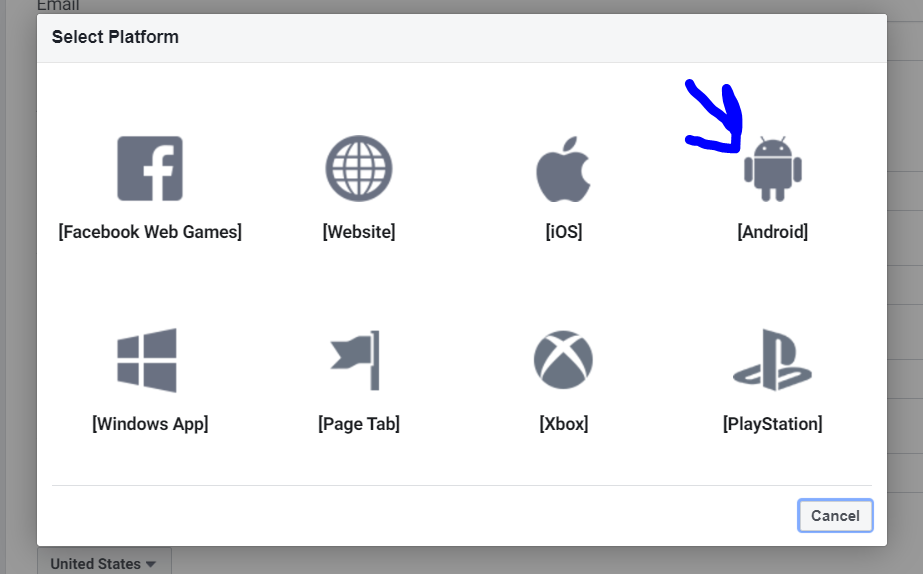
– Now if you scroll down a bit then you will see an Add Platform option. We will add Android platform using it so that we can log in.

Then add the Android Option.
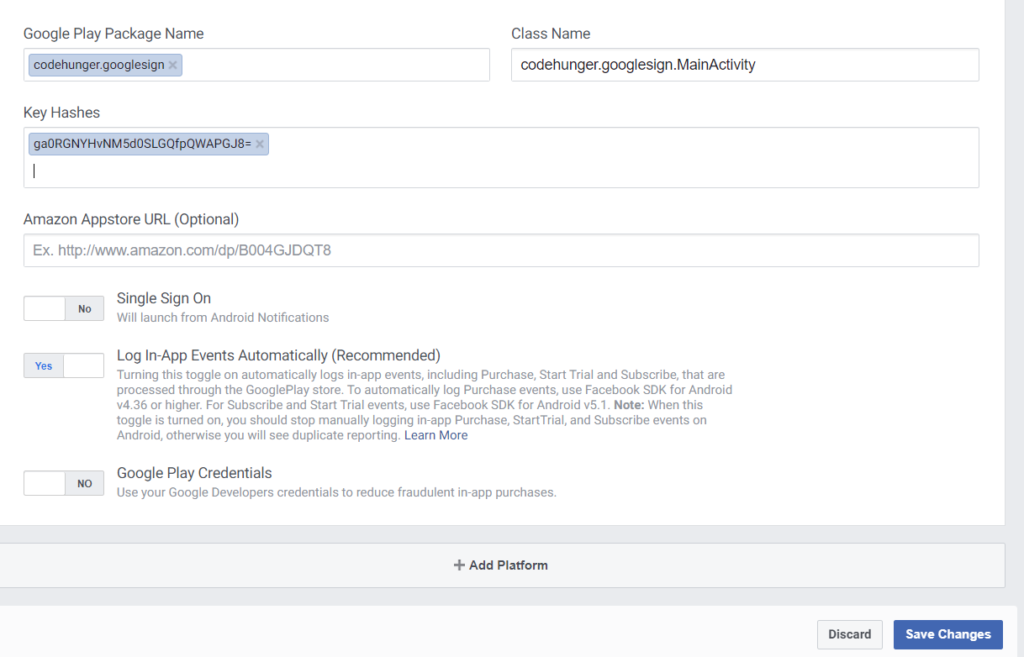
Now you will see an additional Android section at the bottom of the Basic setting section. Please fill the required details.
- Package name from your AndroidManifest.xml file (YourProject > android > app > src > main > AndroidManifest.xml).
- Class Name will be “Package name + MainActivity”.
- After that we have to Enter the Key Hash. And for getting the key hash follow the below steps.
- Navigate to this location in Cmd C:\Program Files\Java\jdk1.8.0_251\bin
- For the windows you need to download the OpenSSL else you will find the following error.

Debug Key Hash
After downloading the OpenSSL you can unzip it in your C directory and run command (Before running please check the file path once).
keytool -exportcert -alias androiddebugkey -keystore C:/Users/hp/GoogleSign/android/app/debug.keystore | C:\bin\openssl.exe sha1 -binary | C:\bin\openssl.exe base64And enter the password Hello. After that you will get the hash key and copy and paste that hash key like the below image.
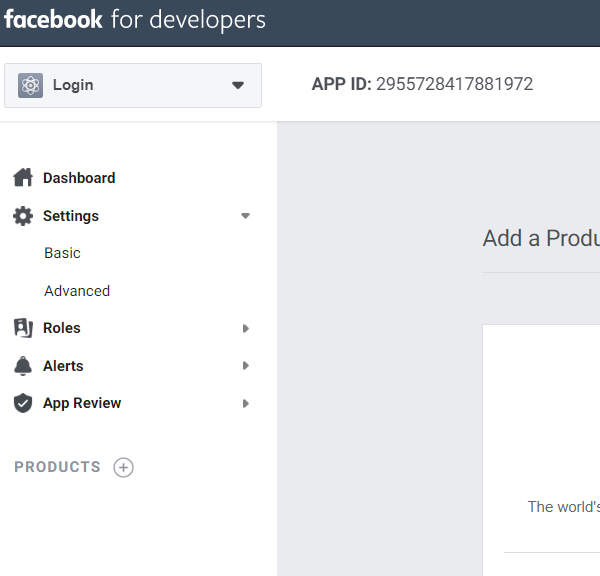
After that just Save the Changes and Copy the Application Id and come to the app.
Add Facebook App Id in Android Code
– After adding the Android platform add the following meta-data in the AndroidManifest.xml file
<meta-data android:name="com.facebook.sdk.ApplicationId"
android:value="@string/facebook_app_id"/>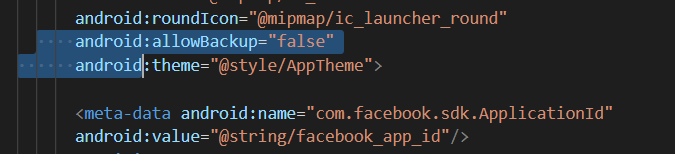
– Add the App ID in the string.xml file. (You can find the App ID at the top of the Facebook console)
<string name="facebook_app_id">2955728417881972</string>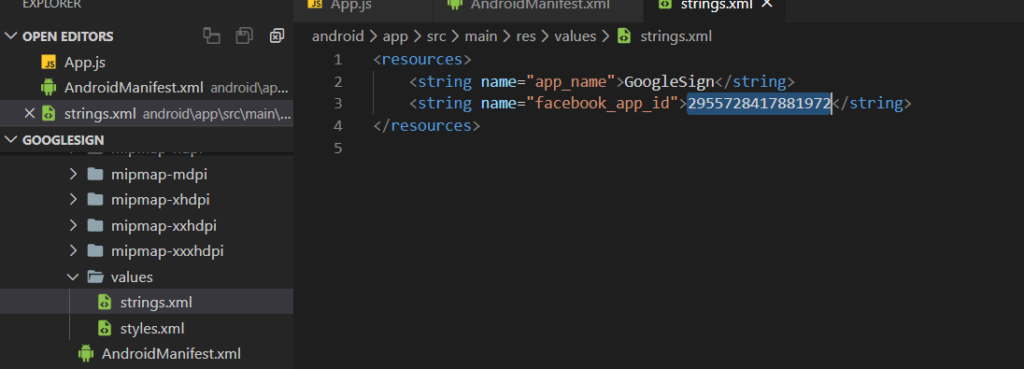
Now open App.js in any code editor and replace the code with the following code.
import React, { Component } from 'react';
import { View, StyleSheet, Text, Alert, Image } from 'react-native';
import {
LoginButton,
AccessToken,
GraphRequest,
GraphRequestManager,
} from 'react-native-fbsdk';
export default class App extends Component {
constructor() {
super();
//Setting the state for the data after login
this.state = {
user_name: '',
token: '',
profile_pic: '',
};
}
get_Response_Info = (error, result) => {
if (error) {
//Alert for the Error
Alert.alert('Error fetching data: ' + error.toString());
} else {
//response alert
alert(JSON.stringify(result));
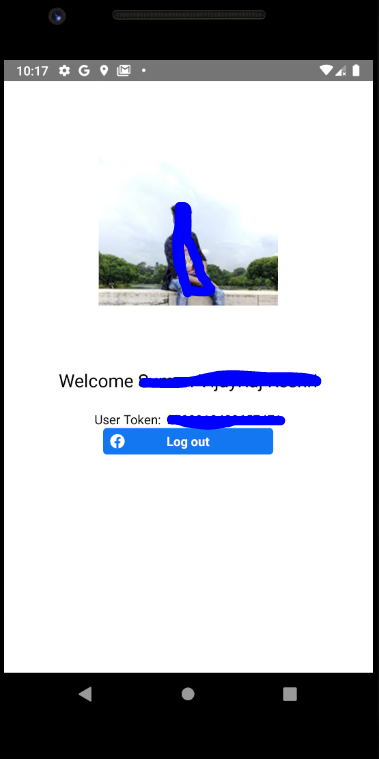
this.setState({ user_name: 'Welcome' + ' ' + result.name });
this.setState({ token: 'User Token: ' + ' ' + result.id });
this.setState({ profile_pic: result.picture.data.url });
}
};
onLogout = () => {
//Clear the state after logout
this.setState({ user_name: null, token: null, profile_pic: null });
};
render() {
return (
<View style={styles.container}>
{this.state.profile_pic ? (
<Image
source={{ uri: this.state.profile_pic }}
style={styles.imageStyle}
/>
) : null}
<Text style={styles.text}> {this.state.user_name} </Text>
<Text> {this.state.token} </Text>
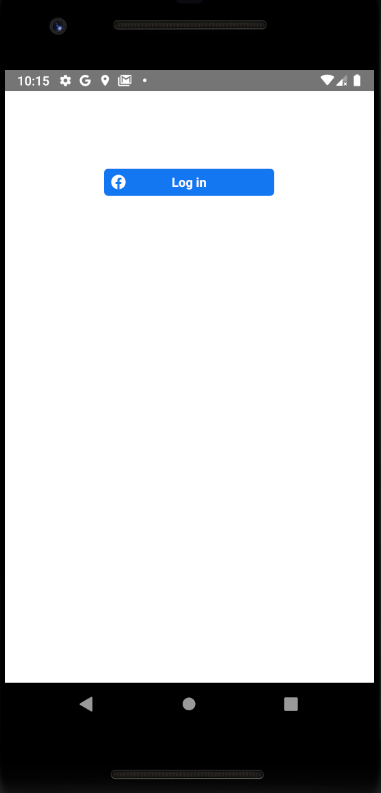
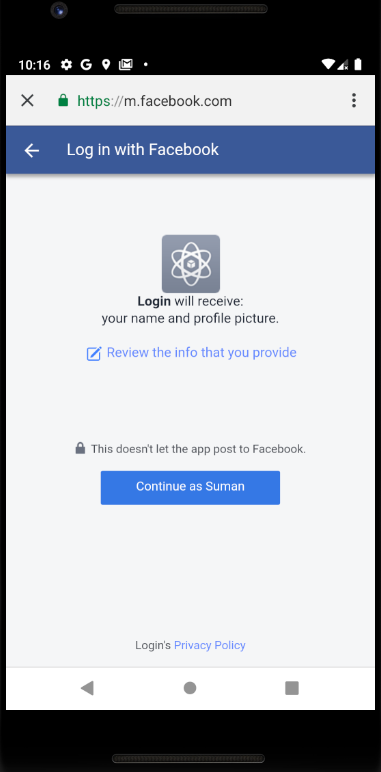
<LoginButton
readPermissions={['public_profile']}
onLoginFinished={(error, result) => {
if (error) {
alert(error);
alert('login has error: ' + result.error);
} else if (result.isCancelled) {
alert('login is cancelled.');
} else {
AccessToken.getCurrentAccessToken().then(data => {
alert(data.accessToken.toString());
const processRequest = new GraphRequest(
'/me?fields=name,picture.type(large)',
null,
this.get_Response_Info
);
// Start the graph request.
new GraphRequestManager().addRequest(processRequest).start();
});
}
}}
onLogoutFinished={this.onLogout}
/>
</View>
);
}
}
const styles = StyleSheet.create({
container: {
flex: 1,
backgroundColor: '#fff',
alignItems: 'center',
},
text: {
fontSize: 20,
color: '#000',
textAlign: 'center',
padding: 20,
},
imageStyle: {
width: 200,
height: 300,
resizeMode: 'contain',
},
});