As we all know that in these modern time we are more focused towards the indoor game . And if we have the PC then we ran towards our PC games but sometimes PC lags and the PC performance slowed down. And its makes us irritated. SO in this article i will show you how to improve the PC performance for gaming

PC gaming is one of the popular activities in the modern age of time. And Windows 10 is the favorite one when it comes to the operating system. However, some users want to know how to make games run faster on computer.
In general, the PC gaming performance can be affected by the graphics card, CPU, memory, hard disk, network, and so on.
9 Tips to Optimize Windows 10 for Gaming
- Optimize Windows 10 with Game Mode.
- Manage the active hours.
- Go for an SSD.
- Tweak your Visual Effects settings.
- Use high performance power plan.
- Disable Nagle’s Algorithm.
- Update GPU drivers.
- Disable mouse acceleration.
- Install DirectX 12.
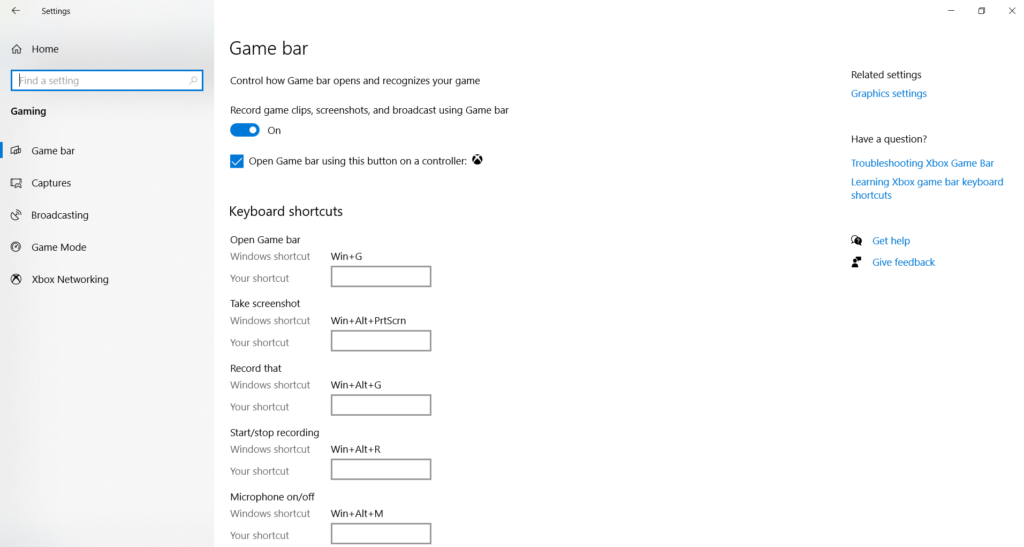
1. Optimize Windows 10 with Game Mode
- Press Windows key and I Key together to open Settings.
- In the Settings page, click Gaming.
- In the next pop-up window, go to the Game Mode panel, and switch the button Use Game Mode to On.
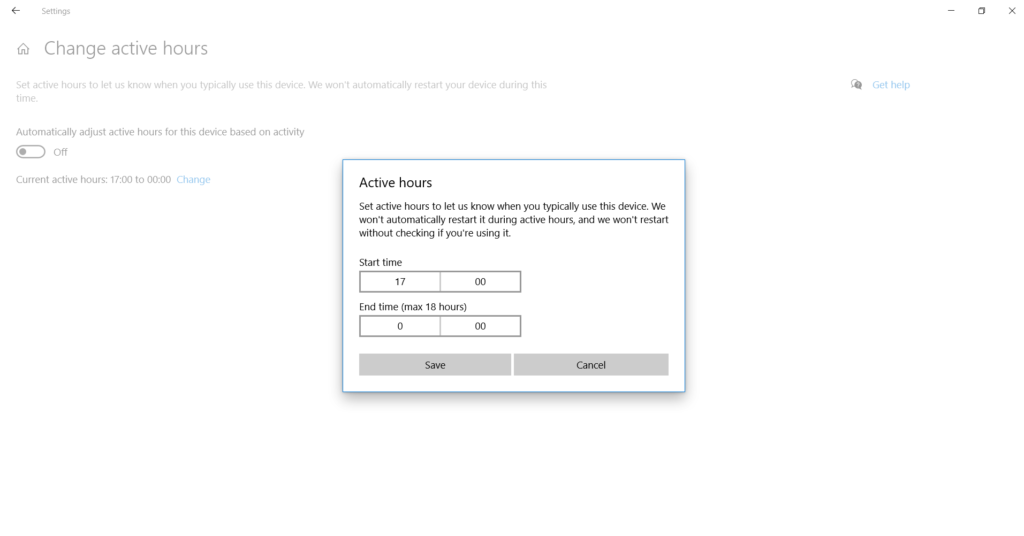
2. Manage Your Active Hours
- Press Windows key and I key together to open Settings.
- Then choose Update & Security to continue.
- On the right panel, click Change active hours.
- Then set the start time and end time based on your needs. Then click Save.
3. Go for an SSD
Upgrading from an HDD to an SSD won’t drastically improve your game performance, but it can help you reduce loading times significantly. It is true that SDDs can be quite expensive and it may seem that loading times is not such an important issue to invest your money in. But while it is probably not the first thing to think about when speeding up your laptop, it is not the last either. Today’s games take more and more disk space, so if you want to play the latest ones, changing from an HDD to an SSD can be a real time-saver and your game loading times can go down from 30-40 seconds to 2-3, which is pretty significant.
As for the money side of things, if a big SSD for both your OS and games is too expensive for you, just get one small SSD for your OS, and keep a big HDD for games.
4. Tweak Your Visual Effects Settings
Hit Windows key + I. Then, type “performance” and select Adjust the appearance and performance of Windows. In the window that opens, choose Adjust for best performance. Then, go to the Advanced tab and verify that the setting is applied to Programs.

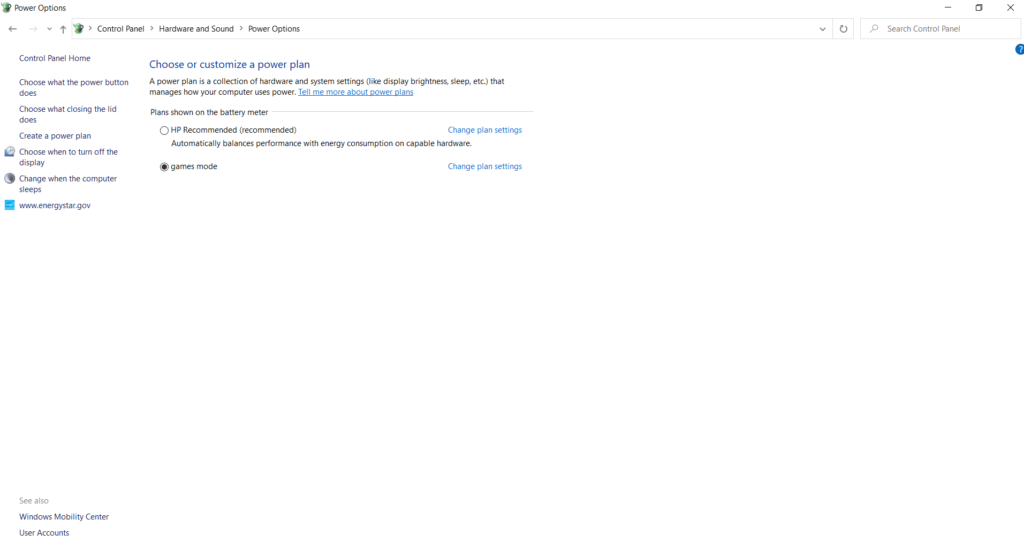
5. Use high performance power plan.
- Press Windows key and I key together to open Settings.
- In the pop-up window, choose System to continue.
- Then navigate to the Power & Sleep tab and click Additional power settings.
- In the Power Options window, check the option Games Mode.
6. Disable Nagle’s Algorithm
At first you have to find your IP address, press Windows key + X and follow these steps: Control Panel – Network and Internet – Network and Sharing Center – Connections – Details – IPv4 Address.
Then Open your Windows Registry Editor by clicking Windows key + Q, typing “regedit” and clicking on the regedit file. Scroll down the HKEY_LOCAL_MACHINE menu to find the following path: \SYSTEM\CurrentControlSet\Services\Tcpip\Parameters\Interface. That will lead you to the menu that comprises folders with many numbers and letters. To access the correct file, match your IP address to the listed DhcpIPAddress in one of those folders.
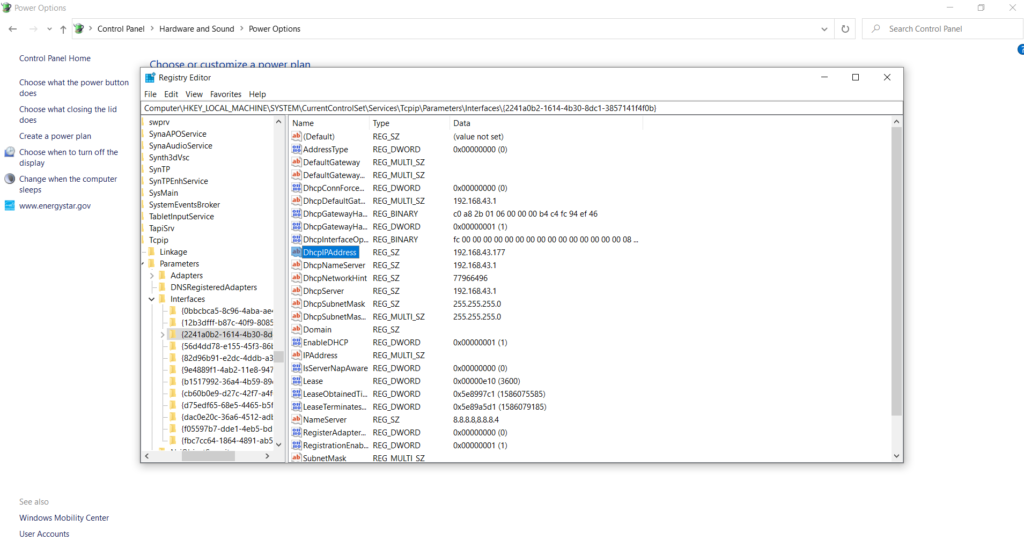
Now you can track down the folder with the proper IP Address. Right-click on that folder and select New – DWORD (32-bit) Value. You’ll have to create two of those values: TcpAckFrequency and TCPNoDelay. Double-click on each of them and set both of their parameters to 1. The Nagle’s Algorithm is now disabled.
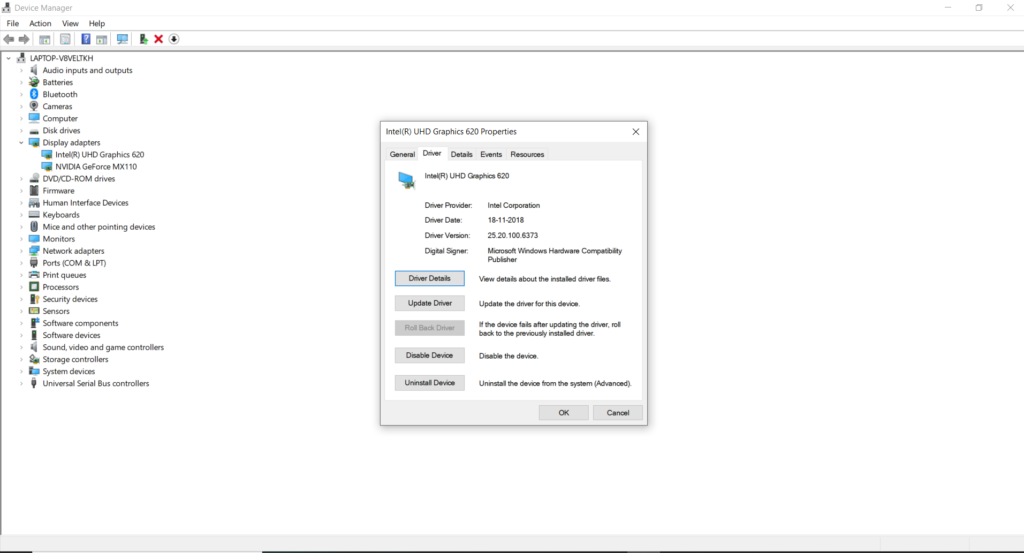
7. Update GPU drivers
- Press Windows key and R key together to open Run dialog.
- Then type msc in the box and click OK to continue.
- In the Device Manager window, expand the Display adapter and select the driver on your computer.
- Right-click it and choose Update driver to continue.
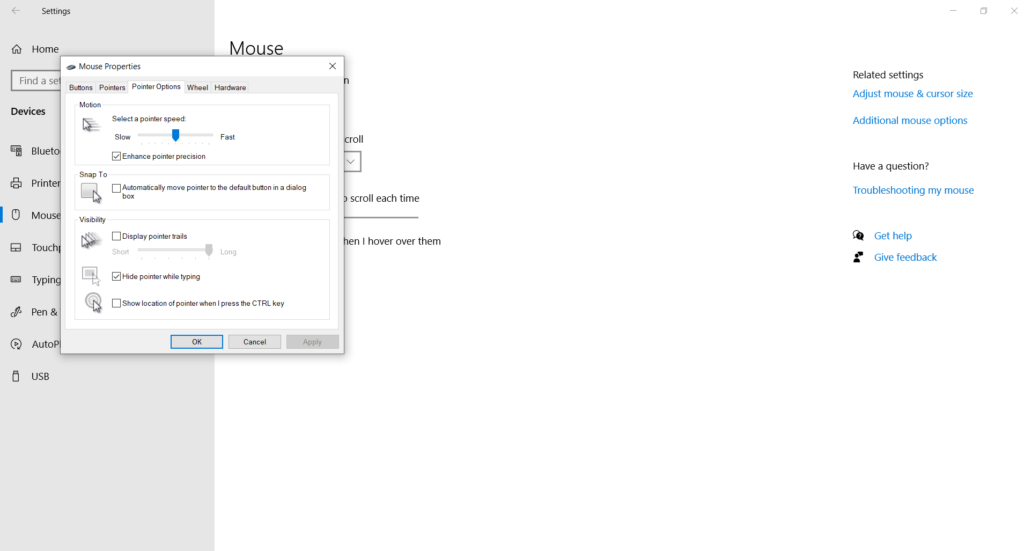
8. Disable mouse acceleration
- Press Windows key and I key together to open Settings.
- In the pop-up window, click Devices.
- Then navigate to the Mouse tab, and click Additional mouse options.
- In the pop-up window, navigate to the Pointer Options and uncheck the option Enhance pointer precision.
9. Install DirectX 12
A collection of software tools that facilitate the graphics in a video game, DirectX is vital to gaming on Windows. Various iterations of DirectX have seen release over the years.
Launched in 2015, DirectX 12 is the latest version, which you’ll find pre-installed on your Windows 10 laptop.
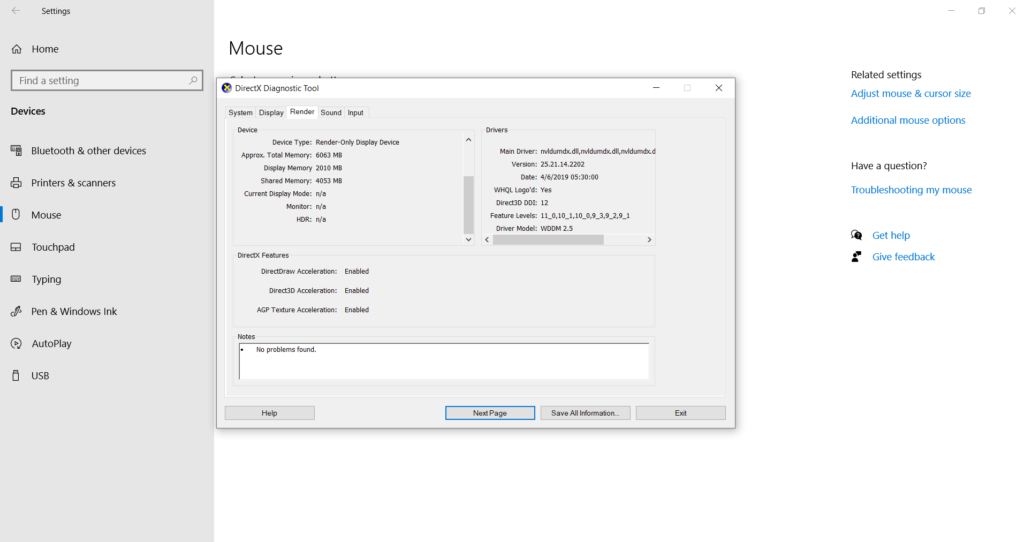
To check your current DirectX version, press WIN + R to open the Run menu and enter dxdiag. Wait for the DirectX Diagnostic Tool (DXDiag) to load, then open the Render tab. Here, you’ll find information about your dedicated graphics card. In the Drivers pane, look for Direct3D DDI. This should be numbered according to the latest version of DirectX.
As well as having your graphic drivers up to date, it is worth ensuring that your audio drivers are fit for gaming. You can check your audio driver status in the Sound tab of DXDiag. Note also that Input device drivers are summarized here too.
Is this article helpful to you? We need your feedback. Of course, if you have any other methods that can make PC games run faster, please leave a comment below for sharing. If you have problems in performing the above methods, you can leave a comment below or send an email to hungerforcode@gmail.com for help. We will reply to you as soon as possible.