In this section, I am going to discuss the Role-Based Authentication in MVC application.
Authentication is the process of ensuring the user’s identity and authenticity. It is the process of obtaining some sort of credentials from the users and using those credentials to verify the user’s identity.
Steps for implementing Forms Authentication
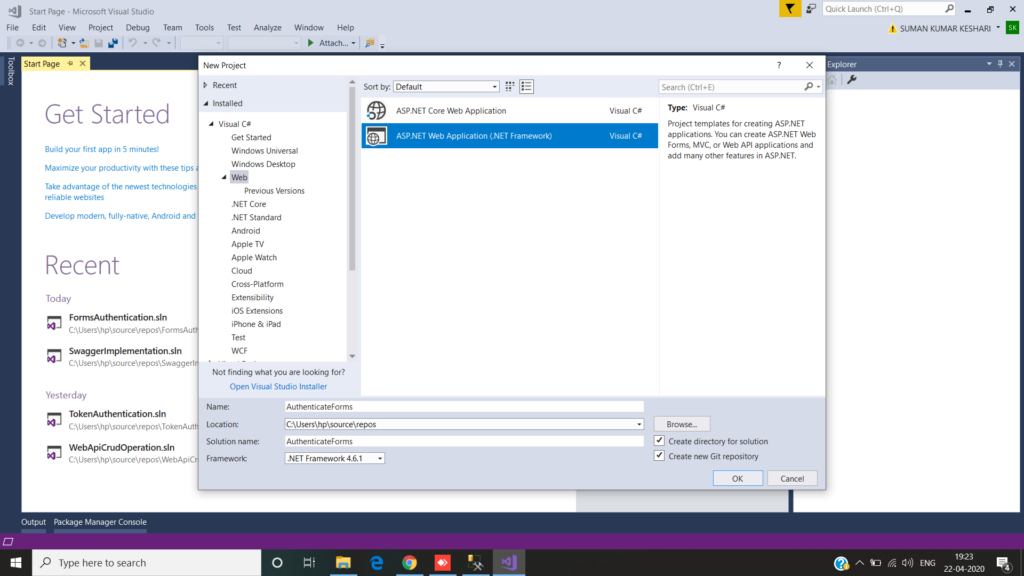
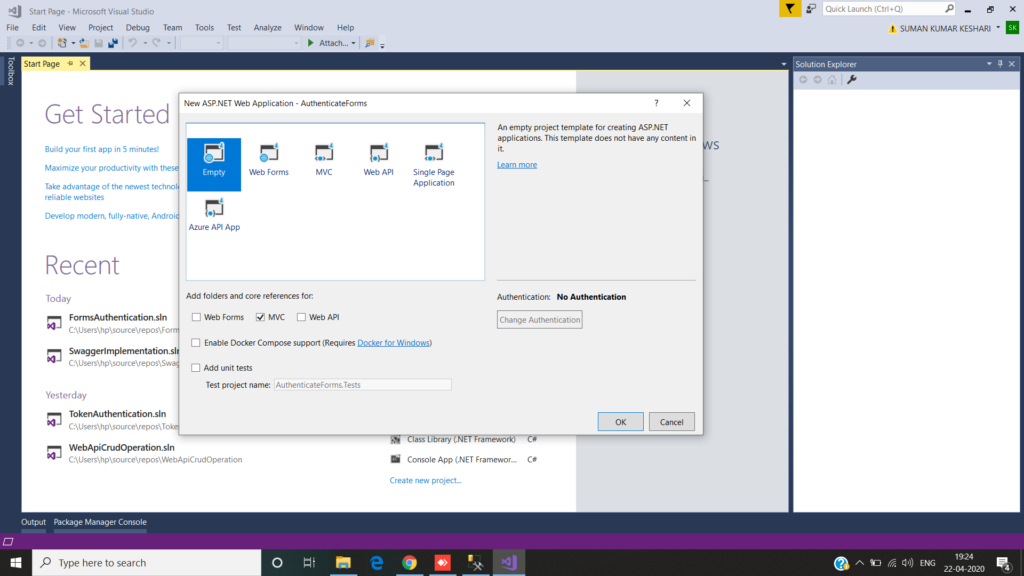
Step 1: Creating a new Empty MVC Application
Step :2 Create a Database
-- Creating a database
CREATE DATABASE FormAuthentication_DB
GO
USE FormAuthentication_DB
GO
-- Creating Employee table
CREATE TABLE Employee
(
ID INT PRIMARY KEY IDENTITY(1,1),
Name VARCHAR(50),
Designation VARCHAR(50),
Salary INT
)
-- Creating Users table
CREATE TABLE Users
(
ID INT PRIMARY KEY IDENTITY(1,1),
UserName VARCHAR(50),
UserPassword VARCHAR(50)
)
-- Creating RoleMaster Table
CREATE TABLE RoleMaster
(
ID INT PRIMARY KEY IDENTITY(1,1),
RollName VARCHAR(50)
)
-- Creating User Roles Mapping table
CREATE TABLE UserRolesMapping
(
ID INT PRIMARY KEY,
UserID INT NOT NULL,
RoleID INT NOT NULL,
)
-- Adding Foreign KeyS
ALTER TABLE UserRolesMapping
ADD FOREIGN KEY (UserID) REFERENCES Users(ID);
ALTER TABLE UserRolesMapping
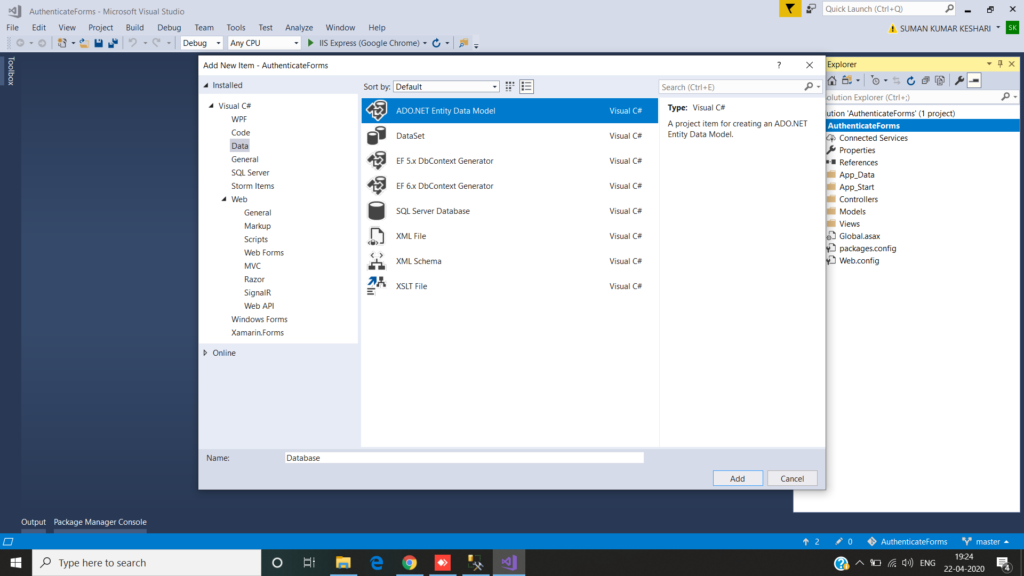
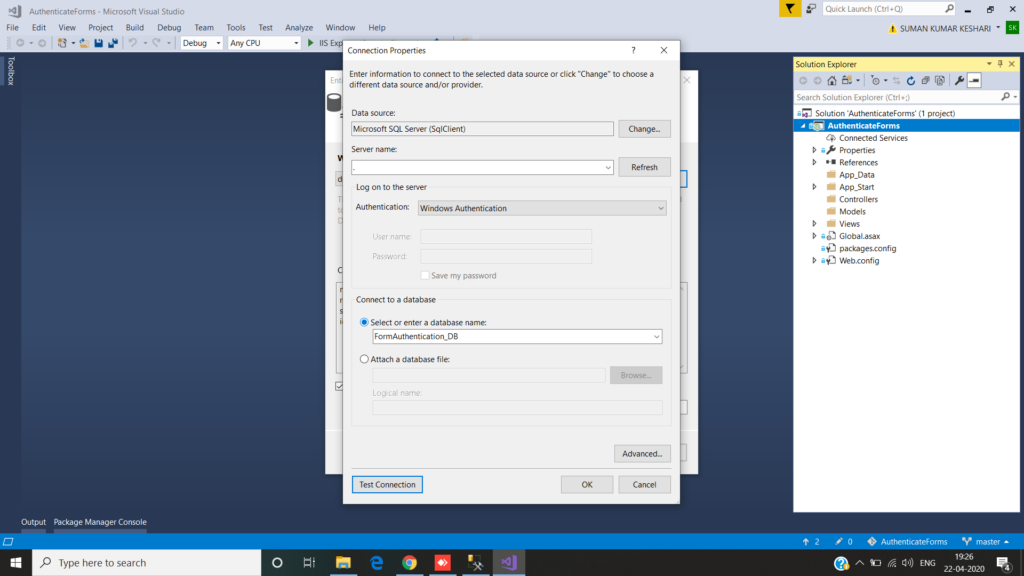
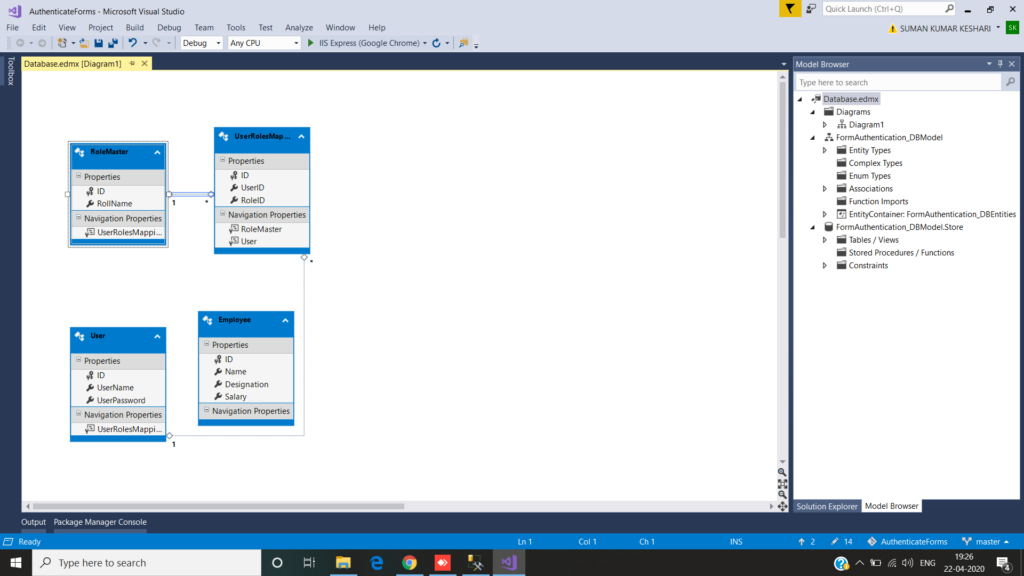
ADD FOREIGN KEY (RoleID) REFERENCES RoleMaster(ID);Step 3: Creating the ADO.NET Entity Data Model
Step 4: Creating Employees Controller

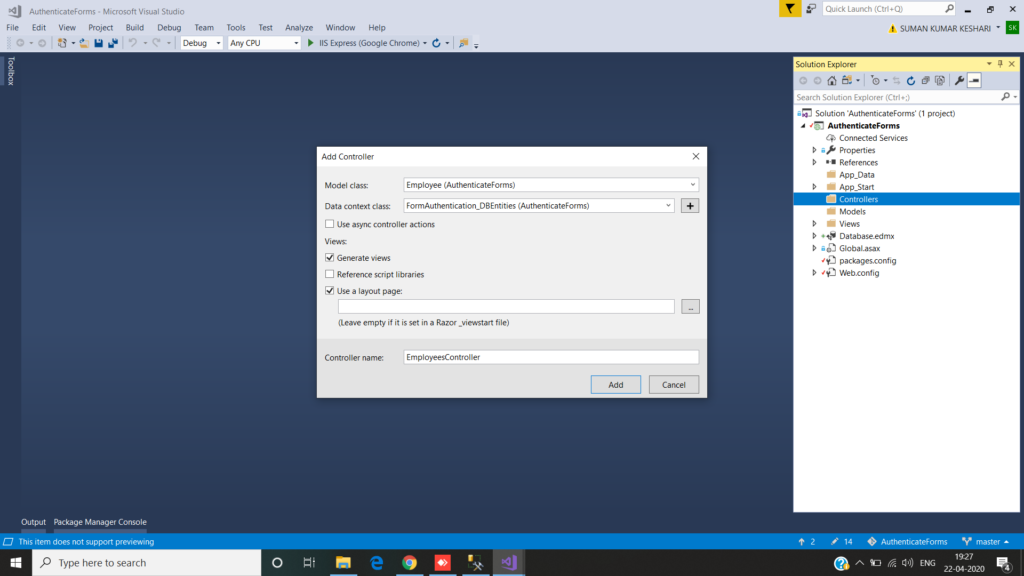
Here we select the MVC 5 Controller with Views, using Entity framework option to create the controller as shown above.
As you can see in the above image, you need to select the Model class as Employee and the Context class as FormAuthentication_DBEntities. Provide the controller name as EmployeesController and then click on the Add button which will create the EmployeesController.
Now the employee controller is created with the required action methods and views to perform the CRUD operation against the Employee entity.
Now, the above application is accessible to each and everyone without any restrictions. Now we need to provide security to this application. So the user with proper credentials can only be able to access our application. To achieve this we are going to use the Forms Authentication.
Implementing Forms Authentication in MVC:
The Forms Authentication is available in System.Web.Security namespace. In order to implement the Forms Authentication in MVC application, we need to do the following three things
- Set the Authentication mode as Forms in the web.config file
- We need to use FormsAuthentication.SetAuthCookie for login
- Again we need to use FormAuthentication.SignOut for logout
We are going to create another controller with the name Accounts to manage the user Signup, Sign in and log out functionalities.
Step 6: Creating Accounts Controller and then Add a new Class of UserModel for SIgn Up and Login.
using System;
using System.Collections.Generic;
using System.Linq;
using System.Web;

namespace AuthenticateForms.Models
{
    public class UserModel
    {
        public int ID { get; set; }
        public string UserName { get; set; }
        public string UserPassword { get; set; }
    }
}
Step 7: Modifying the RouteConfig class
using System;
using System.Collections.Generic;
using System.Linq;
using System.Web;
using System.Web.Mvc;
using System.Web.Routing;

namespace AuthenticateForms
{
    public class RouteConfig
    {
        public static void RegisterRoutes(RouteCollection routes)
        {
            routes.IgnoreRoute("{resource}.axd/{*pathInfo}");

            routes.MapRoute(
                name: "Default",
                url: "{controller}/{action}/{id}",
                defaults: new { controller = "Employees", action = "Index", id = UrlParameter.Optional }
            );
        }
    }
}
Step 8: Then Add Authorize Attribute in the Employee Controller
[Authorize]
public class EmployeesController : Controller
Step 9: Then Implement the Login Sign Up and Sign Out Functionality
using AuthenticateForms.Models;
using System;
using System.Collections.Generic;
using System.Linq;
using System.Web;
using System.Web.Mvc;
using System.Web.Security;

namespace AuthenticateForms.Controllers
{
    public class AccountsController : Controller
    {
        // GET: Accounts
        public ActionResult Login()
        {
            return View();
        }

        [HttpPost]
        public ActionResult Login(UserModel model)
        {
            using (FormAuthentication_DBEntities context = new FormAuthentication_DBEntities())
            {
                bool IsValidUser = context.Users.Any(user => user.UserName.ToLower() ==
                     model.UserName.ToLower() && user.UserPassword == model.UserPassword);

                if (IsValidUser)
                {
                    FormsAuthentication.SetAuthCookie(model.UserName, false);
                    return RedirectToAction("Index", "Employees");
                }

                ModelState.AddModelError("", "invalid Username or Password");
                return View();
            }
        }

        public ActionResult Signup()
        {
            return View();
        }

        [HttpPost]
        public ActionResult Signup(User model)
        {
            using (FormAuthentication_DBEntities context = new FormAuthentication_DBEntities())
            {
                context.Users.Add(model);
                context.SaveChanges();
            }

            return RedirectToAction("Login");
        }

        public ActionResult Logout()
        {
            FormsAuthentication.SignOut();
            return RedirectToAction("Login");
        }
    }
}
Login View
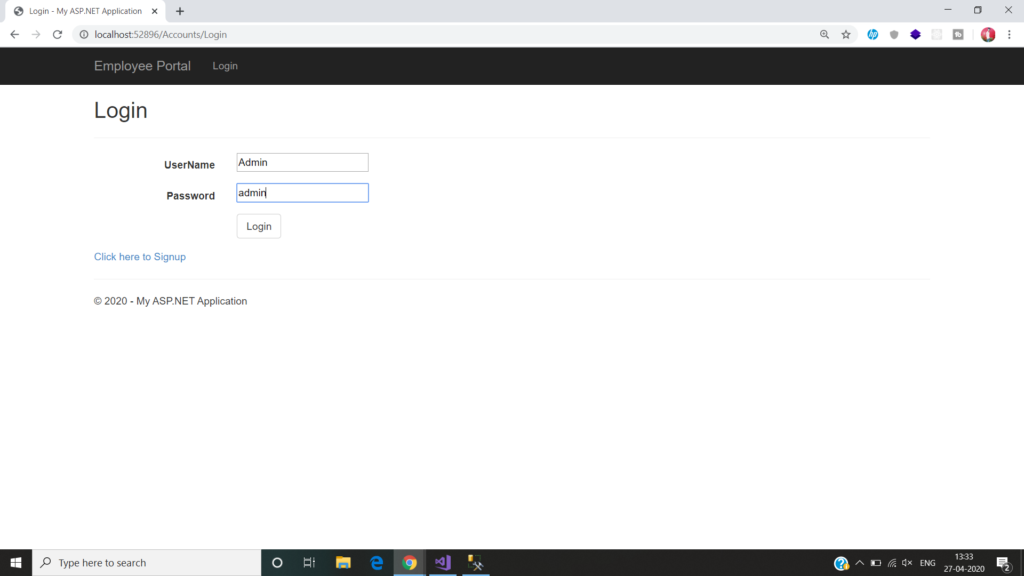
@model AuthenticateForms.Models.UserModel

@{
    ViewBag.Title = "Login";
}

<h2>Login</h2>

@using (Html.BeginForm())
{
    @Html.AntiForgeryToken()

    <div class="form-horizontal">
        <hr />
        @Html.ValidationSummary(true, "", new { @class = "text-danger" })
        <div class="form-group">
            @Html.LabelFor(model => model.UserName, htmlAttributes: new { @class = "control-label col-md-2" })
            <div class="col-md-10">
                @Html.TextBoxFor(model => model.UserName, new { htmlAttributes = new { @class = "form-control" } })
                @Html.ValidationMessageFor(model => model.UserName, "", new { @class = "text-danger" })
            </div>
        </div>

        <div class="form-group">
            @Html.Label("Password", htmlAttributes: new { @class = "control-label col-md-2" })
            <div class="col-md-10">
                @Html.TextBoxFor(model => model.UserPassword, new { htmlAttributes = new { @class = "form-control" } })
                @Html.ValidationMessageFor(model => model.UserPassword, "", new { @class = "text-danger" })
            </div>
        </div>

        <div class="form-group">
            <div class="col-md-offset-2 col-md-10">
                <input type="submit" value="Login" class="btn btn-default" />
            </div>
        </div>
    </div>
}

<div>
    @Html.ActionLink("Click here to Signup", "Signup")
</div>
Sign Up View
@model AuthenticateForms.Models.UserModel

@{
    ViewBag.Title = "Signup";
}

<h2>Signup</h2>

@using (Html.BeginForm())
{
    @Html.AntiForgeryToken()

    <div class="form-horizontal">
        <hr />
        @Html.ValidationSummary(true, "", new { @class = "text-danger" })
        <div class="form-group">
            @Html.LabelFor(model => model.UserName, htmlAttributes: new { @class = "control-label col-md-2" })
            <div class="col-md-10">
                @Html.TextBoxFor(model => model.UserName, new { htmlAttributes = new { @class = "form-control" } })
                @Html.ValidationMessageFor(model => model.UserName, "", new { @class = "text-danger" })
            </div>
        </div>

        <div class="form-group">
            @Html.Label("Password", htmlAttributes: new { @class = "control-label col-md-2" })
            <div class="col-md-10">
                @Html.PasswordFor(model => model.UserPassword, new { htmlAttributes = new { @class = "form-control" } })
                @Html.ValidationMessageFor(model => model.UserPassword, "", new { @class = "text-danger" })
            </div>
        </div>

        <div class="form-group">
            <div class="col-md-offset-2 col-md-10">
                <input type="submit" value="Signup" class="btn btn-default" />
            </div>
        </div>
    </div>
}

<div>
    @Html.ActionLink("Click here to Login", "Login")
</div>
After doing all the Above steps we are going to change the _layout.cshtml which is present in the Views/Shared Folder.
<!DOCTYPE html>
<html>
<head>
    <meta charset="utf-8" />
    <meta name="viewport" content="width=device-width, initial-scale=1.0">
    <title>@ViewBag.Title - My ASP.NET Application</title>
    <link href="~/Content/Site.css" rel="stylesheet" type="text/css" />
    <link href="~/Content/bootstrap.min.css" rel="stylesheet" type="text/css" />
    <script src="~/Scripts/modernizr-2.6.2.js"></script>
</head>
<body>
    <div class="navbar navbar-inverse navbar-fixed-top">
        <div class="container">
            <div class="navbar-header">
                <button type="button" class="navbar-toggle" data-toggle="collapse" data-target=".navbar-collapse">
                    <span class="icon-bar"></span>
                    <span class="icon-bar"></span>
                    <span class="icon-bar"></span>
                </button>
                @Html.ActionLink("Employee Portal", "Index", "Employees", new { area = "" }, new { @class = "navbar-brand" })
            </div>
            <div class="navbar-collapse collapse">
                <ul class="nav navbar-nav">

                    @if (User.Identity.IsAuthenticated)
                    {
                        <li>@Html.ActionLink("Get Employee List", "Index", "Employees")</li>
                        <li>@Html.ActionLink("Add Employee", "Create", "Employees")</li>
                        <li><a>Hello - @User.Identity.Name</a></li>
                        <li>@Html.ActionLink("Logout", "Logout", "Accounts")</li>
                    }
                    else
                    {
                        <li>@Html.ActionLink("Login", "Login", "Accounts")</li>
                    }
                </ul>
            </div>
        </div>
    </div>

    <div class="container body-content">
        @RenderBody()
        <hr />
        <footer>
            <p>© @DateTime.Now.Year - My ASP.NET Application</p>
        </footer>
    </div>

    <script src="~/Scripts/jquery-1.10.2.min.js"></script>
    <script src="~/Scripts/bootstrap.min.js"></script>
</body>
</html>
The User.Identity.IsAuthenticated property returns true if the user is authenticated and the User.Identity.Name property returns the name of the authenticated user which we provide to the SetAuthCookie method which we implement in the Login Post method of Accounts Controller.
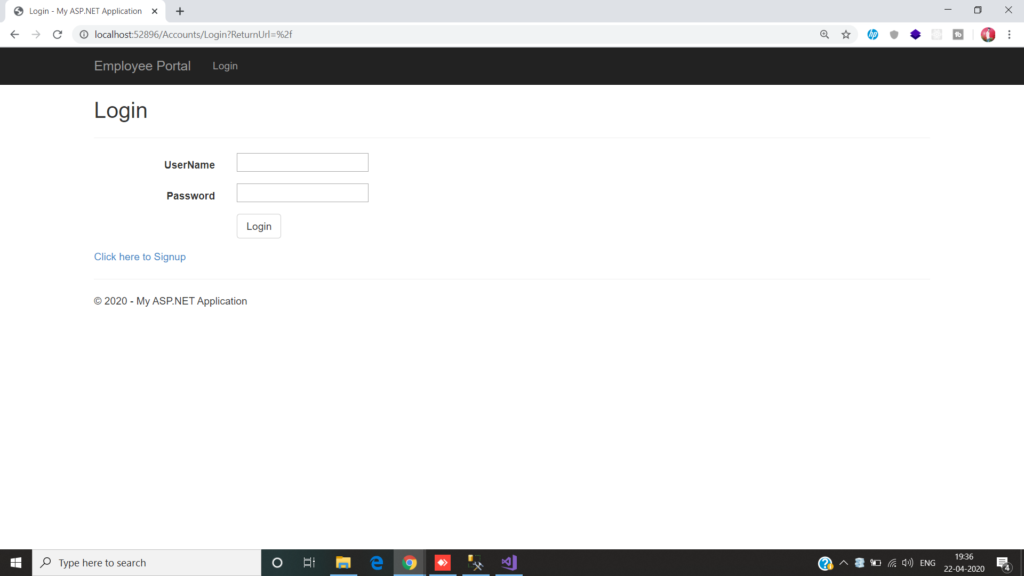
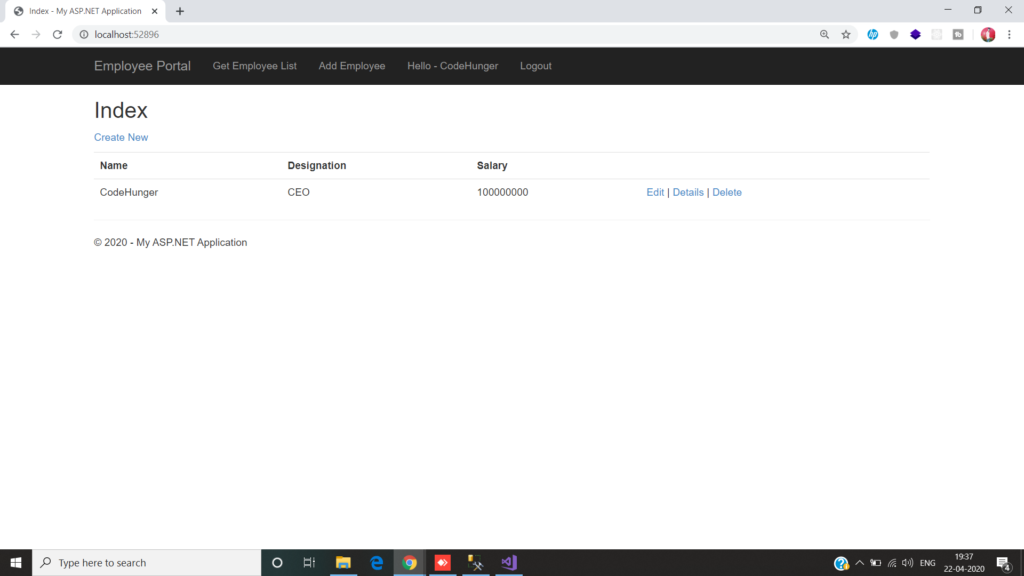
Now run the project and see how it works. As we know we set the default route parameter like i change the default controller name Employees and i also set Authorize parameter attribute so if we run the project then it automatically redirects to the Login Page due to the forms authentication. So first you have to sign up and then login with that credentials so you can access the Employees controller functionality.
After that we are going to provide some roles to different user and according to their roles use can access the different features of the application.
What are the Roles?
Roles are nothing but the permissions given to a particular user to access some resources. Once a user is authenticated then what are the resources the user can access is determined by his roles.
A single user can have multiple roles and Roles plays an important part in providing security to the system. For example, Admin, Customer etc. Below are some dummy data for the Employee and users in the table.
-- Inserting data into Employee table
INSERT INTO Employee VALUES('Sid', 'Software Engineer', 10000)
INSERT INTO Employee VALUES('Sam', 'Tester', 20000)
INSERT INTO Employee VALUES('Sally', 'Software Engineer', 20000)
INSERT INTO Employee VALUES('Kalki', 'Team Lead', 10000)
INSERT INTO Employee VALUES('Juhi', 'Tester', 15000)

-- Inserting data into Users table
INSERT INTO Users VALUES('Admin','admin')
INSERT INTO Users VALUES('User','user')
INSERT INTO Users VALUES('Customer','customer')

-- Inserting data into Role Master table
INSERT INTO RoleMaster VALUES('Admin')
INSERT INTO RoleMaster VALUES('User')
INSERT INTO RoleMaster VALUES('Customer')

-- Inserting data into User Roll Mapping table
INSERT INTO UserRolesMapping VALUES(1, 1, 1)
INSERT INTO UserRolesMapping VALUES(2, 1, 2)
INSERT INTO UserRolesMapping VALUES(3, 1, 3)
INSERT INTO UserRolesMapping VALUES(4, 2, 2)
INSERT INTO UserRolesMapping VALUES(5, 3, 3)
As you can see, the user with id 1 having three roles whiles the user with id 2 and 3 having the only one role.
Creating the Role Provider:
Create a class file with the name UsersRoleProvider within the Models folder and write the code which is written below. This class implements the RoleProvider class. As it is an abstract class we need to implement all the methods of that class. The RoleProvider class belongs to System.Web.Security namespace. After implementing all the methods of the Role Provider we only modify the implementation of the GetRolesForUser method. This method takes the Username as input parameter and based on the username we need to fetch the User Roles as an array and return that array.
using System;
using System.Collections.Generic;
using System.Linq;
using System.Web;
using System.Web.Security;

namespace AuthenticateForms.Models
{
    public class UsersRoleProvider : RoleProvider
    {
        public override string ApplicationName
        {
            get
            {
                throw new NotImplementedException();
            }
            set
            {
                throw new NotImplementedException();
            }
        }
        public override void AddUsersToRoles(string[] usernames, string[] roleNames)
        {
            throw new NotImplementedException();
        }
        public override void CreateRole(string roleName)
        {
            throw new NotImplementedException();
        }
        public override bool DeleteRole(string roleName, bool throwOnPopulatedRole)
        {
            throw new NotImplementedException();
        }
        public override string[] FindUsersInRole(string roleName, string usernameToMatch)
        {
            throw new NotImplementedException();
        }
        public override string[] GetAllRoles()
        {
            throw new NotImplementedException();
        }
        public override string[] GetRolesForUser(string username)
        {
            using (FormAuthentication_DBEntities context = new FormAuthentication_DBEntities())
            {
                var userRoles = (from user in context.Users
                                 join roleMapping in context.UserRolesMappings
                                 on user.ID equals roleMapping.UserID
                                 join role in context.RoleMasters
                                 on roleMapping.RoleID equals role.ID
                                 where user.UserName == username
                                 select role.RollName).ToArray();
                return userRoles;
            }
        }
        public override string[] GetUsersInRole(string roleName)
        {
            throw new NotImplementedException();
        }
        public override bool IsUserInRole(string username, string roleName)
        {
            throw new NotImplementedException();
        }
        public override void RemoveUsersFromRoles(string[] usernames, string[] roleNames)
        {
            throw new NotImplementedException();
        }
        public override bool RoleExists(string roleName)
        {
            throw new NotImplementedException();
        }
    }
}
After that we are going to configure our role provider in our web.config file.
 <system.web>
    <compilation debug="true" targetFramework="4.6.1" />
    <httpRuntime targetFramework="4.6.1" />
    <authentication mode="Forms">
      <forms loginUrl="Accounts/Login"></forms>
    </authentication>
    <roleManager defaultProvider="usersRoleProvider" enabled="true" >
      <providers>
        <clear/>
        <add name="usersRoleProvider" type="AuthenticateForms.Models.UsersRoleProvider"/>
      </providers>
    </roleManager>
  </system.web>
Basically here we are adding our Role Providers. Before adding the Role Providers first we clear all roles. The name you can give anything but the type value is going to be the full name of your Role Provider i.e. including the namespace. Here you can add any number of Role Provider. You have to provide the default provider which is going to be used as default in the default provider parameter of role manager and you need to enable it by setting the value to true of enabled property. After that modify the EmployeeController like below code.
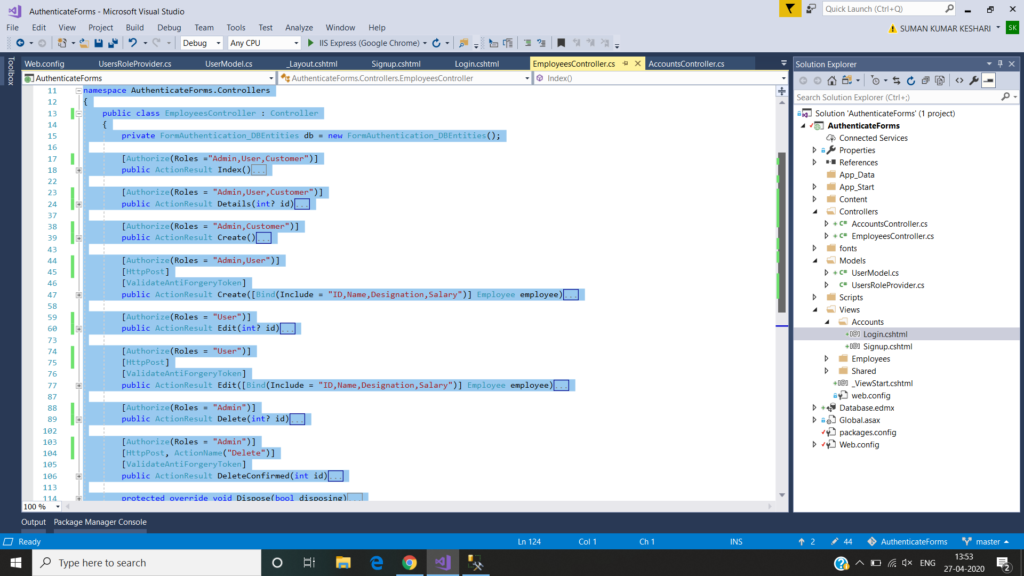
We remove the Authorize attribute from the Controller Level and applied it at the action method level. Here you can pass multiple roles separated by a comma.
After running the project we can enter details and check whether a user is authorized to do so.