
In this blog we will learn about how we can create a single page application with a crup app with laravel and Vue Js.
In this crup app with laravel and Vue Js, you will learn how to implement laravel vue js crud (create, read, update and delete) spa application with vue js router and laravel framework.
Crud App with Laravel and Vue (SPA) Example
To create this application I am going to use Laravel 8 and Vue js 2.5, Follow the following steps to create the Crud App with Laravel and Vue.
- Download Laravel Application
- Configure your env for database connection
- Install Npm Dependencies
- Create Migration, Model and Controller
- Defininig Routes In Api.php
- Create Vue Js Components For Crud App
- Define Vue Js Routes For Crud App
- Include Vue Js Dependencies to app.js
- Run Development Server
Step-1: Download the Laravel Application
Open your command prompt under your htdocs and run the below command
composer create-project laravel/laravel laravel-vue-crudStep-2: Configure you .env file for database connection
 DB_CONNECTION=mysql
 DB_HOST=127.0.0.1
 DB_PORT=3306
 DB_DATABASE=learn_vue_crud
 DB_USERNAME=root
 DB_PASSWORD=
Step-3: Install Npm Dependencies
Run the following command to install Node
npm iAfter that you have to install vue-router and vue-axios. vue-axios will be used for calling Laravel API. Run the following command on your command prompt:
npm install vue-router vue-axios --saveAfter installing all dependencies run this command:
npm run watchnpm run watch is used during the development mode, it will listen all the file changes and compile your assests, npm run prod command will be used during the production mode and it can’t listen the changes everytime.
I suggest you to when all the changes done, then before the deployment run the npm run prod command.
Step 4: Create Migration, Model, and Controller
To create migration, model and, controller run the below command
php artisan make:model Book -mcrNow go to database->migrations and open the file create_books_table.php, you can the file name will be like this 2020_11_21_124216_create_books_table.php, just open that file and put the below code
<?php

use Illuminate\Database\Migrations\Migration;
use Illuminate\Database\Schema\Blueprint;
use Illuminate\Support\Facades\Schema;

class CreateBooksTable extends Migration
{
    /**
     * Run the migrations.
     *
     * @return void
     */
    public function up()
    {
        Schema::create('books', function (Blueprint $table) {
            $table->id(); // auto increment
            $table->timestamps();  // for created_at and updated_at
            $table->string('name'); // creates a name column
            $table->string('author'); // creates a author column
        });

    }

    /**
     * Reverse the migrations.
     *
     * @return void
     */
    public function down()
    {
        Schema::dropIfExists('books'); // drops the table
    }
}
Now it’s time to create tables in database using the migration command just run the below command
php artisan migrateIt will create the tables in your database like the below image
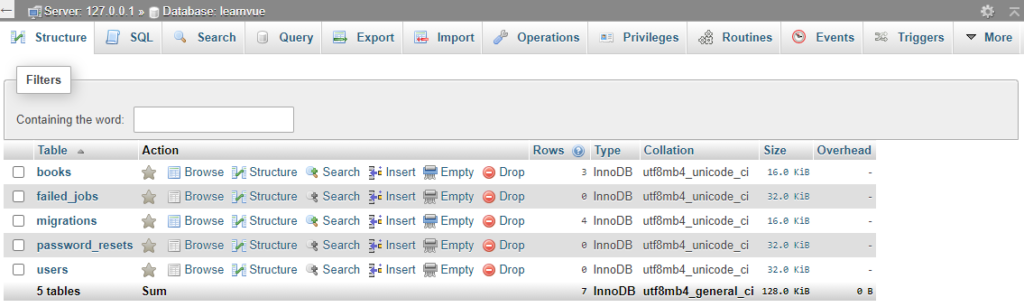
When click on books you can see the below tables

Now go to app->Models and open Book.php file and enter the following code
<?php

namespace App\Models;

use Illuminate\Database\Eloquent\Factories\HasFactory;
use Illuminate\Database\Eloquent\Model;

class Book extends Model
{
    use HasFactory;

    protected $guarded = []; // All fields inside the $guarded array are not mass-assignable
}
If you are familiar with laravel then you see, in some blog people uses guarded and some use fillable below is the basic difference between them.
In Laravel, fillable attributes are used to specify those fields which are to be mass assigned. Guarded attributes are used to specify those fields which are not mass assignable.
Now we will write code in the controller, so go the app->Http->Controllers here you can see a file named BookController.php
<?php

namespace App\Http\Controllers;

use App\Models\Book;
use Illuminate\Http\Request;

class BookController extends Controller
{
    public function index()
    {
        $books = Book::all()->toArray(); // get all data from database
        return array_reverse($books); // convert the data in json
    }

    // add book
    public function add(Request $request)
    {
        $book = new Book([
            'name' => $request->input('name'),
            'author' => $request->input('author')
        ]);
        $book->save(); // save Data in database

        return response()->json('The book successfully added');  // send response with a message
    }

    // edit book
    public function edit($id)
    {
        $book = Book::find($id); // find column with the given id

        return response()->json($book); // return all those data
    }

    // update book
    public function update($id, Request $request)
    {
        $book = Book::find($id); // find column with the given id

        $book->update($request->all()); // update that field relatd to the Id.

        return response()->json('The book successfully updated'); // send response with a message
    }

    // delete book
    public function delete($id)
    {
        $book = Book::find($id); // find column with the given id

        $book->delete(); // delete that column

        return response()->json('The book successfully deleted'); // send response with a message
    }
}
Step-5: Defining routes in web.php
Now define routes in the api.php routes file. So Go to the Routes folder and Open the api.php file and update the following routes:
Route::get('books', [BookController::Class,'index']);
Route::group(['prefix' => 'book'], function () {
    Route::post('add', [BookController::Class,'add']);
    Route::get('edit/{id}', [BookController::Class,'edit']);
    Route::post('update/{id}', [BookController::Class,'update']);
    Route::delete('delete/{id}', [BookController::Class,'delete']);
});
Don’t forget to add controller namespace on the top of api.php
after adding the below one the full code will look like below
<?php

use Illuminate\Http\Request;
use Illuminate\Support\Facades\Route;
use App\Http\Controllers\BookController;

/*
|--------------------------------------------------------------------------
| API Routes
|--------------------------------------------------------------------------
|
| Here is where you can register API routes for your application. These
| routes are loaded by the RouteServiceProvider within a group which
| is assigned the "api" middleware group. Enjoy building your API!
|
*/

Route::middleware('auth:api')->get('/user', function (Request $request) {
    return $request->user();
});

Route::get('books', [BookController::Class,'index']);
Route::group(['prefix' => 'book'], function () {
    Route::post('add', [BookController::Class,'add']);
    Route::get('edit/{id}', [BookController::Class,'edit']);
    Route::post('update/{id}', [BookController::Class,'update']);
    Route::delete('delete/{id}', [BookController::Class,'delete']);
});
Step 6: Create Vue Js App
In this step, navigate to resources/views and open app.blade.php file and add the below code
<!doctype html>
<html lang="{{ str_replace('_', '-', app()->getLocale()) }}">
<head>
    <meta charset="utf-8">
    <meta name="viewport" content="width=device-width, initial-scale=1">
    <meta name="csrf-token" value="{{ csrf_token() }}"/>
    <title>Crud with laravel and Vue</title>
    <link href="https://fonts.googleapis.com/css?family=Nunito:200,600" rel="stylesheet" type="text/css">
    <link href="{{ mix('css/app.css') }}" type="text/css" rel="stylesheet"/>
    <style>
        .bg-light {
            background-color: #eae9e9 !important;
        }
    </style>
</head>
<body>
<div id="app">
</div>
<script src="{{ mix('js/app.js') }}" type="text/javascript"></script>
</body>
</html>
Step 7: Create Vue Js Components For Crud App
Now go to resources->js->components create following vue components
- App.vue
- AddBook.vue
- AllBooks.vue
- EditBook.vue
Now open App.Vue and add the following code
<template>
    <div class="container">
        <div class="text-center" style="margin: 20px 0px 20px 0px;">
            <span class="text-secondary">Crud Application With Laravel and Vue Js</span>
        </div>
        <nav class="navbar navbar-expand-lg navbar-light bg-light">
            <div class="collapse navbar-collapse">
                <div class="navbar-nav">
                    <router-link to="/" class="nav-item nav-link">Home</router-link>
                    <router-link to="/add" class="nav-item nav-link">Add Book</router-link>
                </div>
            </div>
        </nav>
        <br/>
        <router-view></router-view>
    </div>
</template>

<script>
    export default {}
</script>
Note that, App.vue is the main Vue file. We will define router- view in the file. So all route pages will be shown in the App.vue file
Now open AddBook.vue and the below code
<template>
    <div>
        <h3 class="text-center">Add Book</h3>
        <div class="row">
            <div class="col-md-6">
                <form @submit.prevent="addBook">
                    <div class="form-group">
                        <label>Name</label>
                        <input type="text" class="form-control" v-model="book.name">
                    </div>
                    <div class="form-group">
                        <label>Author</label>
                        <input type="text" class="form-control" v-model="book.author">
                    </div>
                    <button type="submit" class="btn btn-primary">Add Book</button>
                </form>
            </div>
        </div>
    </div>
</template>

<script>
    export default {
        data() {
            return {
                book: {}
            }
        },
        methods: {
            addBook() {
                let uri = 'api/book/add'; // add book api
                this.axios
                    .post(uri, this.book) // sending the data to the controller
                    .then(response => (
                        this.$router.push({name: 'home'}) // return back to the homepage
                    ))
                    .catch(error => console.log(error))
                    .finally(() => this.loading = false)
            }
        }
    }
</script>
Now go to AllBooks.vue and add the below code
<template>
    <div>
        <h3 class="text-center">All Books</h3><br/>

        <table class="table table-bordered">
            <thead>
            <tr>
                <th>ID</th>
                <th>Name</th>
                <th>Author</th>
                <th>Created At</th>
                <th>Updated At</th>
                <th>Actions</th>
            </tr>
            </thead>
            <tbody>
            <tr v-for="book in books" :key="book.id">
                <td>{{ book.id }}</td>
                <td>{{ book.name }}</td>
                <td>{{ book.author }}</td>
                <td>{{ book.created_at }}</td>
                <td>{{ book.updated_at }}</td>
                <td>
                    <div class="btn-group" role="group">
                        <router-link :to="{name: 'edit', params: { id: book.id }}" class="btn btn-primary">Edit
                        </router-link>
                        <button class="btn btn-danger" @click="deleteBook(book.id)">Delete</button>
                    </div>
                </td>
            </tr>
            </tbody>
        </table>
    </div>
</template>

<script>
    export default {
        data() {
            return {
                books: []
            }
        },
        created() {
            this.axios
                .get('api/books')
                .then(response => {
                    this.books = response.data;
                });
        },
        methods: {
            deleteBook(id) {
                this.axios
                    .delete(`api/book/delete/${id}`)
                    .then(response => {
                        let i = this.books.map(item => item.id).indexOf(id); // find index of your object
                        this.books.splice(i, 1)
                    });
            }
        }
    }
</script>
Now go to EditBook.vue and add the following code
<template>
    <div>
        <h3 class="text-center">Edit Book</h3>
        <div class="row">
            <div class="col-md-6">
                <form @submit.prevent="updateBook">
                    <div class="form-group">
                        <label>Name</label>
                        <input type="text" class="form-control" v-model="book.name">
                    </div>
                    <div class="form-group">
                        <label>Author</label>
                        <input type="text" class="form-control" v-model="book.author">
                    </div>
                    <button type="submit" class="btn btn-primary">Update Book</button>
                </form>
            </div>
        </div>
    </div>
</template>

<script>
    export default {
        data() {
            return {
                book: {}
            }
        },
        created() {
            this.axios
                .get(`api/book/edit/${this.$route.params.id}`)
                .then((response) => {
                    this.book = response.data;
                });
        },
        methods: {
            updateBook() {
                this.axios
                    .post(`api/book/update/${this.$route.params.id}`, this.book)
                    .then((response) => {
                        this.$router.push({name: 'home'});
                    });
            }
        }
    }
</script>
Step 8: Define Vue Js Routes For Crud App
Now, you need to define vue routes. So go to resources>js folder, create a file named routes.js and update the following routes into your routes.js file
export const routes = [
    {
        name: 'home',
        path: '/',
        component: () => import('./components/AllBooks.vue'),
    },
    {
        name: 'add',
        path: '/add',
        component: () => import('./components/AddBook.vue'),

    },
    {
        name: 'edit',
        path: '/edit/:id',
        component: () => import('./components/EditBook.vue'),
    }
];
Step 9: Include Vue Js Dependencies to app.js
require('./bootstrap');
window.Vue = require('vue');

import App from './App.vue';
import VueRouter from 'vue-router';
import axios from 'axios';
import {routes} from './routes';

Vue.use(VueRouter);
Vue.prototype.axios = axios;

const router = new VueRouter({
  mode: 'history',
  routes: routes
})

const app = new Vue({
  el: '#app',
  router: router,
  render: h => h(App),
});
Step 10: Run Development Server
Run the below command to compile your assests
npm run watchRun the below command to run laravel application in development server
php artisan serveNow open your browser and open this url http://localhost:8000/
you will see the below site in your browser


Hi, the update function in the editbook seems to not work, because it calls for the edit/api/updates/3, how can I fix this?
what type of issue you are facing, please share the screenshot