
In this article, we will be building an Angular 6 application and will perform a CRUD Operation step by step from scratch with an example. We will be generating our Angular 6 application using Angular CLI and then modify it to have an Product management project where the end-user can perform CRUD operations, i.e., Create, List, Update, and Delete with the sample REST API exposed using HttpClientModule. We will also be using RouterModule to have the routing enabled.
In this article I am going to use my API which I have explained in this section CRUD Operation in ASP.NET Core Web API with Entity Framework Core. So you can follow this link for the API.
If you have the @angular/cli version older than 6, then run the following command to install the latest version.

npm uninstall -g @angular/cli
npm cache clean
npm install -g @angular/cli

To install a specific version, you can use this command -

npm install -g @angular/cli@6.0.0
Generating Angular 6 Project
Once the npm and node are upgraded to the latest version, you can run the following command to generate an Angular 6 project in any location of your choice.
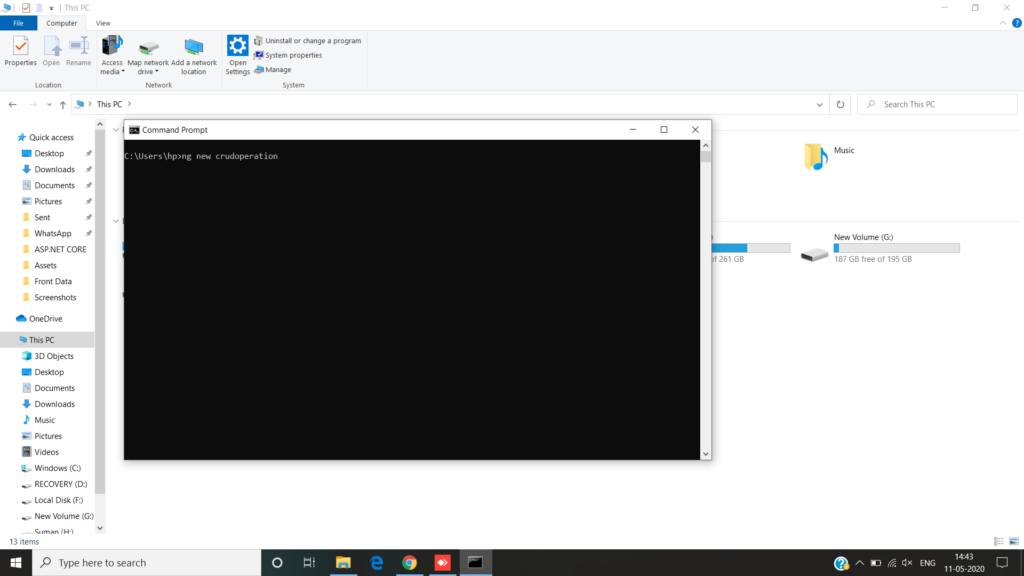
ng new crudoperation
Doing so, our Angular 6 application is generated.
Angular 6 Project Structure
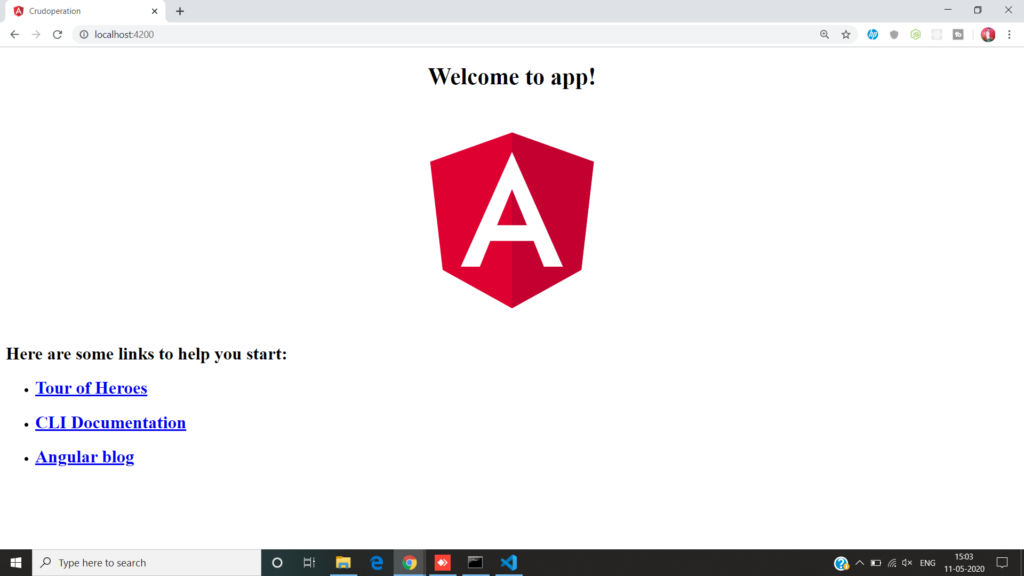
Once the project is generated, you can run the following commands to see the Angular 6 app running at localhost:4200.
cd crudoperation
After that If you want to open your project in the Visual Studio Code then enter code .
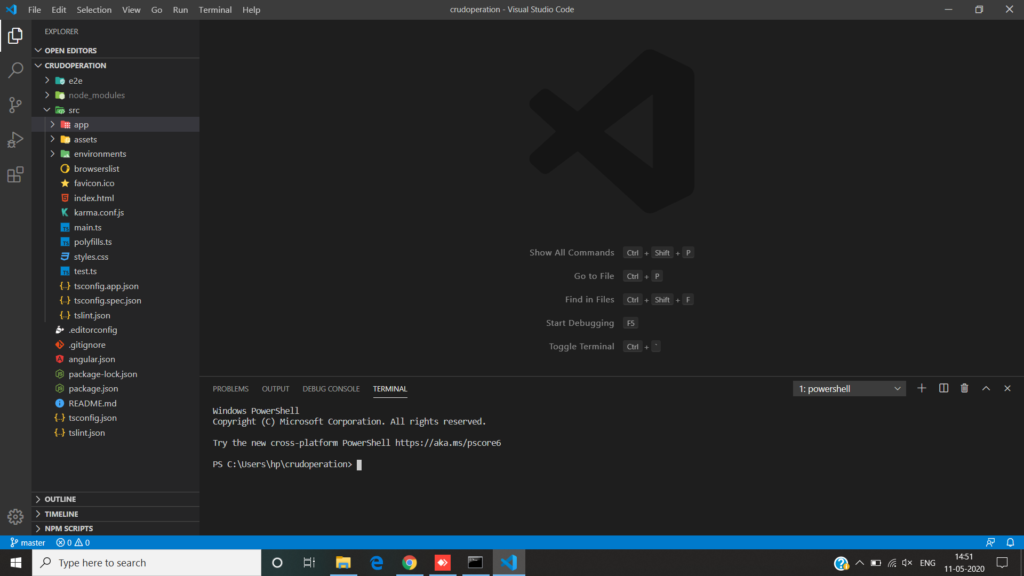
After opening the project in the Visual Studio Code then run the command in your terminal. ng serve.
After running this command if you get the error of
ERROR in node_modules/rxjs/internal/types.d.ts(81,44): error TS1005: ‘;’ expected.
Then go to the package.json file and change the “rxjs”: “^6.0.0” to “6.0.0” and run the command npm uninstall and after that run the npm install. And then run the ng serve.
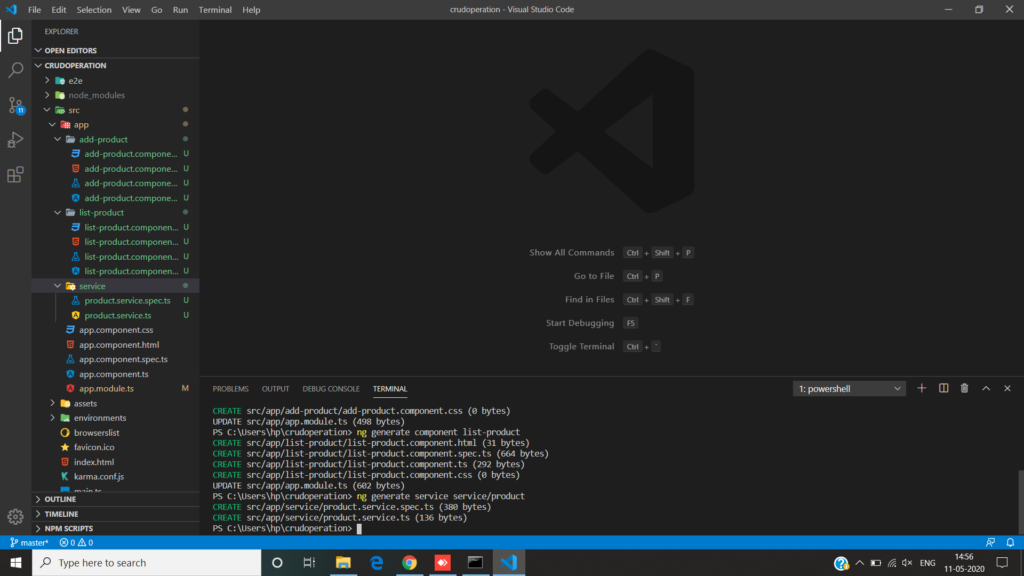
After that add the components and services and routes which we are going to use in this project.
For adding the component run this command – ng generate component ComponentName.
For adding the service run this command – ng generate service services/ServiceName.
After that add a Model folder and add the required code in the product.model.ts file.
export class Product {
    id?: number;
    name?: string;
    price?: string;
}
After that configure the routes in the app-routing.module.ts file. We have configured it to use ListProductComponent as a default component. Also, do not forget to include it in the main module – app.module.ts.
import { NgModule } from '@angular/core';
import { CommonModule } from '@angular/common';
import { RouterModule, Routes } from '@angular/router';
import { ListProductComponent } from './list-product/list-product.component';
import { AddProductComponent } from './add-product/add-product.component';
export const routes: Routes = [
  { path: '', component: ListProductComponent, pathMatch: 'full' },
  { path: 'list-product', component: ListProductComponent },
  { path: 'add-product', component: AddProductComponent }
];
@NgModule({
  imports: [
    CommonModule,
    RouterModule.forRoot(routes)
  ],
  exports: [RouterModule],
  declarations: []
})
export class AppRoutingModule { }
Code of app.module.ts
import { BrowserModule } from '@angular/platform-browser';
import { NgModule } from '@angular/core';
import { HttpClientModule } from '@angular/common/http';
import { AppRoutingModule } from './app-routing.module';
import { ReactiveFormsModule } from "@angular/forms";

import { AppComponent } from './app.component';
import { AddProductComponent } from './add-product/add-product.component';
import { ListProductComponent } from './list-product/list-product.component';
import {ProductService} from './service/product.service';
@NgModule({
  declarations: [
    AppComponent,
    AddProductComponent,
    ListProductComponent
  ],
  imports: [
    BrowserModule,
    HttpClientModule,
    AppRoutingModule,
    ReactiveFormsModule
  ],
  providers: [ProductService],
  bootstrap: [AppComponent]
})
export class AppModule { }
After that you have to use router outlet in the app-component.html for the navigation purpose.
<router-outlet></router-outlet>After that if you refresh your url http://localhost:4200/ then you see the blank page.
Following is the implementation of our ProductService. It has all the API details that are required for the CRUD operation. Here, I have used JSON Server for making API calls. The JSON Server is for front-end developers, which simulates a back-end REST Service to deliver the data in JSON format to the front-end application and make sure everything is working as expected.
import { Injectable } from '@angular/core';
import { HttpClient } from '@angular/common/http';
import { Product } from '../model/product.model';
@Injectable({
  providedIn: 'root'
})
export class ProductService {
  constructor(private http: HttpClient) { }
  baseUrl = 'https://localhost:44317/api/Category';
  getProducts() {
    return this.http.get<Product[]>(this.baseUrl + '/GetAllCategories');
  }
  deleteProducts(id: number) {
    return this.http.delete<Product[]>(this.baseUrl + '/DeleteCategory?categoryId=' + id);
  }
  createProduct(product: Product) {
    console.log(product);
    return this.http.post(this.baseUrl + '/AddCategory', product);
  }
  getProductById(id: number) {
    return this.http.get<Product>(this.baseUrl + '/GetCategoryById?categoryId=' + id);
  }
  updateProduct(product: Product) {
    return this.http.post(this.baseUrl + '/UpdateCategory', product);
  }
}
Then we are going to write the AddProduct and List of Product code in the required files.
Creating Components list-product.component.html
<button [routerLink]="['/add-product']" class="btn btn-info"> Add Product</button>
<div class="col-md-12">
  <h2> Product Details</h2>
  <div class="table-responsive table-container">
    <table class="table">
      <thead>
        <tr>
          <th>Id</th>
          <th>Product Name</th>
          <th>Price</th>
        </tr>
      </thead>
      <tbody>
        <tr *ngFor="let prod of products">
          <td class="hidden">{{prod.id}}</td>
          <td>{{prod.name}}</td>
          <td>{{prod.price}}</td>
          <td>
            <button (click)="deleteProd(prod)" class="btn btn-info"> Delete</button>
            <button (click)="editProd(prod)" style="margin-left: 20px;" class="btn btn-info"> Edit</button>
          </td>
        </tr>
      </tbody>
    </table>
  </div>
</div>
list-product.component.ts
import { Component, OnInit } from '@angular/core';
import { ProductService } from '../service/product.service';
import { Product } from '../model/product.model';
import { Router } from '@angular/router';
@Component({
  selector: 'app-list-product',
  templateUrl: './list-product.component.html',
  styleUrls: ['./list-product.component.css']
})
export class ListProductComponent implements OnInit {

  products: Product[];

  constructor(private prodService: ProductService, private router: Router) { }

  ngOnInit() {
    localStorage.removeItem('editProdId');
    this.prodService.getProducts()
      .subscribe((data: Product[]) => {
        this.products = data;
      });
  }
  deleteProd(product: Product): void {
    this.prodService.deleteProducts(product.id)
      .subscribe(data => {
        this.products = this.products.filter(u => u !== product);
      });
  }
  editProd(product: Product): void {
    localStorage.removeItem('editProdId');
    localStorage.setItem('editProdId', product.id.toString());
    this.router.navigate(['add-product']);
  }
}
add-product.component.html
<div class="col-md-6">
  <h2 class="text-center">{{prodformlabel}}</h2>
  <form [formGroup]="addForm" novalidate class="form">

    <div class="form-group">
      <label for="prodName">Name:</label>
      <input formControlName="name" placeholder="Product Name" name="prodName" class="form-control" id="prodName">
      <div class="alert  alert-danger" *ngIf="addForm.get('name').hasError('required') && addForm.get('name').touched">
        Product Name is required
      </div>
    </div>
    <div class="form-group">
      <label for="prodPrice">Name:</label>
      <input formControlName="price" placeholder="Price" name="prodPrice" class="form-control" id="prodPrice">
      <div class="alert  alert-danger" *ngIf="addForm.get('price').hasError('required') && addForm.get('price').touched">
        Price is required
      </div>
    </div>

    <button class="btn btn-success" [disabled]='addForm.invalid' *ngIf="btnvisibility" (click)="onSubmit()">Save</button>
    <button class="btn btn-success" [disabled]='addForm.invalid' *ngIf="!btnvisibility" (click)="onUpdate()">Update</button>
    <button [routerLink]="['/list-product']" class="btn btn-info"> Back to Products</button>
    <p>Form value: {{ addForm.value | json }}</p>
  </form>
</div>
add-product.component.ts
import { Component, OnInit } from '@angular/core';
import { FormBuilder, FormGroup, Validators } from '@angular/forms';
import { ProductService } from '../service/product.service';
import { Router } from '@angular/router';

@Component({
  selector: 'app-add-product',
  templateUrl: './add-product.component.html',
  styleUrls: ['./add-product.component.css']
})
export class AddProductComponent implements OnInit {
  prodformlabel: String = 'Add Product';
  constructor(private formBuilder: FormBuilder, private router: Router, private prodService: ProductService) {
  }
  addForm: FormGroup;
  btnvisibility: Boolean = true;
  ngOnInit() {
    this.addForm = this.formBuilder.group({
      id: 0,
      name: ['', Validators.required],
      price: ['', Validators.required],
    });
    const prodid = localStorage.getItem('editProdId');
    if (+prodid > 0) {
      this.prodService.getProductById(+prodid).subscribe(data => {
        this.addForm.patchValue(data);
      });
      this.btnvisibility = false;
      this.prodformlabel = 'Edit Product';
    }
  }
  onSubmit() {
    this.prodService.createProduct(this.addForm.value)
      .subscribe(data => {
        this.router.navigate(['list-product']);
      },
      error => {
        alert(error);
      });
  }
  onUpdate() {
    this.prodService.updateProduct(this.addForm.value).subscribe(data => {
      this.router.navigate(['list-product']);
    },
      error => {
        alert(error);
      });
  }

}
After that if you want to use bootstrap in your application then run this command in your terminal – npm install bootstrap
Global Style style.css
/* You can add global styles to this file, and also import other style files */
@import "~bootstrap/dist/css/bootstrap.css";
.ng-valid[required], .ng-valid.required  {
  border-left: 5px solid #42A948; /* green */
}
.ng-invalid:not(form)  {
  border-left: 5px solid #a94442; /* red */
}
.mtop10{
  margin-top:10px;
}
Testing Angular 6 Application
Now, run the command ng serve and hit localhost:4200.
You can see the following screen with a list of Products. On this page, you can perform actions to add, edit, and delete an Product.
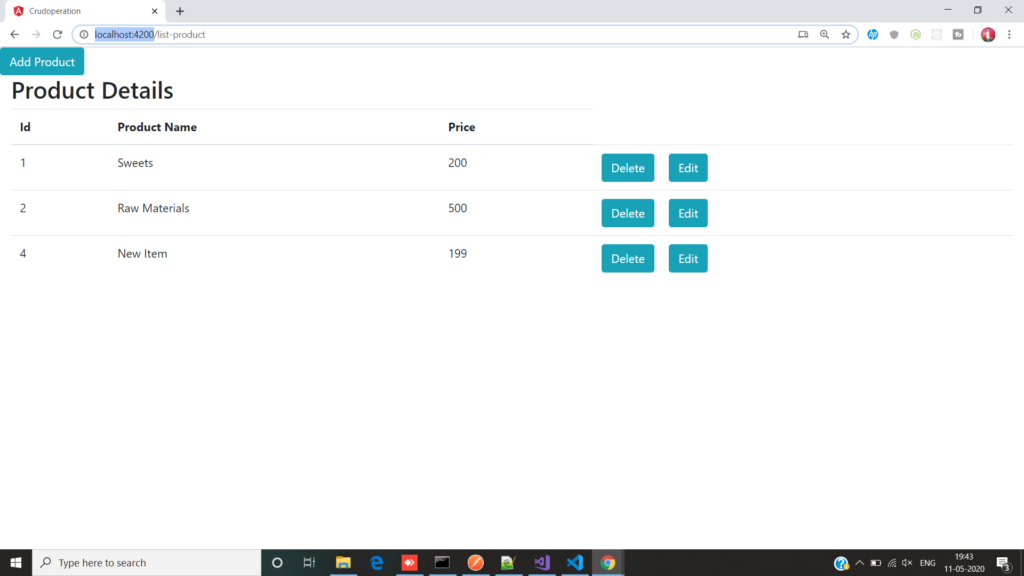
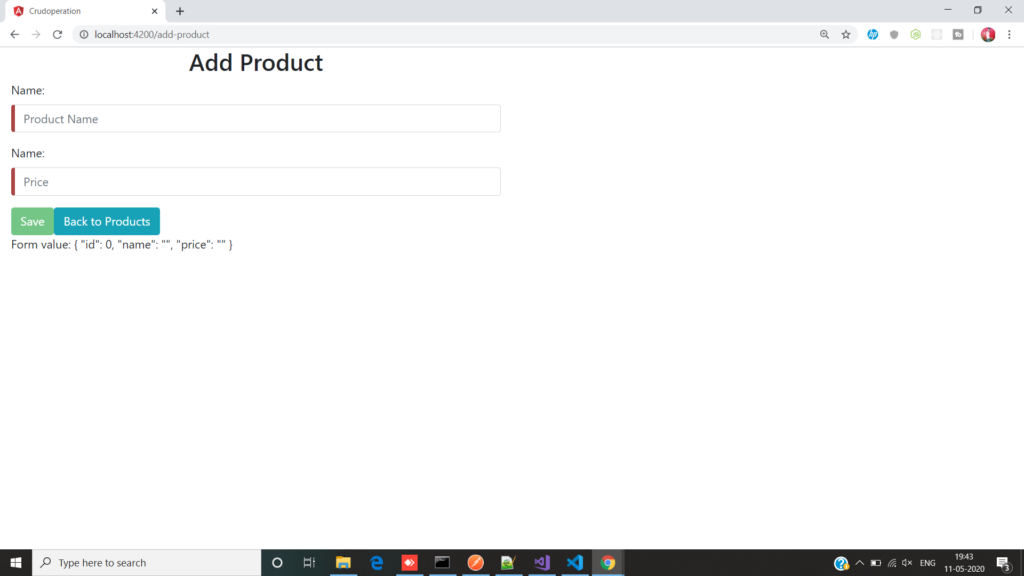
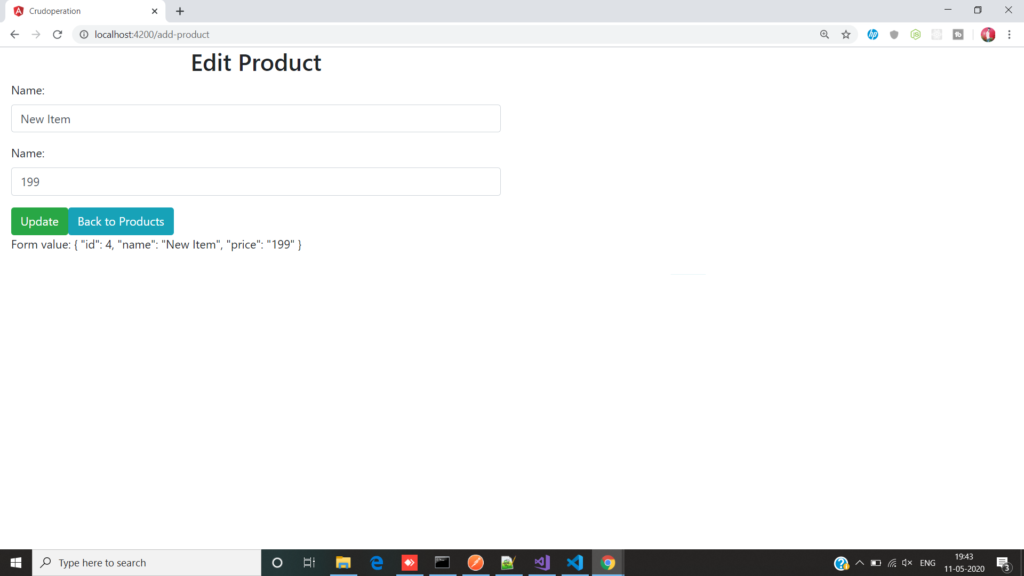
Here, we have used the same component to Add and Edit/Update the Product.
Conclusion
In this article, we learned about Angular 6 CRUD operations and created a demo application.