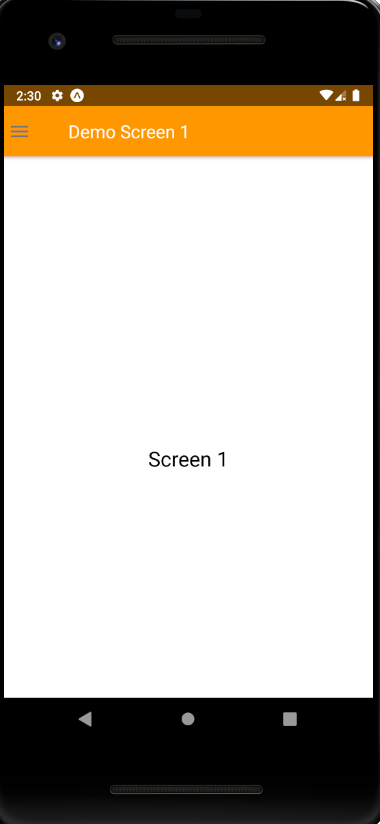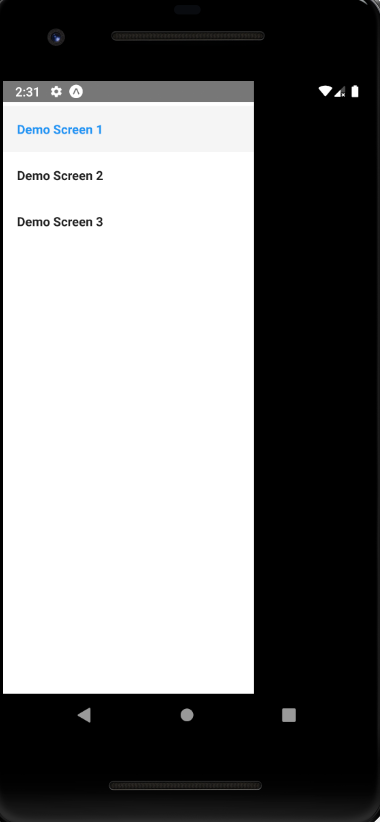
Navigation Drawer/Sidebar
This is an Example of React Native Navigation Drawer for Android and IOS. We will use react-navigation@3.11.1 to make a navigation drawer in this example. React Native Navigation Drawer is a very popular component in app development. It provides you to manage the number of app options in a very easy manner. A user can navigate from one screen to another screen very easily by just pulling out the drawer. Here is an example of a navigation drawer.
To Create React Navigation Drawer
const DrawerNavigatorExample = createDrawerNavigator({
  //Drawer Optons and indexing
  Screen1: { //Title
    screen: FirstActivity_StackNavigator,
    navigationOptions: {
      drawerLabel: "Demo Screen 1"
    }
  },
  Screen2: {//Title
    screen: Screen2_StackNavigator,
    navigationOptions: {
      drawerLabel: "Demo Screen 2"
    }
  },
  Screen3: {//Title
    screen: Screen3_StackNavigator,
    navigationOptions: {
      drawerLabel: "Demo Screen 3"
    }
  },
});
export default createAppContainer(DrawerNavigatorExample);
Install react-navigation dependency to import createAppContainer. If you install react-navigation@3.11.1 then createDrawerNavigator and createStackNavigator present inside the react-navigation. Otherwise you have to install independently other dependencies.
npm install react-navigation --save2. Other supporting libraries for react-navigation
npx npm install react-native-gesture-handler react-native-safe-area-context @react-native-community/masked-view react-native-screens react-native-reanimated --save3. Install react-navigation-drawer to import createDrawerNavigator
npm install react-navigation-drawer --saveThese steps are enough for the drawer navigation but in this example, we are also using createStackNavigator to switch screens, so please follow the next step also
4. Install react-navigation-stack to import createStackNavigator
npm install react-navigation-stack --saveThese commands will copy all the dependencies into your node_module directory.
CocoaPods Installation
Please use the following command to install CocoaPods
cd ios && pod install && cd ..Project Structure
To start with this Example you need to create a directory named pages in your project and create three files Screen1.js, Screen2.js, and Screen3.js in it.
To have the drawer Icon in Action Bar you have to make an image directory in your project and have to copy any drawer image with name drawer.png (For this example. You can change if you want but you need to change the file name in code too).


App.js
//This is an example code for NavigationDrawer//
import React, { Component } from 'react';
//import react in our code.
import { View, Image, TouchableOpacity } from 'react-native';
// import all basic components

//Import React Navigation
import {createAppContainer} from 'react-navigation';
import {createDrawerNavigator} from 'react-navigation-drawer';
import {createStackNavigator} from 'react-navigation-stack';

//Import external files
import Screen1 from './pages/Screen1';
import Screen2 from './pages/Screen2';
import Screen3 from './pages/Screen3';

class NavigationDrawerStructure extends Component {
  //Structure for the navigatin Drawer
  toggleDrawer = () => {
    //Props to open/close the drawer
    this.props.navigationProps.toggleDrawer();
  };
  render() {
    return (
      <View style={{ flexDirection: 'row' }}>
        <TouchableOpacity onPress={this.toggleDrawer.bind(this)}>
          {/*Donute Button Image */}
          <Image
            source={require('./image/drawer.png')}
            style={{ width: 25, height: 25, marginLeft: 5 }}
          />
        </TouchableOpacity>
      </View>
    );
  }
}

const FirstActivity_StackNavigator = createStackNavigator({
  //All the screen from the Screen1 will be indexed here
  First: {
    screen: Screen1,
    navigationOptions: ({ navigation }) => ({
      title: 'Demo Screen 1',
      headerLeft: ()=> <NavigationDrawerStructure navigationProps={navigation} />,
      headerStyle: {
        backgroundColor: '#FF9800',
      },
      headerTintColor: '#fff',
    }),
  },
});

const Screen2_StackNavigator = createStackNavigator({
  //All the screen from the Screen2 will be indexed here
  Second: {
    screen: Screen2,
    navigationOptions: ({ navigation }) => ({
      title: 'Demo Screen 2',
      headerLeft: ()=> <NavigationDrawerStructure navigationProps={navigation} />,
      headerStyle: {
        backgroundColor: '#FF9800',
      },
      headerTintColor: '#fff',
    }),
  },
});

const Screen3_StackNavigator = createStackNavigator({
  //All the screen from the Screen3 will be indexed here
  Third: {
    screen: Screen3,
    navigationOptions: ({ navigation }) => ({
      title: 'Demo Screen 3',
      headerLeft: ()=> <NavigationDrawerStructure navigationProps={navigation} />,
      headerStyle: {
        backgroundColor: '#FF9800',
      },
      headerTintColor: '#fff',
    }),
  },
});

const DrawerNavigatorExample = createDrawerNavigator({
  //Drawer Optons and indexing
  Screen1: {
    //Title
    screen: FirstActivity_StackNavigator,
    navigationOptions: {
      drawerLabel: 'Demo Screen 1',
    },
  },
  Screen2: {
    //Title
    screen: Screen2_StackNavigator,
    navigationOptions: {
      drawerLabel: 'Demo Screen 2',
    },
  },
  Screen3: {
    //Title
    screen: Screen3_StackNavigator,
    navigationOptions: {
      drawerLabel: 'Demo Screen 3',
    },
  },
});

export default createAppContainer(DrawerNavigatorExample);
Screen1.js
//This is an example code for NavigationDrawer//
import React, { Component } from 'react';
//import react in our code.
import { StyleSheet, View, Text } from 'react-native';
// import all basic components

export default class Screen1 extends Component {
  //Screen1 Component
  render() {
    return (
      <View style={styles.MainContainer}>
        <Text style={{ fontSize: 23 }}> Screen 1 </Text>
      </View>
    );
  }
}

const styles = StyleSheet.create({
  MainContainer: {
    flex: 1,
    paddingTop: 20,
    alignItems: 'center',
    marginTop: 50,
    justifyContent: 'center',
  },
});
Open pages/Screen2.js in any code editor and the Replace the code with the following code.
Screen2.js
//This is an example code for NavigationDrawer//
import React, { Component } from 'react';
//import react in our code.
import { StyleSheet, View, Text } from 'react-native';
// import all basic components

export default class Screen2 extends Component {
  //Screen2 Component
  render() {
    return (
      <View style={styles.MainContainer}>
        <Text style={{ fontSize: 23 }}> Screen 2 </Text>
      </View>
    );
  }
}

const styles = StyleSheet.create({
  MainContainer: {
    flex: 1,
    paddingTop: 20,
    alignItems: 'center',
    marginTop: 50,
    justifyContent: 'center',
  },
});
Open pages/Screen3.js in any code editor and the Replace the code with the following code.
Screen3.js
//This is an example code for NavigationDrawer//
import React, { Component } from 'react';
//import react in our code.
import { StyleSheet, View, Text } from 'react-native';
// import all basic components

export default class Screen3 extends Component {
  //Screen3 Component
  render() {
    return (
      <View style={styles.MainContainer}>
        <Text style={{ fontSize: 23 }}> Screen 3 </Text>
      </View>
    );
  }
}

const styles = StyleSheet.create({
  MainContainer: {
    flex: 1,
    paddingTop: 20,
    alignItems: 'center',
    marginTop: 50,
    justifyContent: 'center',
  },
});
Then run the project using the command npm start if you are using expo tools.