In this blog we are going to see how we can integrate Push Notification in a React Native Application. We are going to implement this using Firebase Console. I am going to cover all the points which is necessary in the integration. Because I personally face many problems regarding this implementation. So let’s start the tutorial.
First of all you have to create a project using this command.
npx react-native init ProjectName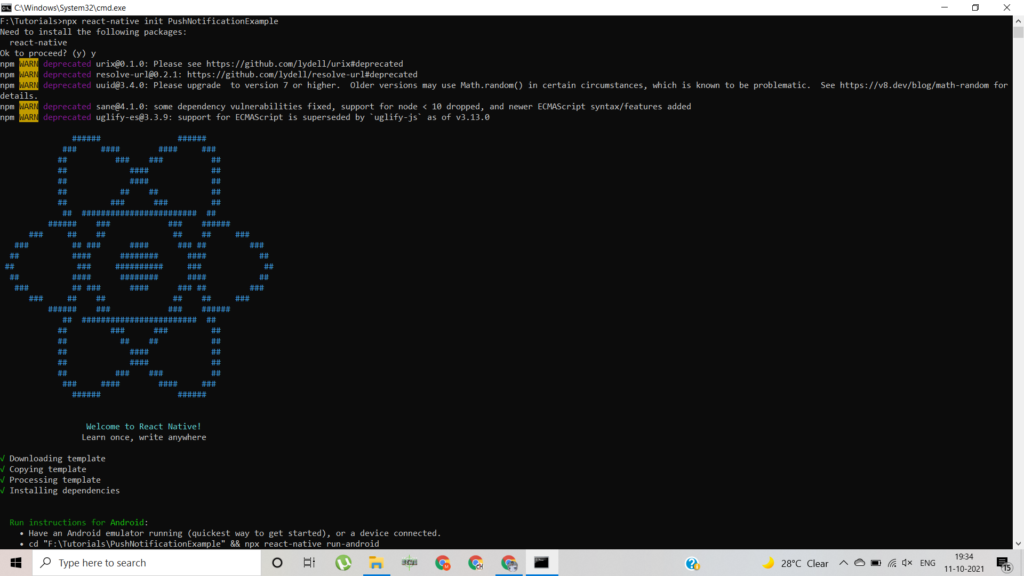
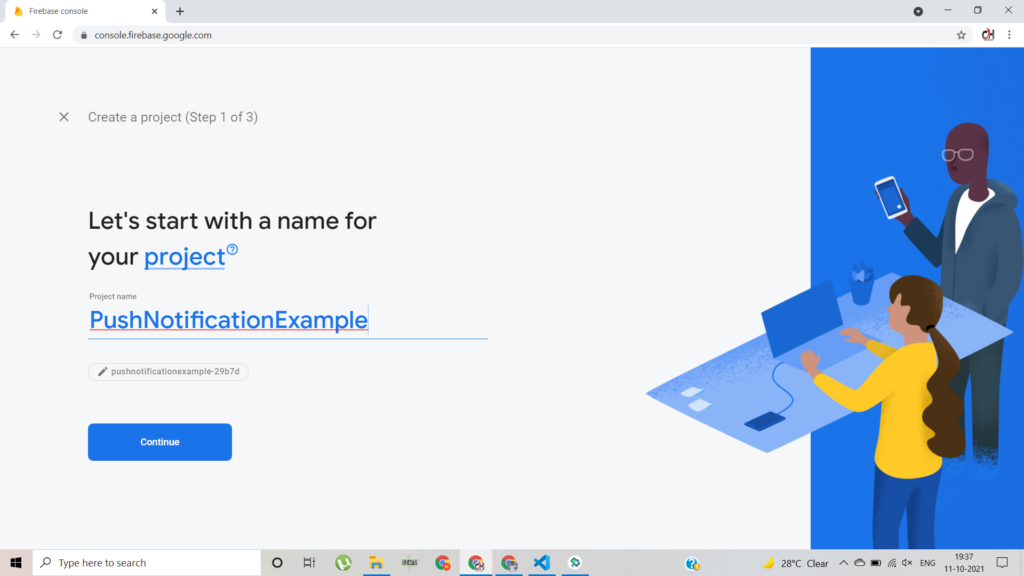
So lets first open the Firebase Console clicking this link and register your app.
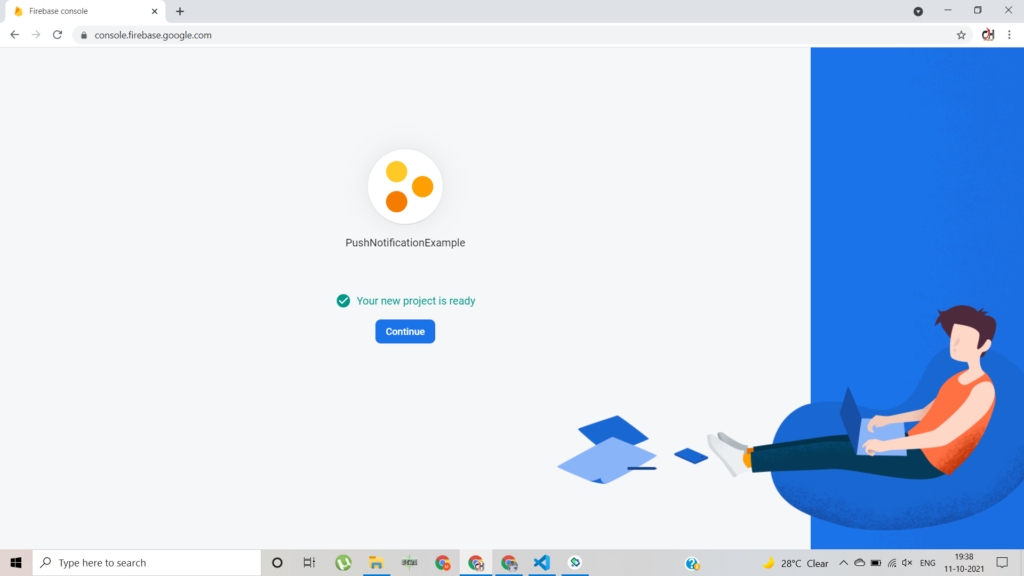
Step 1: Add a Project and Just Enter the details and Follow the steps.
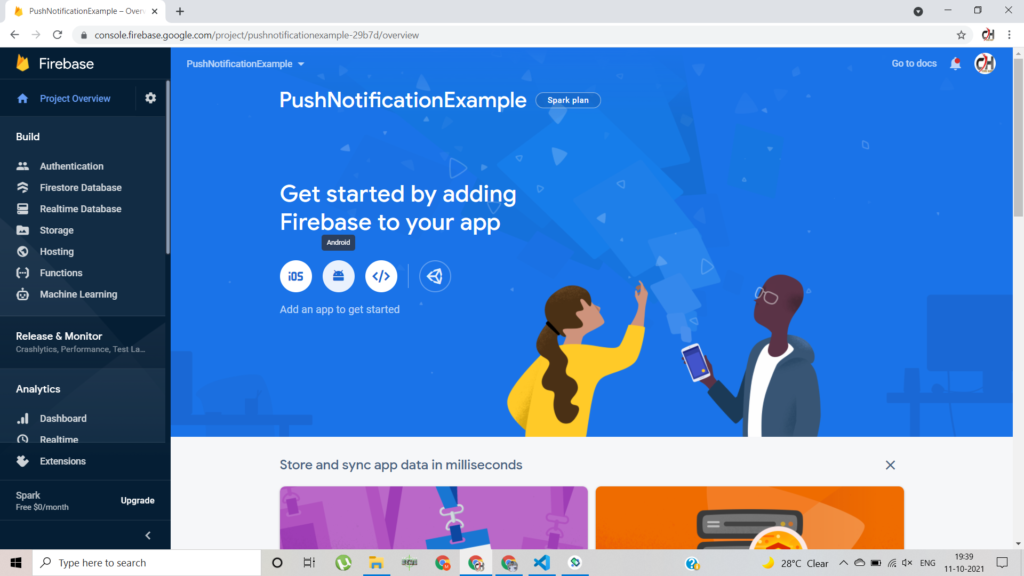
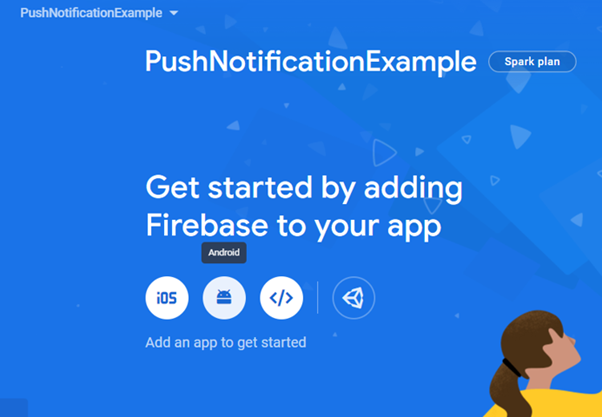
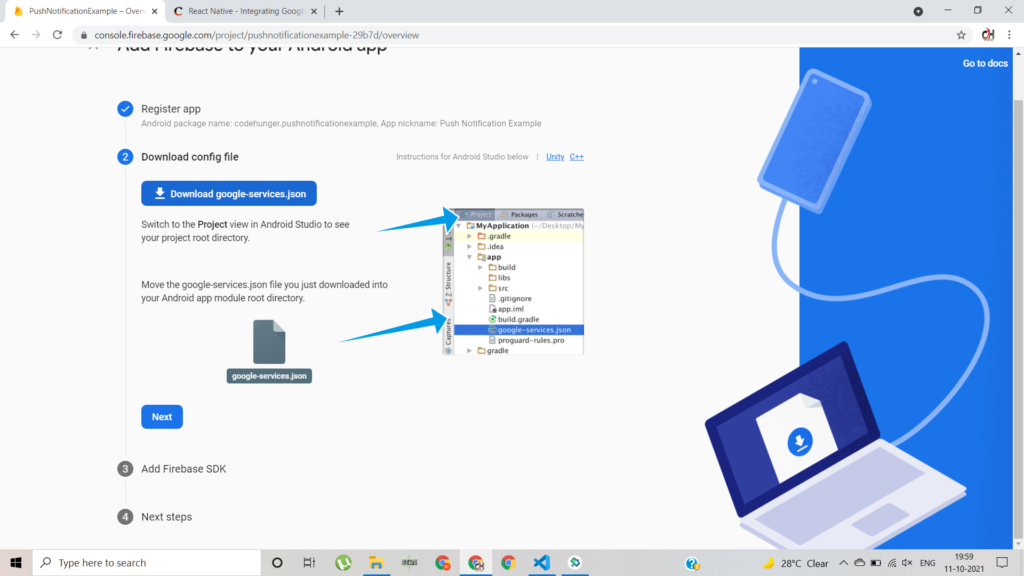
Step 2: After that click on the android icon as below image.
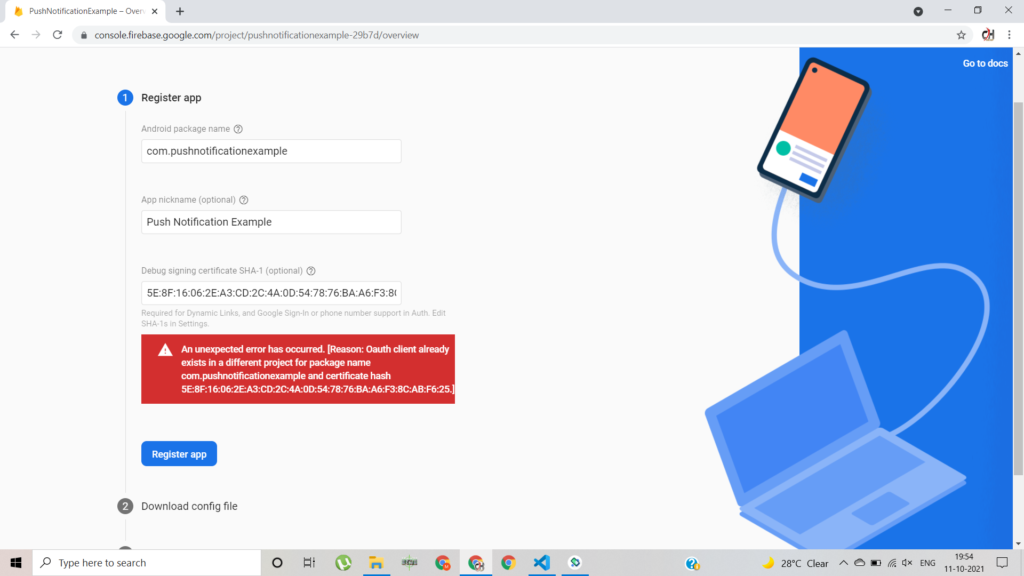
Step 3: After that you got a screen like this where you have to enter enter your details.
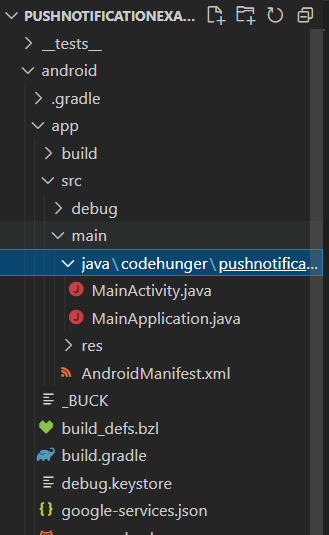
For Android Package Name just go to this location and copy the package name.
Yourproject -> android -> app -> src -> main -> AndroidManifest.xml file.
After that just provide a name of the App as per your choice. And then for getting the SHA 1 you have to follow some steps like below:
From React-native Project:
– Run this command in React-Native App directory
cd android && ./gradlew signingReport
– copy the SHA1 from the debug key (This generates two variant keys. You can copy the ‘SHA1’ that belongs to the debugAndroidTest variant key option.)
Copy the SHA1 and paste in the DebugSigning Certificate and when you Register your app sometimes you will get an error like below image.
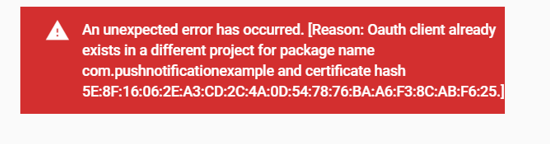
I’ve changed project’ subfolder name from:
“android/app/src/main/java/MY/APP/com/” to “android/app/src/main/java/MY/APP/AnyName/“
Then manually switched the old and new package ids:
In: android/app/src/main/java/MY/APP/NEW_ID/MainActivity.java:
package MY.APP.NEW_ID;In android/app/src/main/java/MY/APP/NEW_ID/MainApplication.java:
package MY.APP.NEW_ID;In android/app/src/main/AndroidManifest.xml:
package="MY.APP.NEW_ID"And in android/app/build.gradle:
applicationId "MY.APP.NEW_ID"(Optional) In android/app/BUCK:
android_build_config(
  package="MY.APP.NEW_ID"
)
android_resource(
  package="MY.APP.NEW_ID"
)
Gradle’ cleaning in the end (in /android folder):
./gradlew cleanStep 4: After that copy your new package name and paste in the Package Name of Firebase Console.
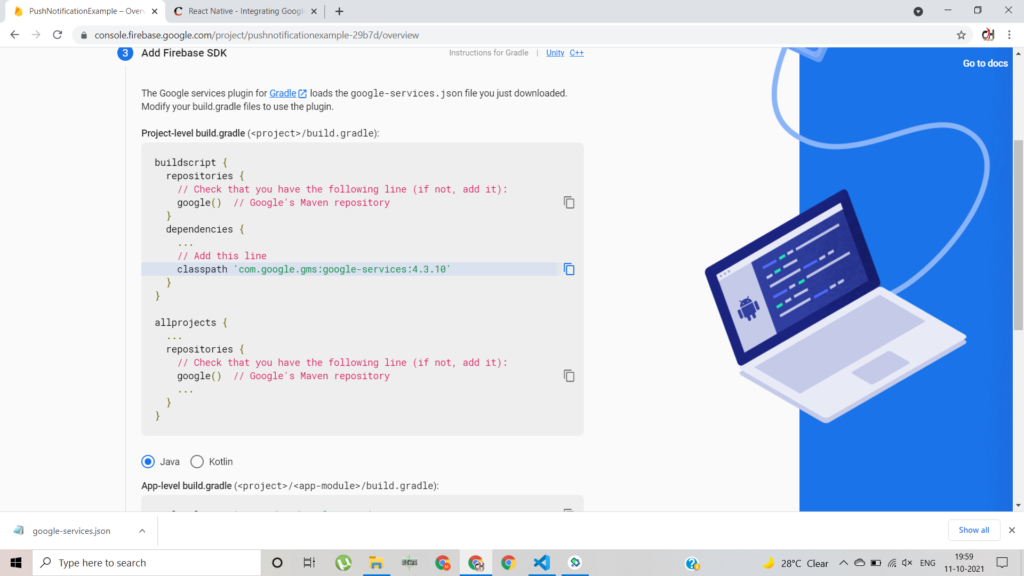
Step 5: Just Follow the other steps and download the google-service.json and paste that file in the ProjectName\android\app.
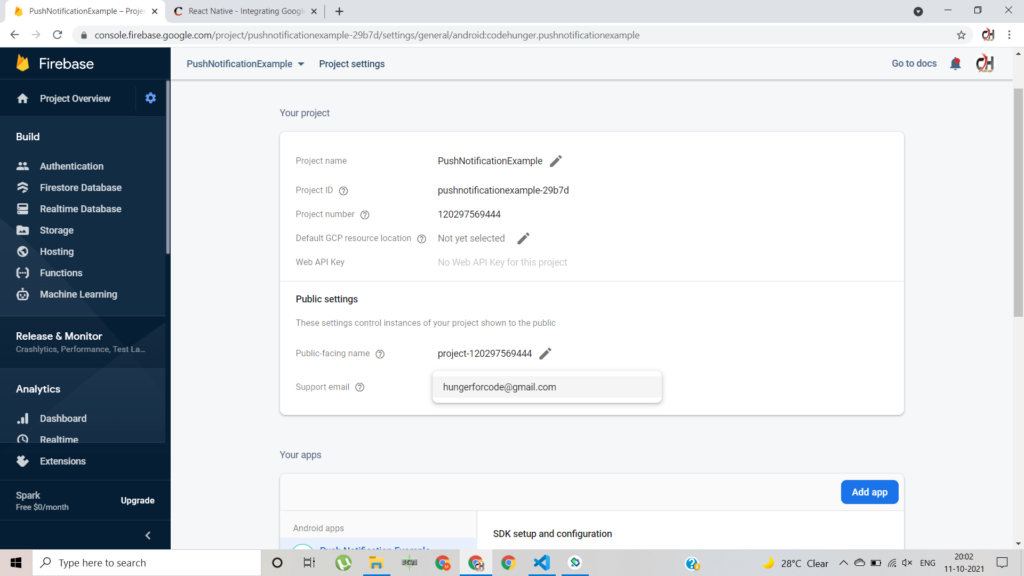
Configure the Support Email in the Project Setting Section.
After that we have to install the packages for Push Notification. You can follow this link (https://rnfirebase.io/messaging/usage) or you can directly install the below packages.
npminstall--save @react-native-firebase/app – #Setup for Firebase App module
npminstall--save @react-native-firebase/messaging – #Setup for Messaging module
npm install react-native-push-notification --save – #Setup for Local Notification
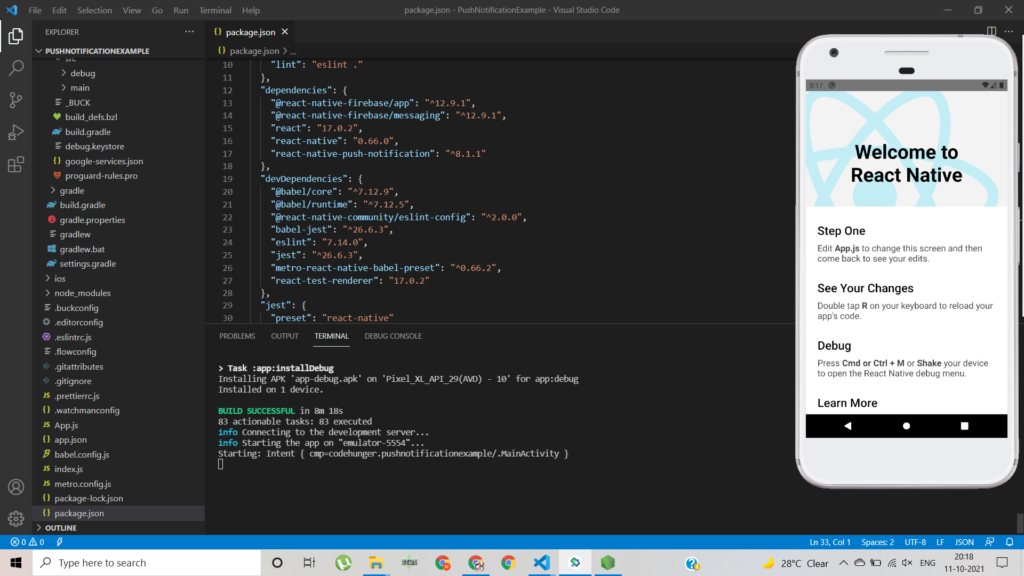
After installing all the packages run the project once for checking if the Application is running fine or not.
Now we have to implement the functionality for Push notification as we have setup our project by using all the dependencies.
First we have to modify our AndroidManifest.xml file to receive the Notification and we have to provide our Channel Id in the Android Manifest for getting the Local Notification. We have also added some user permission for getting the notifications.
AndroidManifest.xml
<manifest xmlns:android="http://schemas.android.com/apk/res/android"
  package="codehunger.pushnotificationexample">

    <uses-permission android:name="android.permission.INTERNET" />

    <uses-permission android:name="android.permission.VIBRATE" />

    <uses-permission android:name="android.permission.RECEIVE_BOOT_COMPLETED"/>

    <application
      android:name=".MainApplication"
      android:label="@string/app_name"
      android:icon="@mipmap/ic_launcher"
      android:roundIcon="@mipmap/ic_launcher_round"
      android:allowBackup="false"
      android:theme="@style/AppTheme">
      <!-- Change the value to true to enable pop-up for in foreground on receiving remote notifications (for prevent duplicating while showing local notifications set this to false) -->
        <meta-data  android:name="com.dieam.reactnativepushnotification.notification_foreground"
                    android:value="false"/>
                    <meta-data
      android:name="com.dieam.reactnativepushnotification.default_notification_channel_id"
      android:value="@string/default_notification_channel_id" />
        <!-- Change the resource name to your App's accent color - or any other color you want -->
        <meta-data  android:name="com.dieam.reactnativepushnotification.notification_color"
                    android:resource="@color/white"/> <!-- or @android:color/{name} to use a standard color -->
        <receiver android:name="com.dieam.reactnativepushnotification.modules.RNPushNotificationActions" />
        <receiver android:name="com.dieam.reactnativepushnotification.modules.RNPushNotificationPublisher" />
        <receiver android:name="com.dieam.reactnativepushnotification.modules.RNPushNotificationBootEventReceiver">
            <intent-filter>
                <action android:name="android.intent.action.BOOT_COMPLETED" />
                <action android:name="android.intent.action.QUICKBOOT_POWERON" />
                <action android:name="com.htc.intent.action.QUICKBOOT_POWERON"/>
            </intent-filter>
        </receiver>
        <service
            android:name="com.dieam.reactnativepushnotification.modules.RNPushNotificationListenerService"
            android:exported="false" >
            <intent-filter>
                <action android:name="com.google.firebase.MESSAGING_EVENT" />
            </intent-filter>
        </service>
      <activity
        android:name=".MainActivity"
        android:label="@string/app_name"
        android:configChanges="keyboard|keyboardHidden|orientation|screenSize|uiMode"
        android:launchMode="singleTask"
        android:windowSoftInputMode="stateAlwaysHidden|adjustPan">
        <intent-filter>
            <action android:name="android.intent.action.MAIN" />
            <category android:name="android.intent.category.LAUNCHER" />
        </intent-filter>
         <intent-filter android:label="pushnotificationexample">
            <action android:name="android.intent.action.VIEW" />
            <category android:name="android.intent.category.DEFAULT" />
            <category android:name="android.intent.category.BROWSABLE" />
        <data android:scheme="http"
              android:host="pushnotificationexample"
              android:pathPrefix="/pushnotificationexample" />
        </intent-filter>
      </activity>
       <activity android:name="com.facebook.react.devsupport.DevSettingsActivity" />
    </application>
</manifest>
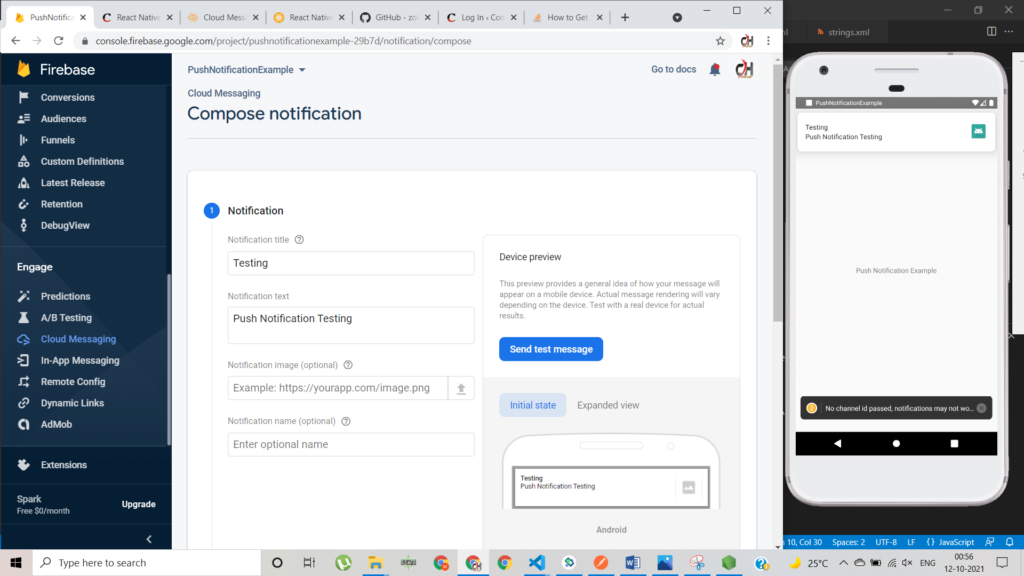
As you can see the manifest file I have added a default notification channel id. We need to set that in our strings.xml file inside the res folder of android.
<resources>
    <string name="app_name">PushNotificationExample</string>
    <string name="default_notification_channel_id">PushNotificationExample</string>
</resources>
After that we have to modify our index.js to handle the Notification when the App is in Background state.
Index.js
import React from 'react';
import {AppRegistry} from 'react-native';
import App from './App';
import {name as appName} from './app.json';
import messaging from '@react-native-firebase/messaging';

messaging().setBackgroundMessageHandler(async (remoteMessage) => {
    console.log('Message handled in the background!', remoteMessage);
});

function HeadlessCheck({ isHeadless }) {
    if (isHeadless) {
        // App has been launched in the background by iOS, ignore
        return null;
    }
    return <App />;
}

AppRegistry.registerComponent(appName, () => HeadlessCheck);
When the application is in a background or quit state, the onMessage handler will not be called when receiving messages. Instead, you need to setup a background callback handler via the setBackgroundMessageHandler method. To setup a background handler, call the setBackgroundMessageHandler outside of your application logic as early as possible.
After that I have added two new files where I have written all the code related to the Push notification and the Local Notification Services like creating FCM Token, Registering our App to firebase, Requesting Permission for the Notification, For getting the Local Notifications when the App is in Foreground state or App is in running state. You will understand all the methods as I have provided comments in each functionalities.
FCMService.js
import messaging from '@react-native-firebase/messaging';
import { Platform } from 'react-native';

class FCMService {
    //for registering and checking the permission
    register = (onRegister, onNotification, onOpenNotification) => {
        this.checkPermission(onRegister);
        this.createNotificationListeners(
            onRegister,
            onNotification,
            onOpenNotification,
        );
    };

    //for registering with FCM firebase
    registerAppWithFCM = async () => {
        if (Platform.OS === 'ios') {
            await messaging().registerDeviceForRemoteMessages();
            await messaging().setAutoInitEnabled(true);
        }
    };

    //for checking the permission
    checkPermission = (onRegister) => {
        messaging()
            .hasPermission()
            .then((enabled) => {
                if (enabled) {
                    console.log('enable', enabled);
                    this.getToken(onRegister);
                } else {
                    this.requestPermission(onRegister);
                }
            })
            .catch((error) => {
                console.log('Permission Rejected', error);
            });
    };


    //for gettng the fcm token
    getToken = (onRegister) => {
        messaging()
            .getToken()
            .then((fcmToken) => {
                if (fcmToken) {
                    onRegister(fcmToken);
                } else {
                    console.log('User does not have device token');
                }
            })
            .catch((error) => {
                console.log('getToken rejected', error);
            });
    };

    //for requesting the permission for fcm
    requestPermission = (onRegister) => {
        messaging()
            .requestPermission()
            .then(() => {
                this.getToken(onRegister);
            })
            .catch((error) => {
                console.log('Request permission rejected', error);
            });
    };

    //for deleting the fcm token
    deleteToken = () => {
        console.log('deleteToken');
        messaging()
            .deleteToken()
            .catch((error) => {
                console.log('Delete Token error', error);
            });
    };

    //notification listener
    createNotificationListeners = (
        onRegister,
        onNotification,
        onOpenNotification,
    ) => {
        // when the application is running, but in the background
        messaging().onNotificationOpenedApp((remoteMessage) => {
            console.log('notification caused app to open');
            if (remoteMessage) {
                const notification = remoteMessage.notification;
                onOpenNotification(notification, remoteMessage.data);
            }
        });
        // when the application is opened from a quite state
        messaging()
            .getInitialNotification()
            .then((remoteMessage) => {
                console.log('getInitial notification caused app to open');
                if (remoteMessage) {
                    const notification = remoteMessage.notification;
                    onOpenNotification(notification, remoteMessage.data);
                }
            });

        // foreground state message
        this.messageListener = messaging().onMessage(async (remoteMessage) => {
            console.log('new FCM message arrived', remoteMessage);
            if (remoteMessage) {
                let notification = null;
                if (Platform.OS === 'ios') {
                    notification = remoteMessage.data.notification;
                } else {
                    notification = remoteMessage.notification;
                }
                onNotification(notification, remoteMessage.data);
            }
        });

        // triggered when have new token
        messaging().onTokenRefresh((fcmToken) => {
            console.log('New Token Refresh: ', fcmToken);
            onRegister(fcmToken);
        });
    };

    //for unregistering with firebase
    unRegister = () => {
        this.messageListener();
    };
}

const fcmService = new FCMService();
export default fcmService;
For Permission On Android, you do not need to request user permission for this code but you can set manually for the User permission for getting the notifications.
FCM messages can be sent to real Android/iOS devices and Android emulators (iOS simulators however do not handle cloud messages) via a number of methods (see below). A message is simply a payload of data which can be used however you see fit within your application.
Common use-cases for handling messages could be:
- Displaying a notification
- Syncing message data silently on the device (e.g. via
AsyncStorage). - Updating the application’s UI.
Depending on the devices state, incoming messages are handled differently by the device and module. To understand these scenarios, it is first important to establish the various states a device can be in:
| State | Description |
| Foreground | When the application is open and in view. |
| Background | When the application is open, however in the background (minimised). This typically occurs when the user has pressed the “home” button on the device or has switched to another app via the app switcher. |
| Quit | When the device is locked or application is not active or running. The user can quit an app by “swiping it away” via the app switcher UI on the device. |
The user must have opened the app before messages can be received. If the user force quits the app from the device settings, it must be re-opened again before receiving messages.
Depending on the contents of the message, it’s important to understand both how the device will handle the message (e.g. display a notification, or even ignore it) and also how the library sends events to your own listeners.
If you want to get the Notification when you are inside the application you need to Implement Local Notification method as below.
LocalNotification.js
import PushNotification,{Importance} from 'react-native-push-notification';

import {Platform} from 'react-native';

class LocalNotificationService {
  //for configuring the local notification
  configure = (onOpenNotification) => {
    PushNotification.configure({
      onRegister: function (token) {
        console.log('[LocalNotificationService] onRegister', token);
      },
      onNotification: function (notification) {
        console.log('[LocalNotificationService] onNotification', notification);
        if (!notification?.data) {
          return;
        }
        notification.userInteraction = true
        onOpenNotification(
          Platform.OS === 'ios' ? notification.data.item : notification.data, notification.data
        );
        if (Platform.OS === 'ios') {
          // (required) Called when a remote is received or opened, or local notification is opened
         // notification.finish(PushNotificationIOS.FetchResult.NoData);
        }
      },
      senderID: "246666371258",
      // IOS ONLY (optional): default: all - Permissions to register.
      permissions: {
        alert: true,
        badge: true,
        sound: true,
      },
      // Should the initial notification be popped automatically
      // default: true
      popInitialNotification: true,
      /**
       * (optional) default: true
       * - Specified if permissions (ios) and token (android and ios) will requested or not,
       * - if not, you must call PushNotificationsHandler.requestPermissions() later
       * - if you are not using remote notification or do not have Firebase installed, use this:
       *     requestPermissions: Platform.OS === 'ios'
       */
      requestPermissions: true,
    });
    PushNotification.createChannel(
      {
        channelId: "PushNotificationExample", // (required)
        channelName: "My channel", // (required)
        channelDescription: "A channel to categorise your notifications", // (optional) default: undefined.
        playSound: false, // (optional) default: true
        soundName: "default", // (optional) See `soundName` parameter of `localNotification` function
        importance: Importance.HIGH, // (optional) default: Importance.HIGH. Int value of the Android notification importance
        vibrate: true, // (optional) default: true. Creates the default vibration pattern if true.
      },
      (created) => console.log(`createChannel returned '${created}'`) // (optional) callback returns whether the channel was created, false means it already existed.
    );
  };

  //for unregistering the push notification
  unregister = () => {
    PushNotification.unregister();
  };

  //for showing the notification in the notification bar
  showNotification = (id, title, message, data = {}, options = {}) => {
    PushNotification.localNotification({
      /* Android Only Properties */
      ...this.buildAndroidNotification(id, title, message, data, options),
      /* IOS Only Properties  */
      ...this.buildIOSNotification(id, title, message, data, options),
      /* IOS and Andoid Properties */
      title: title || '',
      message: message || '',
      playSound: options.playSound || false,
      soundName: options.soundName || 'default',
      userInteraction: false,
    });
  };

  //for building the notification in the android
  buildAndroidNotification = (id, title, message, data = {}, options = {}) => {
    return {
      id: id,
      autoCancel: true,
      largeIcon: options.largeIcon || 'ic_launcher',
      smallIcon: options.smallIcon || 'ic_launcher',
      bigText: message || '',
      subText: title || '',
      vibrate: options.vibrate || true,
      vibration: options.vibration || 300,
      priority: options.priority || 'high',
      importance: options.importance || 'high',
      data: data,
      channelId:id,
    };
  };

  //for building the notification in the iOS
  buildIOSNotification = (id, title, message, data = {}, options = {}) => {
    return {
      alertAction: options.alertAction || 'view',
      category: options.category || '',
      userInfo: {
        id: id,
        item: data,
      },
    };
  };

  //for cancelling the local notification
  cancelAllLocalNotifications = () => {
    if (Platform.IOS === 'ios') {
     // PushNotificationIOS.cancelAllLocalNotifications();
    } else {
      PushNotification.cancelAllLocalNotifications();
    }
  };

  removeDeliveredNotificationByID = (notificationId) => {
    console.log('LCN', notificationId);
    PushNotification.cancelLocalNotification({id: `${notificationId}`});
  };
}

const localNotificationService = new LocalNotificationService();
export default localNotificationService;
As we have written all the codes related to the Push Notifications. Now we are going to use these methods in App.js for getting our Notification when the App is in Foreground Mode or in Background Mode.
App.js
import React, { Component } from 'react';
import {
  Text,
  View,
} from 'react-native';
import fcmService from './FCMService';
import localNotificationService from './LocalNotificationService';

class App extends Component {
  constructor(props) {
    super(props);
    this.onOpenNotification = this.onOpenNotification.bind(this);
  }

  async UNSAFE_componentWillMount() {
    fcmService.registerAppWithFCM();
    fcmService.register(
      this.onRegister,
      this.onNotification,
      this.onOpenNotification,
    );
    localNotificationService.configure(this.onOpenNotification);
  }


  onRegister(token) {
    console.log('[App] onRegister. We get FCM Token: ', token);
  }

  onNotification(notify, data) {
    console.log('[App] notify: ', notify);
    console.log('[App] data: ', data);
    const options = {
      soundName: 'default',
      playSound: true,
    };

    localNotificationService.showNotification(
      0,
      notify.title,
      notify.body,
      notify,
      options,
    );
  }

  async onOpenNotification(notify, data) {
    console.log('onOpenNotification ', { notify, data })
  }
  render() {
    return (
      <View style={{ justifyContent: 'center', alignItems: 'center' ,flex:1}}>
        <Text>
          Push Notification Example
        </Text>
      </View>
    )
  }
}

export default App;
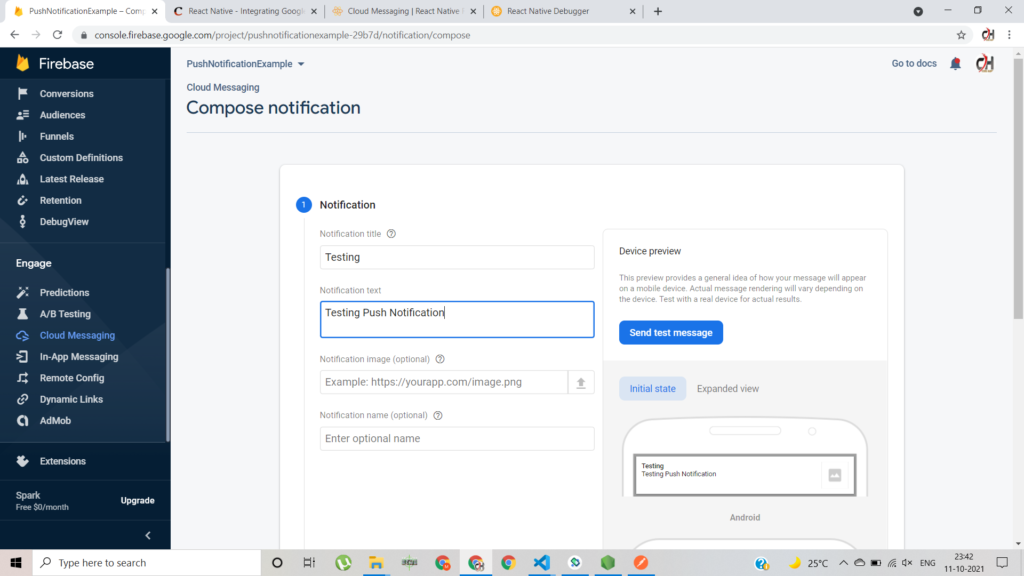
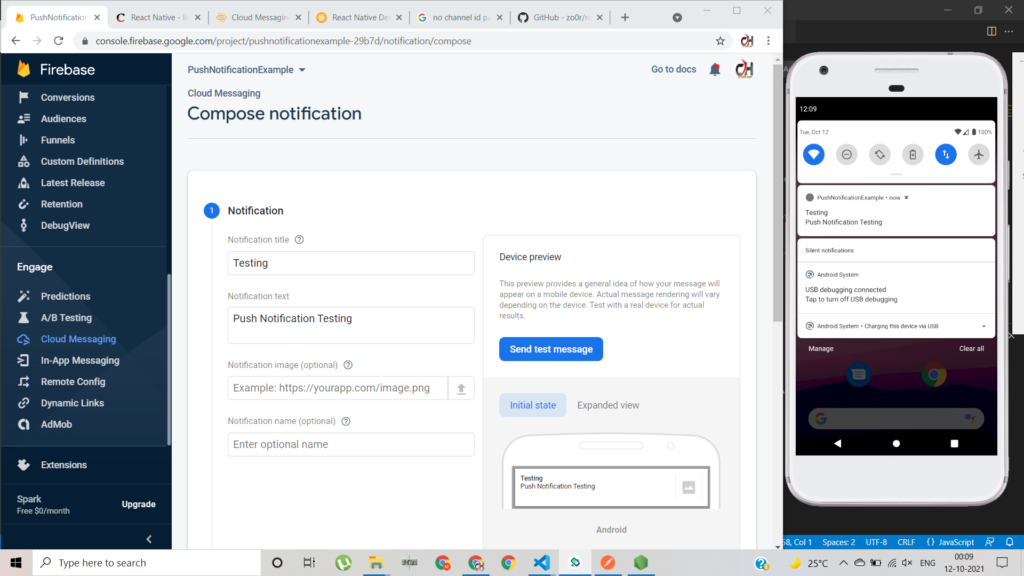
After doing all these stuffs we are ready to get our notification. Run the Project.
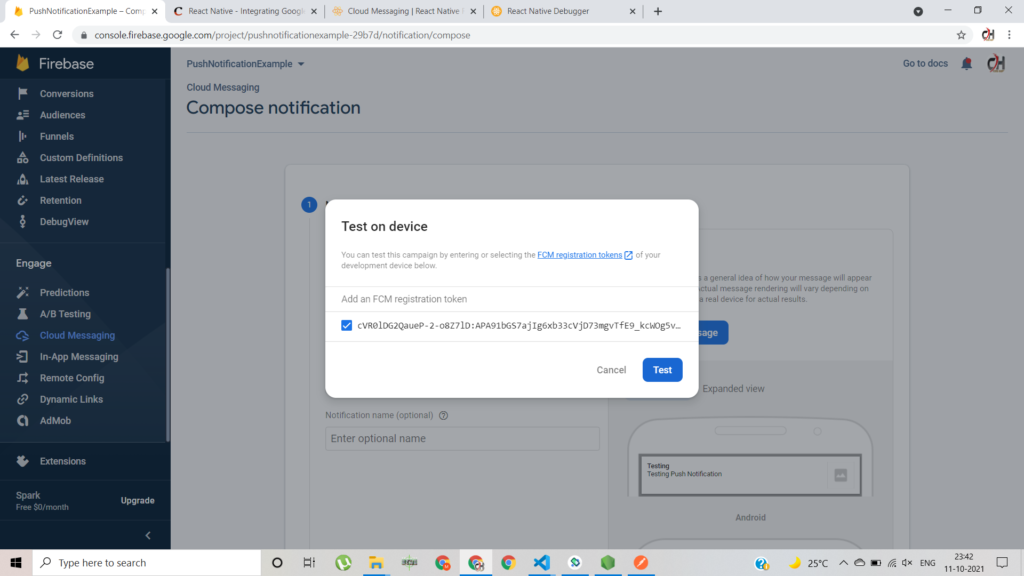
As you can see I have console log my FCM token so that I can use that Token for sending the Notification.