
In this article we will learn about how we can integrate razorpay payment gateway in Laravel 8.
To integrate the Razorpay Payment gateway we will follow the below steps.
- Create an Account in Razorpay
- Get the App id and App Secret
- Install Laravel Project via composer
- Install Razorpay via composer
- Add Razorpay ID and Secret In the .env
- Create controller
- Add routes
- Create Blade file
- Add Controller Code
- Test the integration
Step :1 Create Account in Razorpay
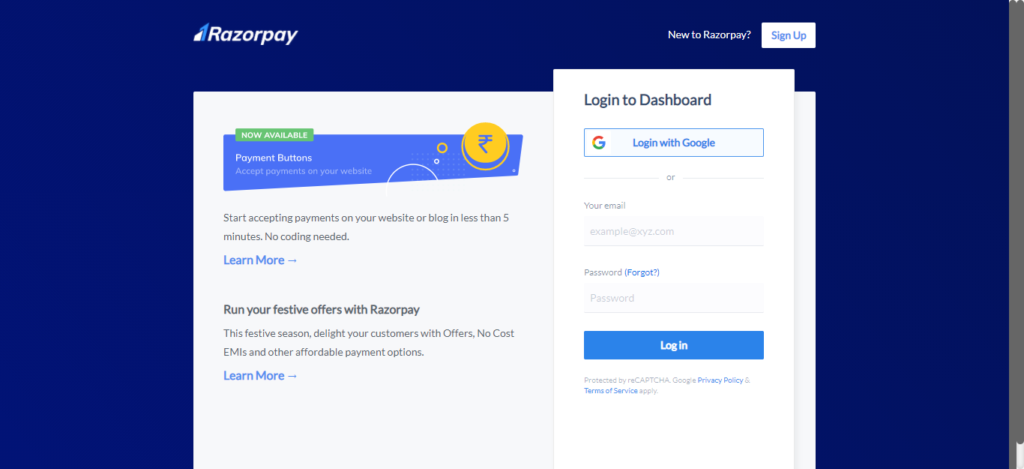
To create the account in razorpay please visit this link , When you click on the link you have something like the below image.
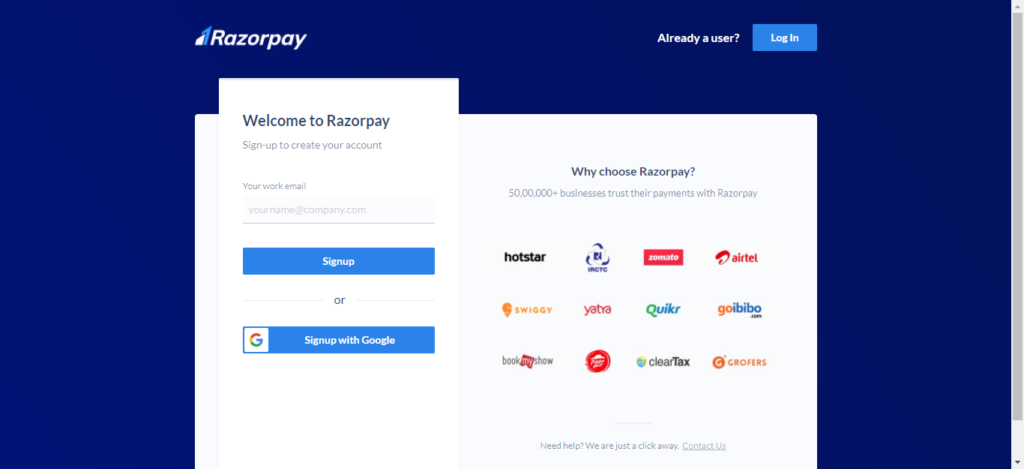
Now click on signup and create one accout, you can also login with the google.Signup page will be like the below one.
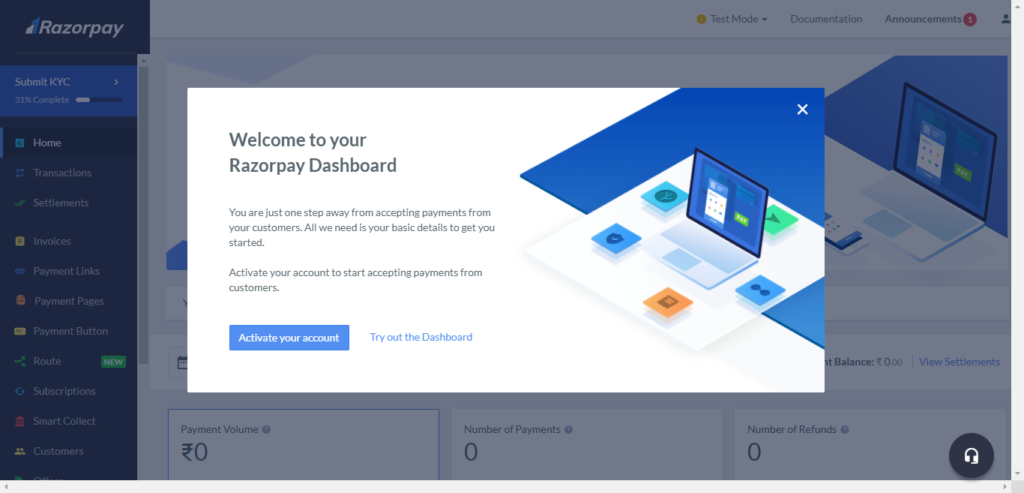
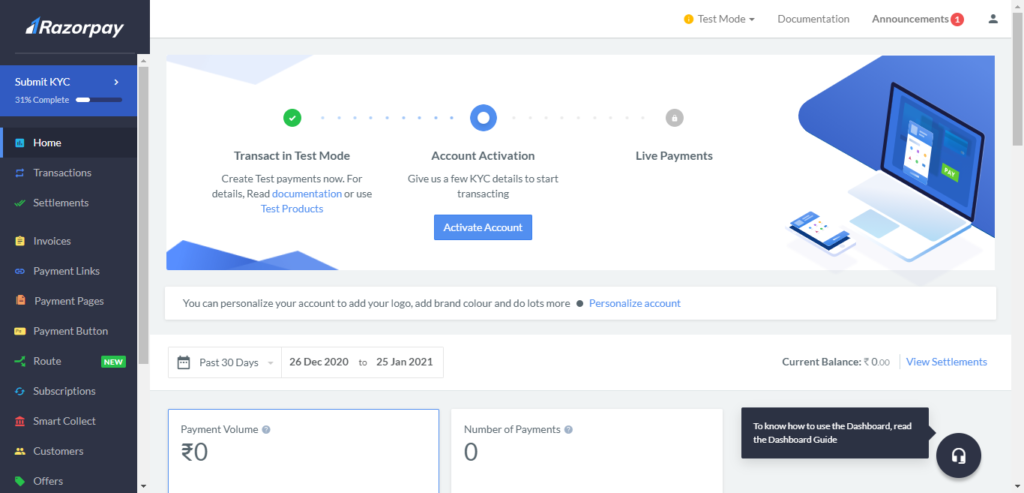
When you log in for the first time you have something like the below one, click on the try out the dashboard.
When you click on the try out the dashboard then you have something like the below one.

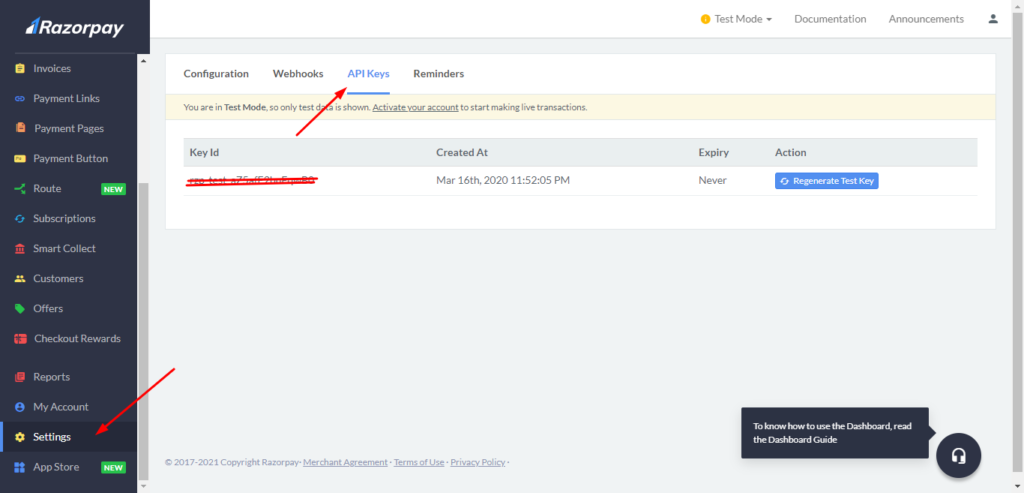
Step: 2 Get App id and Secret
In the sidebar look for settings, click on it, now a tab for API keys click on it generate Razorpay Id and secret. Save those API key we will use them later.
Step: 3 Installation of Laravel Application
Run the below command to install Laravel
composer create-project --prefer-dist laravel/laravel razorpay
Step: 4 Run the below command to install razorpay
Run the below command to install razorpay via composer.
composer require razorpay/razorpay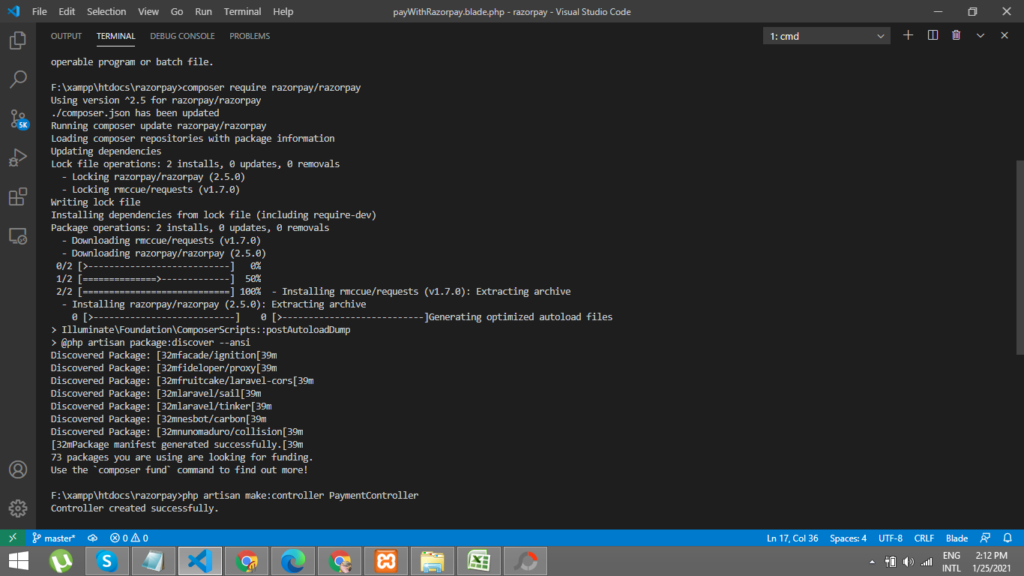
Step: 5 Add Razorpay ID and Secret In the .env
Now we will add Razorpay ID and secret in the .env, remember we have already get the razorpay ID and secret in the step 2.
Add those key’s in your .env like the below one.
RAZOR_KEY=rzp_test_QosuQeS8QJSZJc
RAZOR_SECRET=MVRWv96psmthGnNOv5IRgAQd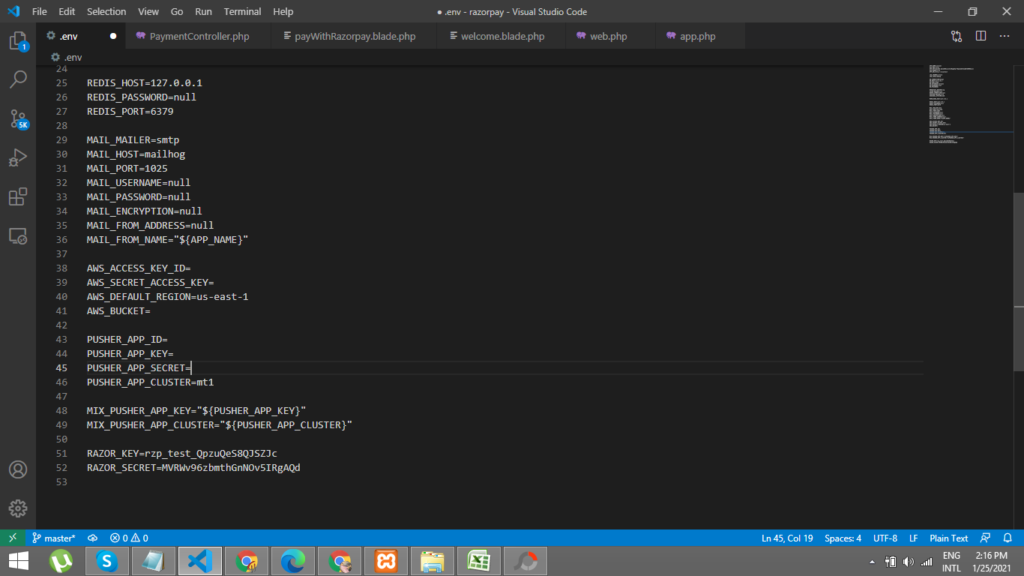
Step: 6 Create a Controller
Now we will create a controller for our razorpay payment gateway, enter the below command to create controller.
php artisan make:controller PaymentControllerStep : 7 Add routes
Now we will add routes in order to create frontend of razorpay.
On the top use the below namespace.
use App\Http\Controllers\PaymentController;Now add the below routes in your routes/web.php file
Route::get('razorpay-payment', [PaymentController::class, 'create'])->name('pay.with.razorpay'); // create payment

Route::post('payment', [PaymentController::class, 'payment'])->name('payment'); //accept paymetnt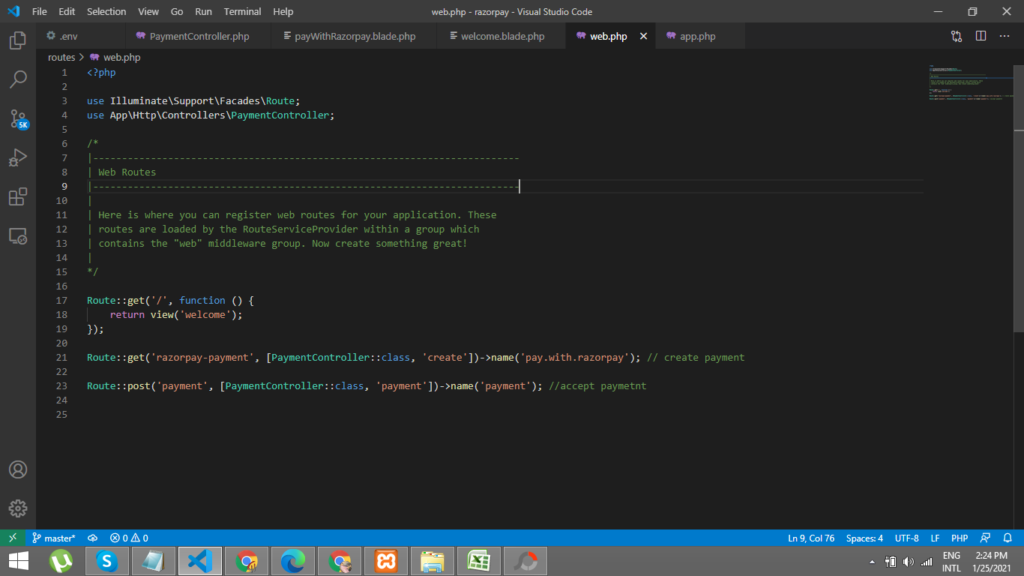
Step: 8 Create Blade File
Now go to resources/views and create one file named razorpay.blade.php and the below code.
<!DOCTYPE html>
<html lang="{{ str_replace('_', '-', app()->getLocale()) }}">
<head>
    <meta charset="utf-8">
    <meta name="viewport" content="width=device-width, initial-scale=1">
    <!-- CSRF Token -->
    <meta name="csrf-token" content="{{ csrf_token() }}">
    <title>Laravel 8 - Razorpay Payment Gateway Integration</title>
    <link rel="stylesheet" href="https://maxcdn.bootstrapcdn.com/bootstrap/4.5.2/css/bootstrap.min.css">
    <script src="https://ajax.googleapis.com/ajax/libs/jquery/3.5.1/jquery.min.js"></script>
    <script src="https://cdnjs.cloudflare.com/ajax/libs/popper.js/1.16.0/umd/popper.min.js"></script>
    <script src="https://maxcdn.bootstrapcdn.com/bootstrap/4.5.2/js/bootstrap.min.js"></script>
</head>
<body>
    <div id="app">
        <main class="py-4">
            <div class="container">
                <div class="row">
                    <div class="col-md-6 offset-3 col-md-offset-6">
                        @if($message = Session::get('error'))
                            <div class="alert alert-danger alert-dismissible fade in" role="alert">
                                <button type="button" class="close" data-dismiss="alert" aria-label="Close">
                                    <span aria-hidden="true">×</span>
                                </button>
                                <strong>Error!</strong> {{ $message }}
                            </div>
                        @endif
                        @if($message = Session::get('success'))
                            <div class="alert alert-success alert-dismissible fade {{ Session::has('success') ? 'show' : 'in' }}" role="alert">
                                <button type="button" class="close" data-dismiss="alert" aria-label="Close">
                                    <span aria-hidden="true">×</span>
                                </button>
                                <strong>Success!</strong> {{ $message }}
                            </div>
                        @endif
                        <div class="card card-default">
                            <div class="card-header">
                                Laravel 8 - Razorpay Payment Gateway Integration
                            </div>

                            <div class="card-body text-center">
                                <form action="{{ route('payment') }}" method="POST" >
                                    @csrf
                                    <script src="https://checkout.razorpay.com/v1/checkout.js"
                                            data-key="{{ env('RAZOR_KEY') }}"
                                            data-amount="100"
                                            data-buttontext="Pay 1 INR"
                                            data-name="Demo Payment Page"
                                            data-description="CodeHunger"
                                            data-image="{{ asset('/image/nice.png') }}"
                                            data-prefill.name="name"
                                            data-prefill.email="email"
                                            data-theme.color="#9FE2BF">
                                    </script>
                                </form>
                            </div>
                        </div>
                    </div>
                </div>
            </div>
        </main>
    </div>
</body>
</html>
Step: 9 Add code to controller
Now add the below code to you controller.
<?php

namespace App\Http\Controllers;

use Illuminate\Http\Request;
use Razorpay\Api\Api;
use Session;
use Redirect;

class PaymentController extends Controller
{
    public function create()
    {
        return view('razorpay');
    }

    public function payment(Request $request)
    {
        $input = $request->all();

        $api = new Api(env('RAZOR_KEY'), env('RAZOR_SECRET'));

        $payment = $api->payment->fetch($input['razorpay_payment_id']);

        if(count($input)  && !empty($input['razorpay_payment_id'])) {
            try {
                $response = $api->payment->fetch($input['razorpay_payment_id'])->capture(array('amount'=>$payment['amount']));

            } catch (\Exception $e) {
                return  $e->getMessage();
                \Session::put('error',$e->getMessage());
                return redirect()->back();
            }
        }

        \Session::put('success', 'Payment successful');
        return redirect()->back();
    }
}
Step:10 Test the integration
Now we will check the integration visit, open you terminal and run php artisan serve , it will start the php development server.
When you visit http://127.0.0.1:8000/ you will have the screen like below one
In URL tab visit this URL http://127.0.0.1:8000/razorpay-payment, then it will have something like the below one
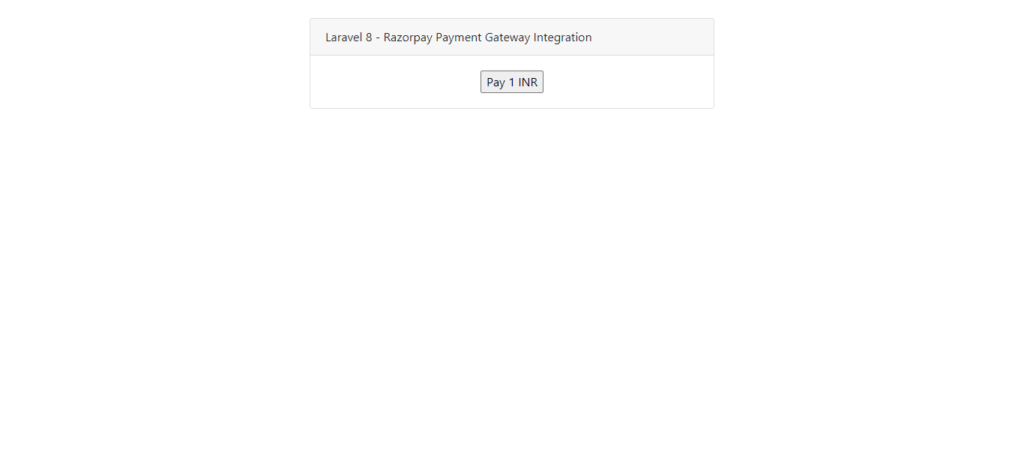
We will make a test payment of INR 1.Click on that button.
For the test we will use below credit card details
Card number: 5105105105105100
CVV : 123
Expiry : 12/24
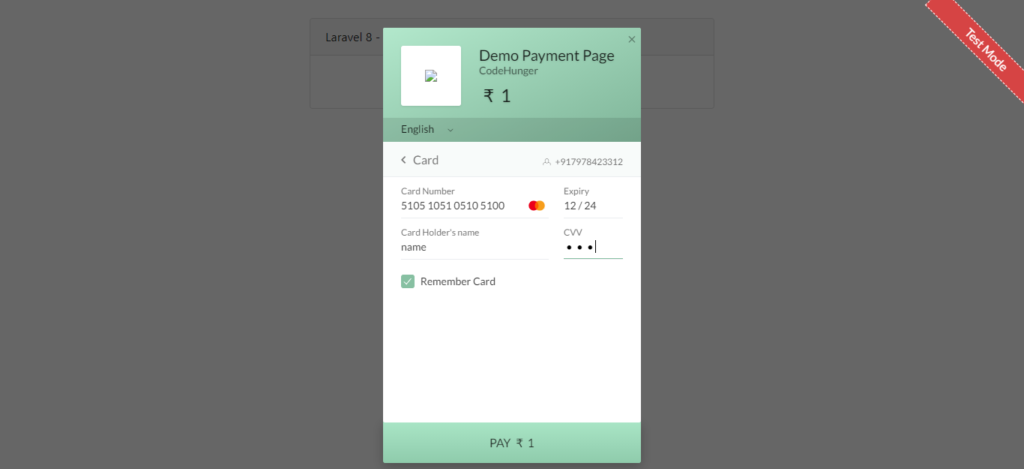
When you click on pay below image will shown.
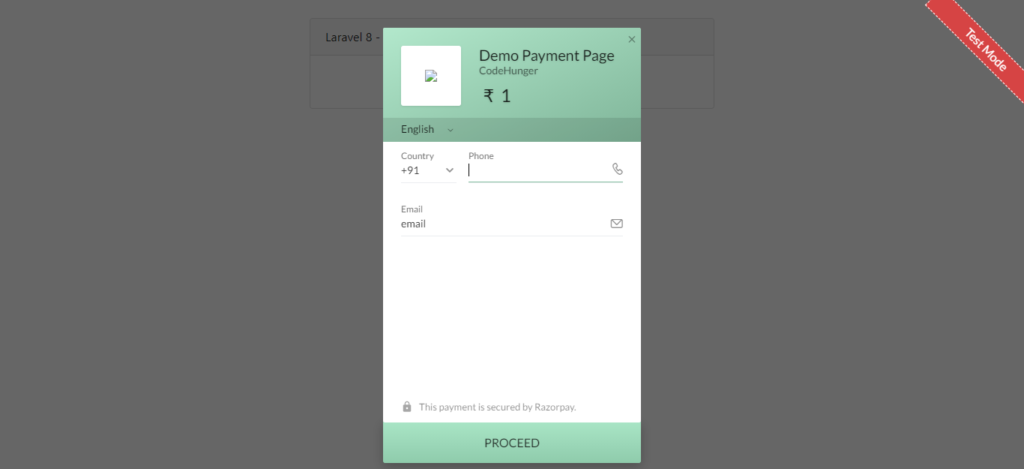
Give your mobile number and email ID and then click on proceed.when you click on the proceed you will have something like the below image.
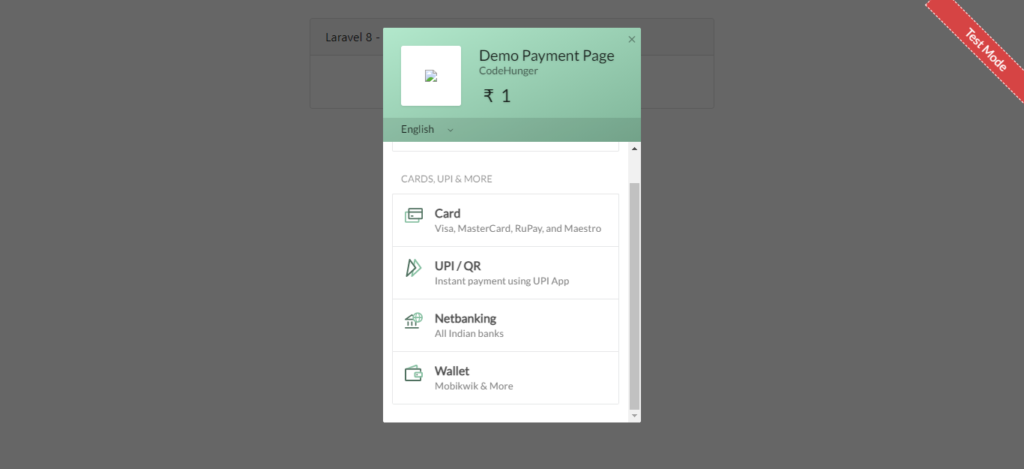
You can use any one of them, I am going to use Card for a demo payment.When you move forward they will sent otp on your number enter the otp and proceed.
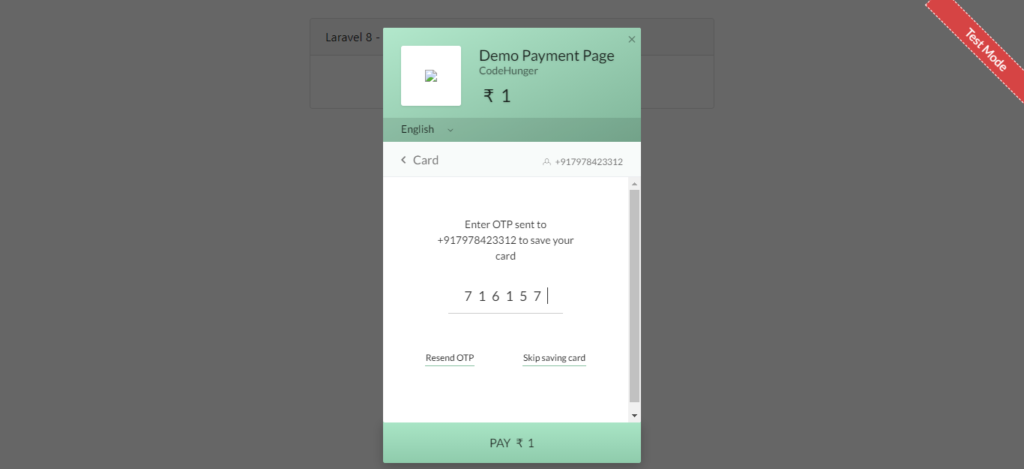
Then you have something like the below image.
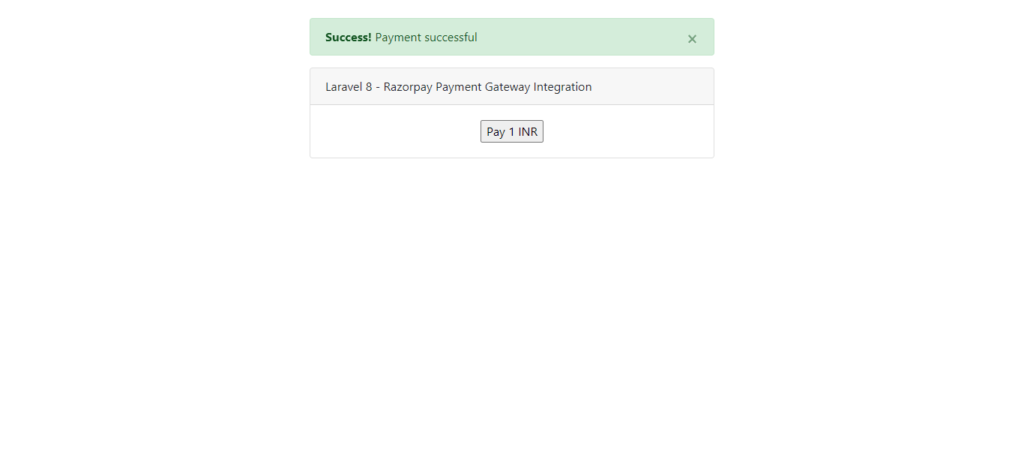
On successfull payment you have something like the below image
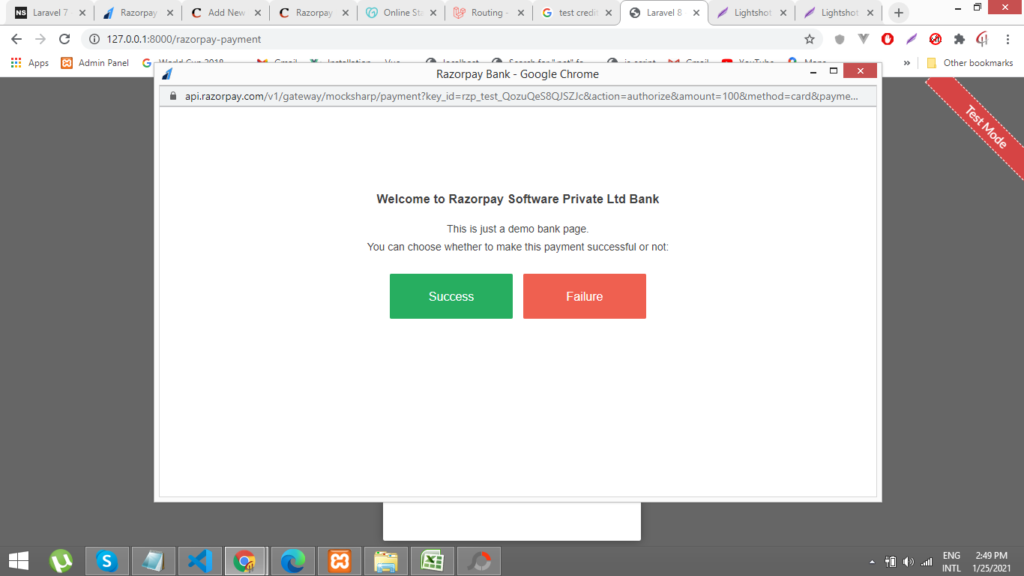
Click on success then you will redirected to the laravel application page.
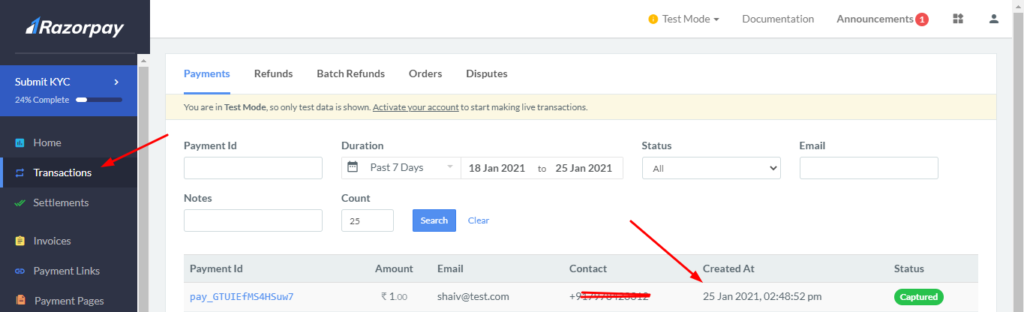
Now we will login to our dashboard to see whether payment is received or not.
Go to your dashboard and click on transaction, then you can see that payment has been received.
Read Also: Integrate Stripe Payment In Laravel 8
Read Also: Mollie Payment in Laravel 8
You can also see demo by clicking on the below link
I hope you like the above tutorial,Still confused please do comment.


Well explained and useful information about Razorpay payment Gateway. Thanks for sharing.
If I wait for more than 3min in production key, in razor pay it logged me out and payment not recorded