In this article, we will learn about how we can integrate stripe payment gateway in Laravel 8. Integration of Stripe payment gateway in Laravel 8 is very easy and simple.
we will use stripe/stripe-php composer library for integration of stripe payment gateway in Laravel 8. we will make a Rs 100 charge using Stripe payment gateway Integration.
Before moving forward let’s know what stripe is ?
Stripe is a US company allowing businesses to accept payments over the Internet. It operates in 25 countries and powers 100,000+ businesses.Stripe payments allow you to get paid with all major cards from customers around the world on the web or in mobile apps. This is all about stripe.
I will give you an example from scratch to implement a stripe payment gateway in Laravel 8 applications. In this tutorial, we are going to use stripe js v3 and stripe intent to make the payment. You just need to follow each and every step to get paid.
Requirments for integrating stripe payment with Laravel 8
- Stripe Account
- A system with installed composer
- Basic idea of PHP and Laravel
STEP – 1 Install fresh Laravel Project by using the below command just open the command prompt and copy-paste the below code.
composer create-project --prefer-dist laravel/laravel Stripe
STEP – 2 Install stripe via composer again go to your command and write the below code
composer require stripe/stripe-php
STEP – 3 Create your stripe Account

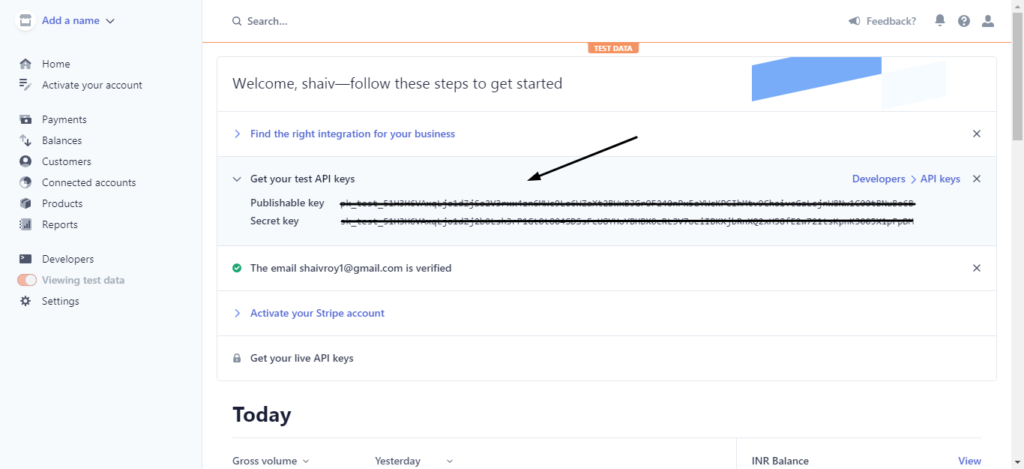
STEP- 4 Get your stripe key and secret you will find those things in your stripe dashboard, Just copy the publishable key and secret key and paste to the safe place we will use those later.
STEP – 5 Create a CheckoutController Using the following Command.
php artisan make:controller CheckoutControllerSTEP – 6 Go to web.php and the following code in that file
Note: Don’t forgot add controller namespace on the top
use App\Http\Controllers\CheckoutController;Route::get('checkout',[CheckoutController::class, 'checkout']);
Route::post('checkout',[CheckoutController::class, 'afterpayment'])->name('checkout.credit-card');STEP – 7 Go CheckoutController.php add the below code
<?php

namespace App\Http\Controllers;

use Illuminate\Http\Request;

class CheckoutController extends Controller
{
    public function checkout()
    {
        // Enter Your Stripe Secret
        \Stripe\Stripe::setApiKey('use-your-stripe-key-here');

		$amount = 100;
		$amount *= 100;
        $amount = (int) $amount;

        $payment_intent = \Stripe\PaymentIntent::create([
			'description' => 'Stripe Test Payment',
			'amount' => $amount,
			'currency' => 'INR',
			'description' => 'Payment From Codehunger',
			'payment_method_types' => ['card'],
		]);
		$intent = $payment_intent->client_secret;

		return view('checkout.credit-card',compact('intent'));

    }

    public function afterPayment()
    {
        echo 'Payment Has been Received';
    }
}
STEP – 8 Create blade file credit-card.blade.php under resources/views/checkout/credit-card.blade.php and add the below code.
<!DOCTYPE html>
<html lang="en">
<head>
  <title>Stripe Payment</title>
  <meta charset="utf-8">
  <meta name="viewport" content="width=device-width, initial-scale=1">
  <link rel="stylesheet" href="https://maxcdn.bootstrapcdn.com/bootstrap/4.5.2/css/bootstrap.min.css">
  <script src="https://ajax.googleapis.com/ajax/libs/jquery/3.5.1/jquery.min.js"></script>
  <script src="https://cdnjs.cloudflare.com/ajax/libs/popper.js/1.16.0/umd/popper.min.js"></script>
  <script src="https://maxcdn.bootstrapcdn.com/bootstrap/4.5.2/js/bootstrap.min.js"></script>
</head>
<body>
    @php
        $stripe_key = 'put your publishable key here';
    @endphp
    <div class="container" style="margin-top:10%;margin-bottom:10%">
        <div class="row justify-content-center">
            <div class="col-md-12">
                <div class="">
                    <p>You will be charged rs 100</p>
                </div>
                <div class="card">
                    <form action="{{route('checkout.credit-card')}}"  method="post" id="payment-form">
                        @csrf
                        <div class="form-group">
                            <div class="card-header">
                                <label for="card-element">
                                    Enter your credit card information
                                </label>
                            </div>
                            <div class="card-body">
                                <div id="card-element">
                                <!-- A Stripe Element will be inserted here. -->
                                </div>
                                <!-- Used to display form errors. -->
                                <div id="card-errors" role="alert"></div>
                                <input type="hidden" name="plan" value="" />
                            </div>
                        </div>
                        <div class="card-footer">
                          <button
                          id="card-button"
                          class="btn btn-dark"
                          type="submit"
                          data-secret="{{ $intent }}"
                        > Pay </button>
                        </div>
                    </form>
                </div>
            </div>
        </div>
    </div>
    <script src="https://js.stripe.com/v3/"></script>
    <script>
        // Custom styling can be passed to options when creating an Element.
        // (Note that this demo uses a wider set of styles than the guide below.)

        var style = {
            base: {
                color: '#32325d',
                lineHeight: '18px',
                fontFamily: '"Helvetica Neue", Helvetica, sans-serif',
                fontSmoothing: 'antialiased',
                fontSize: '16px',
                '::placeholder': {
                    color: '#aab7c4'
                }
            },
            invalid: {
                color: '#fa755a',
                iconColor: '#fa755a'
            }
        };

        const stripe = Stripe('{{ $stripe_key }}', { locale: 'en' }); // Create a Stripe client.
        const elements = stripe.elements(); // Create an instance of Elements.
        const cardElement = elements.create('card', { style: style }); // Create an instance of the card Element.
        const cardButton = document.getElementById('card-button');
        const clientSecret = cardButton.dataset.secret;

        cardElement.mount('#card-element'); // Add an instance of the card Element into the `card-element` <div>.

        // Handle real-time validation errors from the card Element.
        cardElement.addEventListener('change', function(event) {
            var displayError = document.getElementById('card-errors');
            if (event.error) {
                displayError.textContent = event.error.message;
            } else {
                displayError.textContent = '';
            }
        });

        // Handle form submission.
        var form = document.getElementById('payment-form');

        form.addEventListener('submit', function(event) {
            event.preventDefault();

        stripe.handleCardPayment(clientSecret, cardElement, {
                payment_method_data: {
                    //billing_details: { name: cardHolderName.value }
                }
            })
            .then(function(result) {
                console.log(result);
                if (result.error) {
                    // Inform the user if there was an error.
                    var errorElement = document.getElementById('card-errors');
                    errorElement.textContent = result.error.message;
                } else {
                    console.log(result);
                    form.submit();
                }
            });
        });
    </script>
</body>
</html>STEP – 9 visit this URL from your system – http://localhost/crud/public/checkout you will get view something like below.
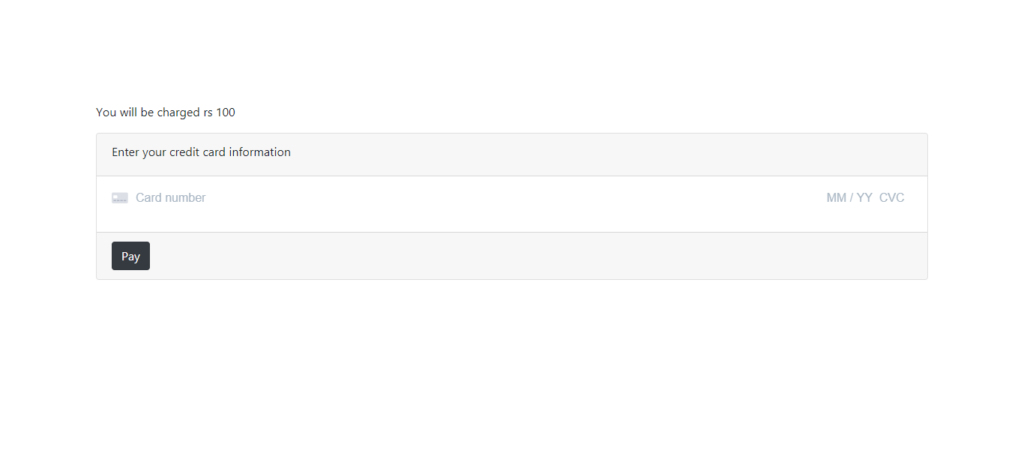
STEP – 10 Enter the below test card detail to make a test payment
Card Number - 4242 4242 4242 4242
EXP - 12/32
CVV - 123
ZIP - 12345
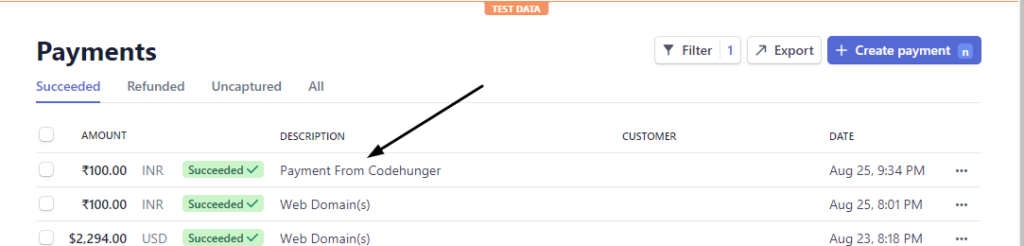
STEP – 11 After the successful payment you can check your stripe dashboard for the payment confirmation.
Still Having issue Fell Free to comment, we are here to help you


view input fields are not showing on view page. can you please provide full code of blade file.
Hey, if card details is wrong..
Step. 11-How payment is done…???
It seems stripe claims handleCardPayment is deprecated. Have you had much success with their replacement: confirmCardPayment using webhooks?
No handlecardPayment is not currently deprecated as it’s working fine with few of my website, but webook is best way to confirm the payments. Thanks