Bottom Navigation is very useful when you have 2-3 main navigation options. It provides the user with easy access to regular usable options. In this section we are going to discuss tab navigation which is placed in the bottom of the screen. Tabs are basically used to navigation from one section to other. I will give you a example of Bottom Tab Navigator in this section.
As we know it is the part of React Navigation so we have to install the required react-navigation@3.11.1 package.
Install react-navigation dependency to import createAppContainer. If you install react-navigation@3.11.1 then createswitchNavigator present inside the react-navigation. Otherwise you have to install independently other dependencies.
npm install react-navigation –save
- Other supporting libraries for react-navigation
npx npm install react-native-gesture-handler react-native-safe-area-context @react-native-community/masked-view react-native-screens react-native-reanimated –save
- Install react-navigation-tabs to import createBottomTabNavigator
npm install react-navigation-tabs –save
- We are going to use Ionicons to show the menu icons from react-native-vector-icons/Ionicons. So install react-native-vector-icons
npm install react-native-vector-icons –save
We are also using createStackNavigator to switch screens, so please follow the next step also
- Install react-navigation-stack to import createStackNavigator
npm install react-navigation-stack –save
CocoaPods Installation
Please use the following command to install CocoaPods
cd ios && pod install && cd ..
Project File Structure
To start with this Example you need to create a directory named pages in your project and create four files DetailsScreen.js, HomeScreen.js, Screen1.js and Screen2.js in it.
App.js
import React,{Component} from 'react';
import { Button, Text, View, TouchableOpacity, StyleSheet } from 'react-native';
import Ionicons from 'react-native-vector-icons/Ionicons';

import {createAppContainer,createBottomTabNavigator,createStackNavigator} from 'react-navigation';


import HomeScreen from './pages/HomeScreen';
import Screen1 from './pages/Screen1';
import DetailsScreen from './pages/DetailsScreen';
import Screen2 from './pages/Screen2';
const HomeStack = createStackNavigator(
  {
    Home: { screen: HomeScreen },
    Details: { screen: DetailsScreen },
  },
  {
    defaultNavigationOptions: {
      headerStyle: {
        backgroundColor: '#42f44b',
      },
      headerTintColor: '#FFFFFF',
      title: 'Home',
    },
  }
);
const DetailStack = createStackNavigator(
  {
    Details: { screen: DetailsScreen },
    Screen1: { screen: Screen1 },
    Screen2: { screen: Screen2 },
  },
  {
    defaultNavigationOptions: {
      headerStyle: {
        backgroundColor: '#42f44b',
      },
      headerTintColor: '#FFFFFF',
      title: 'Details',
    },
  }
);
const App = createBottomTabNavigator(
  {
    Home: { screen: HomeStack },
    Details: { screen: DetailStack },
  },
  {
    defaultNavigationOptions: ({ navigation }) => ({
      tabBarIcon: ({ focused, horizontal, tintColor }) => {
        const { routeName } = navigation.state;
        let IconComponent = Ionicons;
        let iconName;
        if (routeName === 'Home') {
          iconName = `md-information-circle${focused ? '' : '-outline'}`;
        } else if (routeName === 'Details') {
          iconName = `md-checkmark-circle${focused ? '' : '-outline'}`;
        }
        return <IconComponent name={iconName} size={25} color={tintColor} />;
      },
    }),
    tabBarOptions: {
      activeTintColor: '#42f44b',
      inactiveTintColor: 'gray',
    },
  }
);
export default createAppContainer(App);
HomeScreen.js
import React from 'react';
import { Text, View, TouchableOpacity, StyleSheet } from 'react-native';
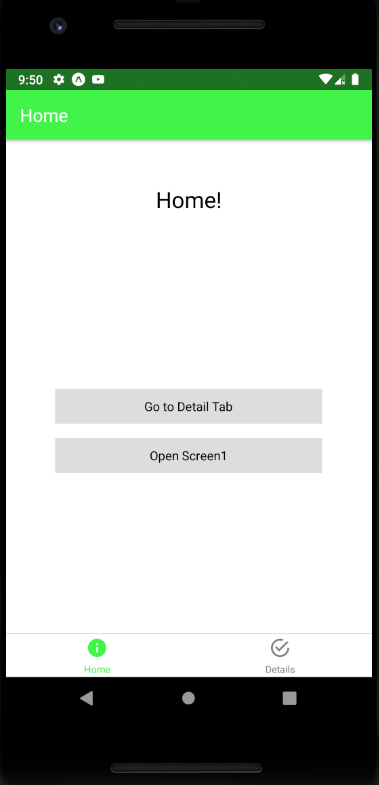
export default class HomeScreen extends React.Component {
render() {
return (
<View style={{ flex: 1, justifyContent: 'center', alignItems: 'center' }}>
<Text style={{ marginTop: 50, fontSize: 25 }}>Home!</Text>
<View
style={{ flex: 1, justifyContent: 'center', alignItems: 'center' }}>
<TouchableOpacity
style={styles.button}
onPress={() => this.props.navigation.navigate('Details')}>
<Text>Go to Detail Tab</Text>
</TouchableOpacity>
<TouchableOpacity
style={styles.button}
onPress={() => this.props.navigation.navigate('Screen1')}>
<Text>Open Screen1</Text>
</TouchableOpacity>
</View>
</View>
);
}
}
const styles = StyleSheet.create({
button: {
alignItems: 'center',
backgroundColor: '#DDDDDD',
padding: 10,
width: 300,
marginTop: 16,
},
});DetailScreen.js
import React from 'react';
import { Text, View, TouchableOpacity, StyleSheet } from 'react-native';
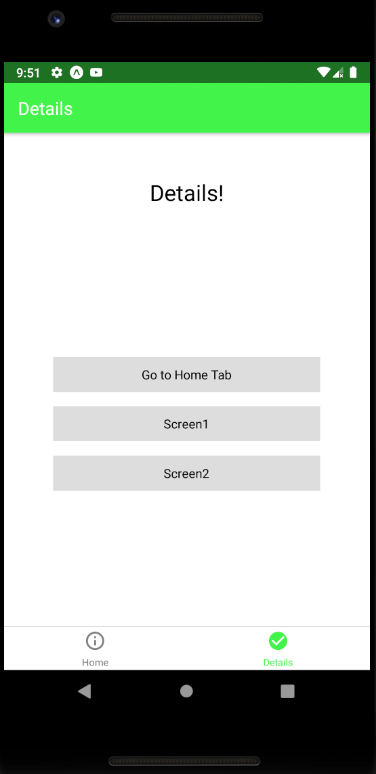
export default class DetailsScreen extends React.Component {
render() {
return (
<View style={{ flex: 1, justifyContent: 'center', alignItems: 'center' }}>
<Text style={{ marginTop: 50, fontSize: 25 }}>Details!</Text>
<View
style={{ flex: 1, justifyContent: 'center', alignItems: 'center' }}>
<TouchableOpacity
style={styles.button}
onPress={() => this.props.navigation.navigate('Home')}>
<Text>Go to Home Tab</Text>
</TouchableOpacity>
<TouchableOpacity
style={styles.button}
onPress={() => this.props.navigation.navigate('Screen1')}>
<Text>Screen1</Text>
</TouchableOpacity>
<TouchableOpacity
style={styles.button}
onPress={() => this.props.navigation.navigate('Screen2')}>
<Text>Screen2</Text>
</TouchableOpacity>
</View>
</View>
);
}
}
const styles = StyleSheet.create({
button: {
alignItems: 'center',
backgroundColor: '#DDDDDD',
padding: 10,
width: 300,
marginTop: 16,
},
});Screen1.js
//This is an example code for Navigation Drawer with Custom Side bar//
import React, { Component } from 'react';
//import react in our code.
import { StyleSheet, TouchableOpacity, Text } from 'react-native';
// import all basic components
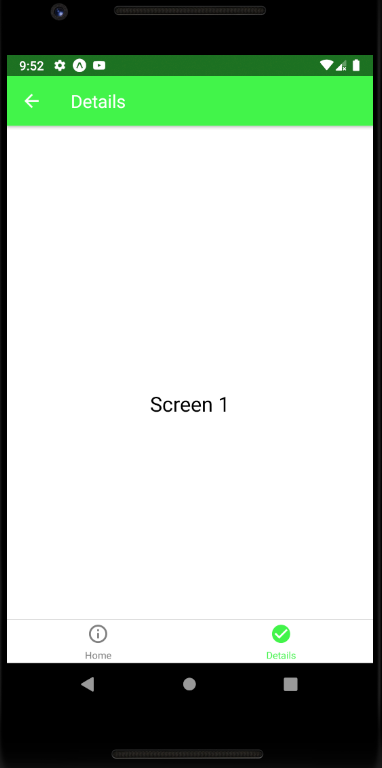
export default class Screen1 extends Component {
//Screen1 Component
render() {
return (
<TouchableOpacity style={styles.MainContainer}>
<Text style={{ fontSize: 23 }}> Screen 1 </Text>
</TouchableOpacity>
);
}
}
const styles = StyleSheet.create({
MainContainer: {
flex: 1,
paddingTop: 20,
alignItems: 'center',
marginTop: 50,
justifyContent: 'center',
},
});Screen2.js
//This is an example code for Navigation Drawer with Custom Side bar//
import React, { Component } from 'react';
//import react in our code.
import { StyleSheet, View, Text } from 'react-native';
// import all basic components

export default class Screen2 extends Component {
  //Screen2 Component
  render() {
    return (
      <View style={styles.MainContainer}>
        <Text style={{ fontSize: 23 }}> Screen 2 </Text>
      </View>
    );
  }
}

const styles = StyleSheet.create({
  MainContainer: {
    flex: 1,
    paddingTop: 20,
    alignItems: 'center',
    marginTop: 50,
    justifyContent: 'center',
  },
});